Simulation of RSLogix Emulate 5000
In this practice, we will see how to configure the RSEmulate 5000 from Allen Bradley to test our projects, exercises, practices, etc...
As its name indicates, with this simulator we can work with PLCs from the 5000 series, and the software for these PLCs is RSLogix 5000, which is currently at version 20. To be able to simulate it, a requirement is to work with the same version, that is, if we have RSLogix 5000 V.16 we need RSEmulate 5000 V.16
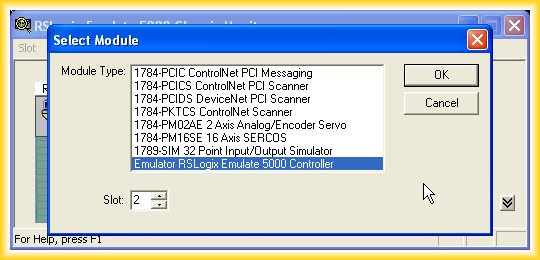
1.- The first step would be to create a new project, in which when selecting the CPU we are going to use, we must select Emulator and the slot number, as shown in the following image
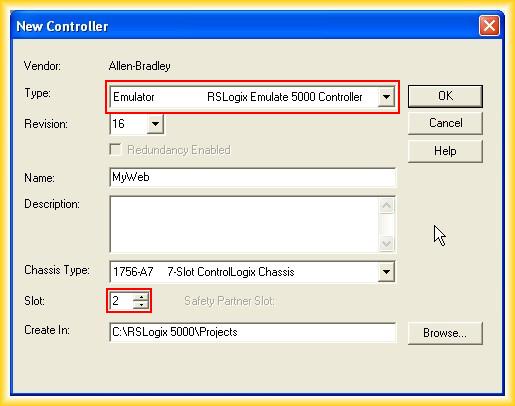
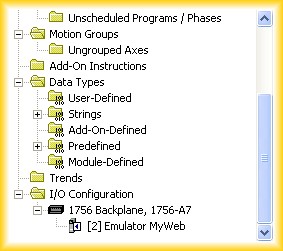
Here you can see how our CPU is shown in Slot number 2, it is always possible to modify the parameters if we right-click on the object and select properties
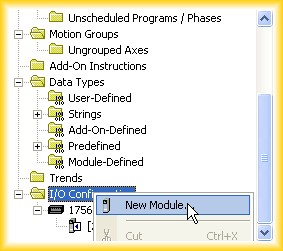
2.- Once the CPU is selected, the next step will be to add the input and output modules, for this we right-click on I/O Configuration and select New Module
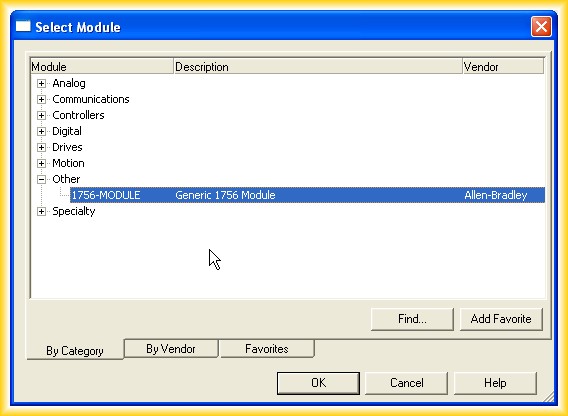
3.- The simulation modules are available in others with the Reference 1756-Module, as can be seen
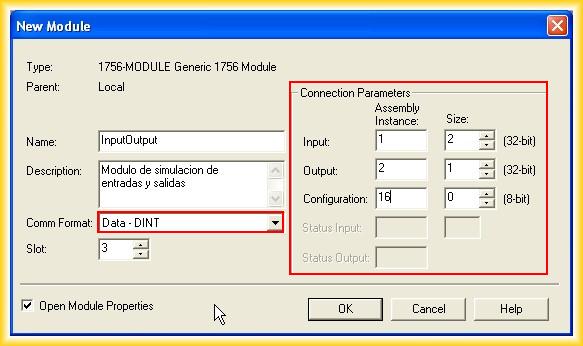
4.- When adding the new module, a window appears where we can configure it. Important parameterize the module according to the following image, otherwise no error occurs but it does not work
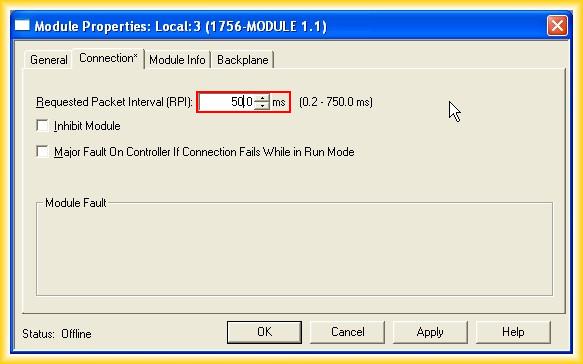
Another important parameter to change is the time from 5ms to 50ms as indicated in the Manual.
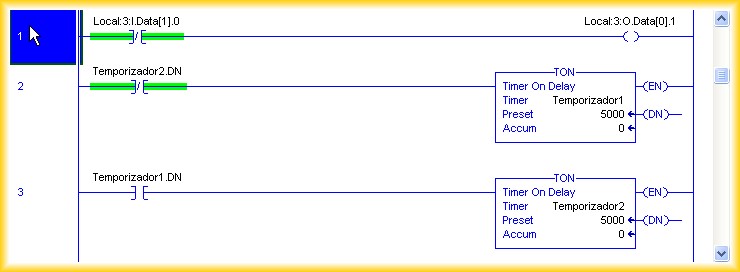
With these steps, we would have configured our hardware, now we can add a couple of lines of programming code so that when we perform the simulation we can observe it correctly
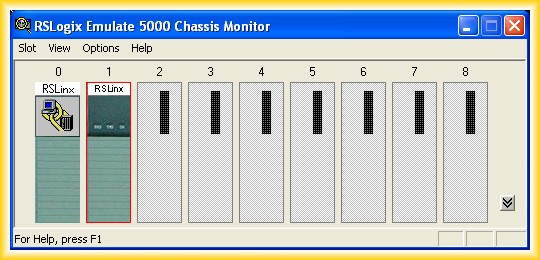
Now we will proceed to configure the RSEmulate, once the program is executed it has the following interface, by default Slot number 0 and 1 are already occupied, so our CPU will go in Slot number 2 as we had configured, we select Slot number 2 and add a new one, the following window appears and we select Emulator RSLogix Emulate 5000 Controller
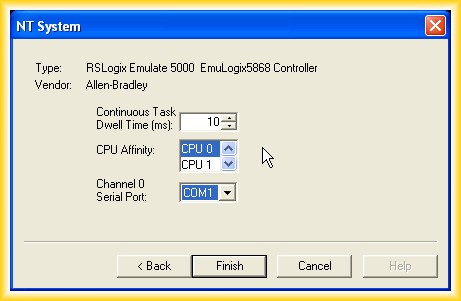
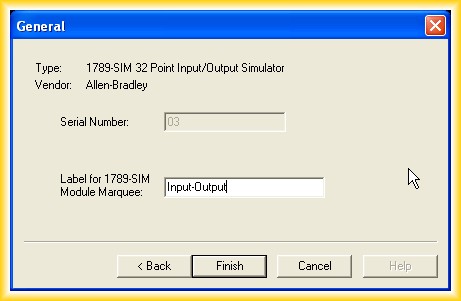
Next, a pop-up window appears for the parameterization of this module, you can leave it by default and click on finish to complete the process of selecting our CPU
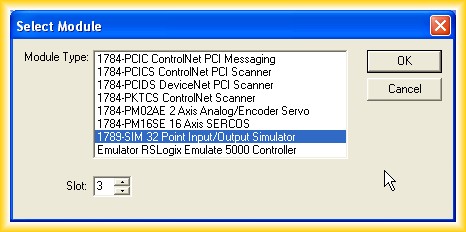
Now it is time to configure our input and output cards, we proceed in the same way, on slot number 3 we add a new module and select 1789 SIM as shown, in the following configuration window we click next and finish
So far, we have configured our small project in RSLogix 5000, configured our RSEmulate, and finally, we need to configure RSLinx
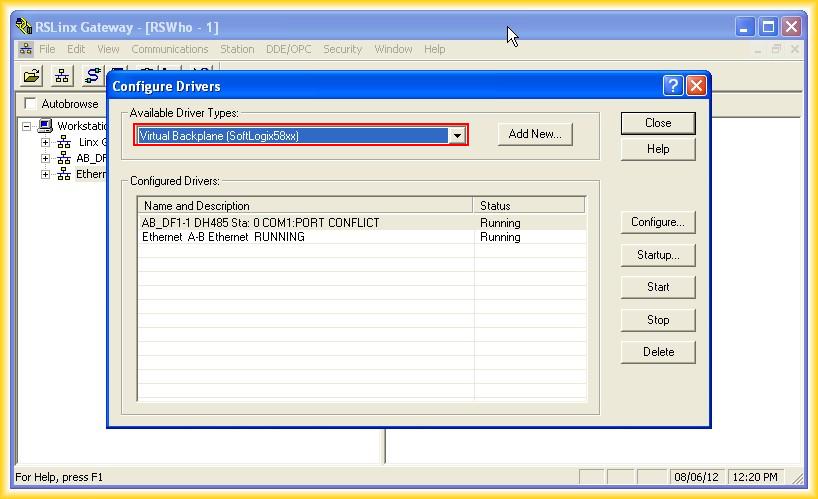
We run our RSLinx and add a new driver as shown in the image
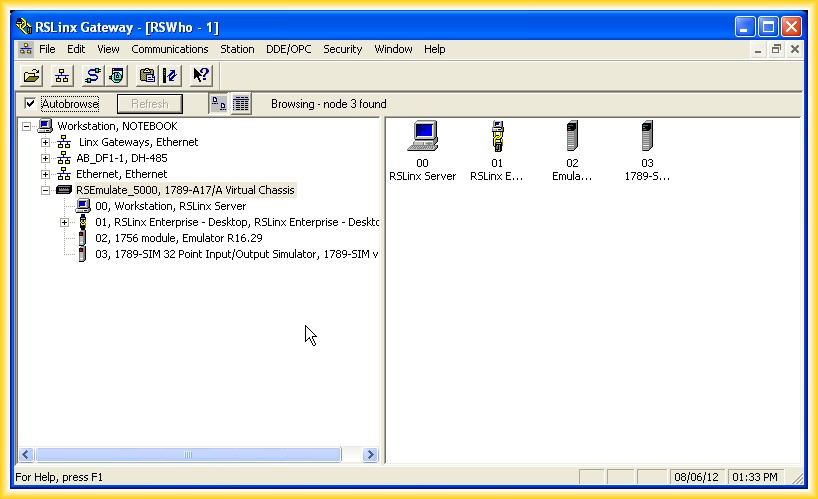
As our RSEmulate is running, if we have the Autobrowser option selected, it will automatically detect our device, once confirmed that it is correct we can close this window as we will run RSWho from RSLogix to transfer our project to the CPU
We return again to RSLogix 5000 and under communications we select RSWho, the following window will automatically appear
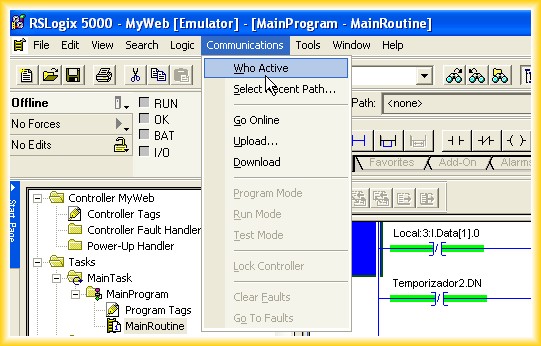
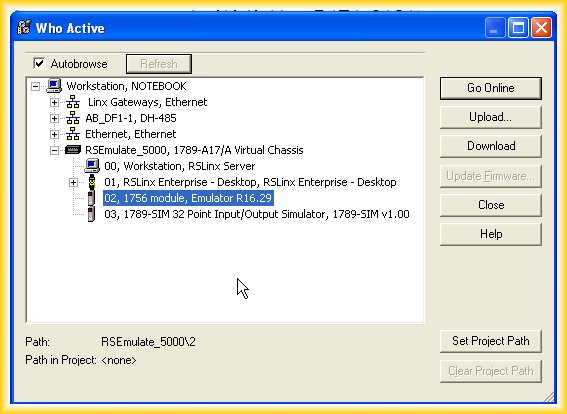
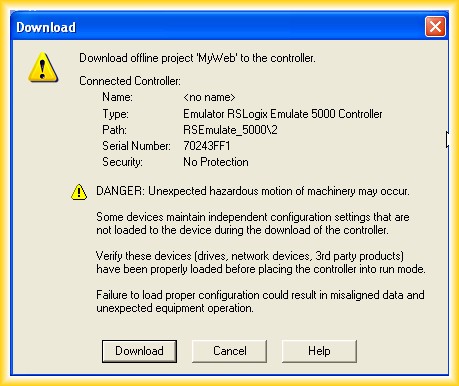
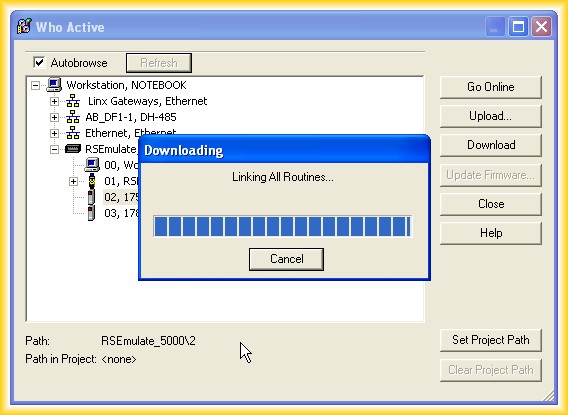
We select our CPU in Slot number 2 and we can now click on Download to transfer our project, another warning window will appear, we click on Download and that's it
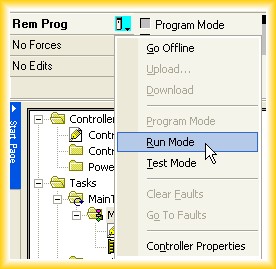
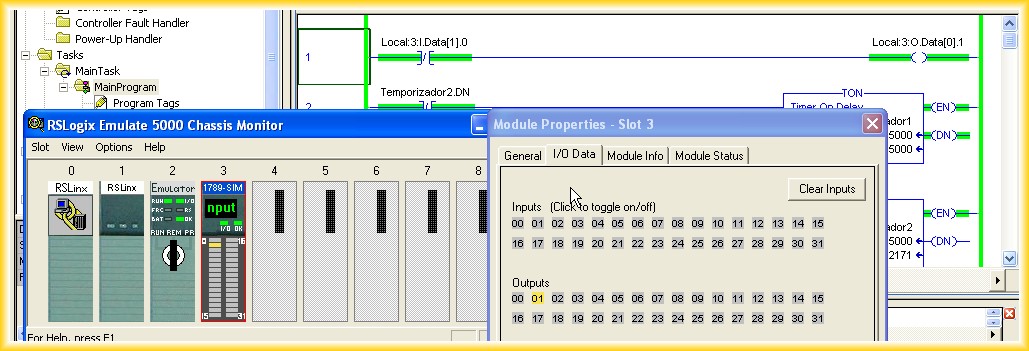
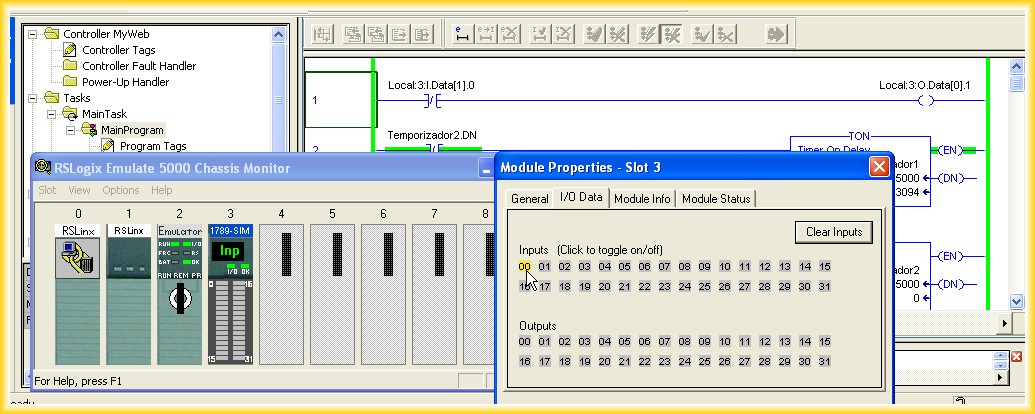
Now we just need to go Online and test the operation, for this we go to our processor and set it to RUN Mode, we observe our lines of code and act on the simulator
With these steps, we conclude this first part so that in the next one we can link our PLC with our SCADA
As an informative note, it should be added that in later versions such as V.16 the operating system had to be in English for RSEmulate to function, otherwise there was an error that I cannot specify in more detail right now
August 7, 2012