Creation and Simulation of a Project in CodeSys
In today's practice, I will create and test my project in CodeSys, which can be very useful since other manufacturers use CodeSys, as we have seen with ABB, and I reserve the right to try some others.
For this, I have created a virtual machine to carry out the following tests, I have downloaded version 3.4 from CodeSys and I am ready to test it.
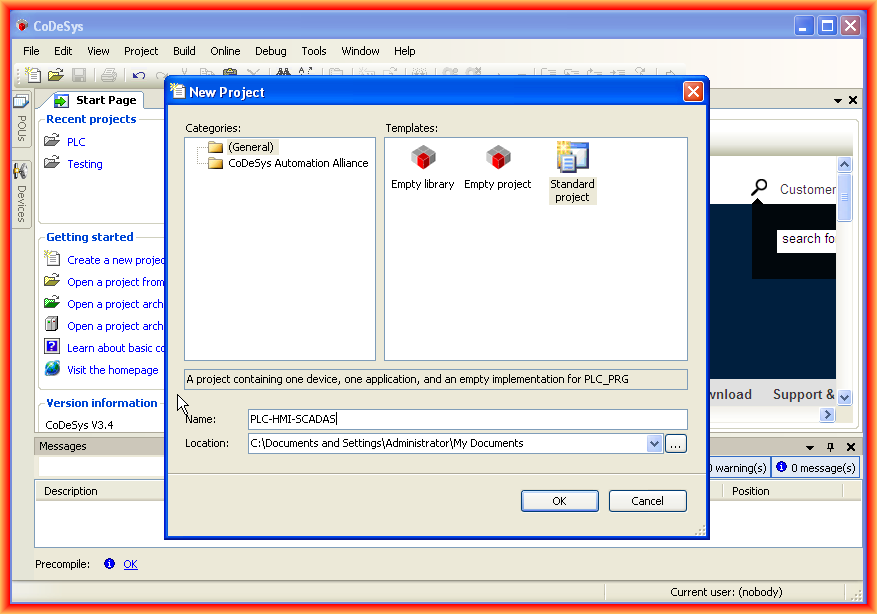
Once installed, I run it and will create a new project with the wizard.
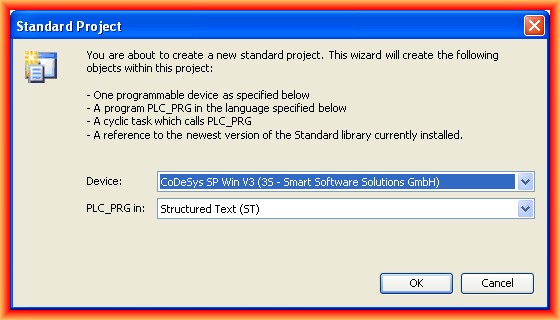
When executing a Standard Project, it will create a device and an application for me. We select the device according to our interest, as well as the programming language.
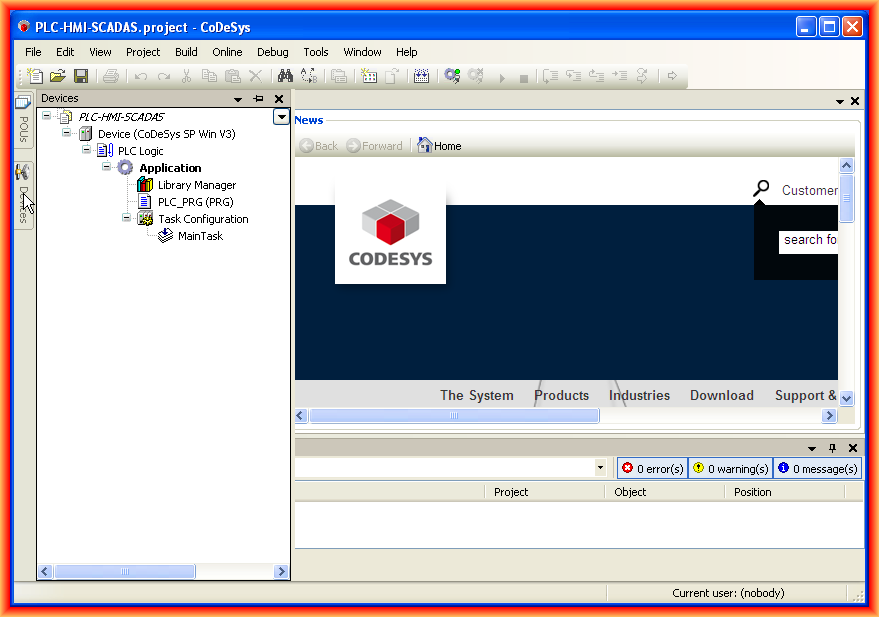
The appearance of our interface is as can be seen, and the first thing I will do is create a new object of the type global variables, following the next steps.
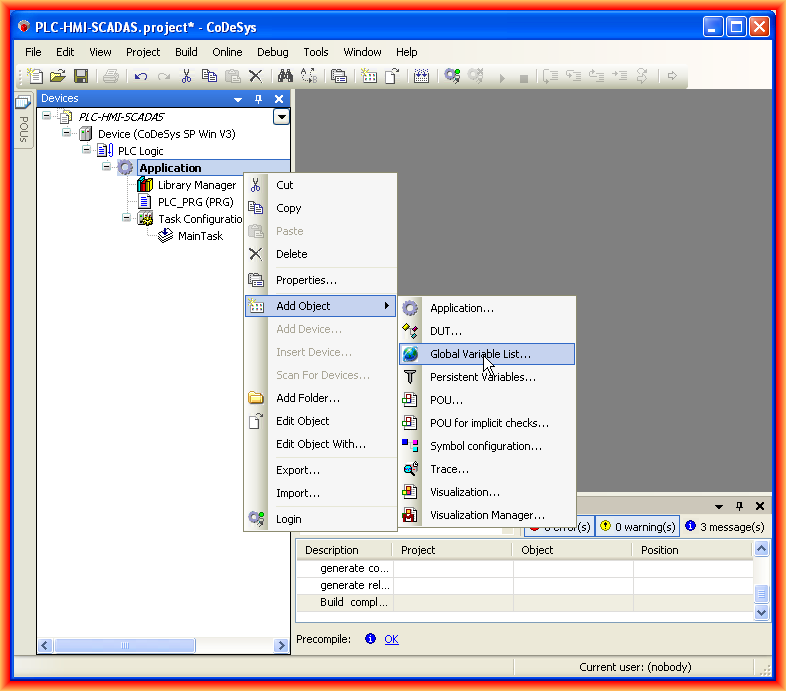
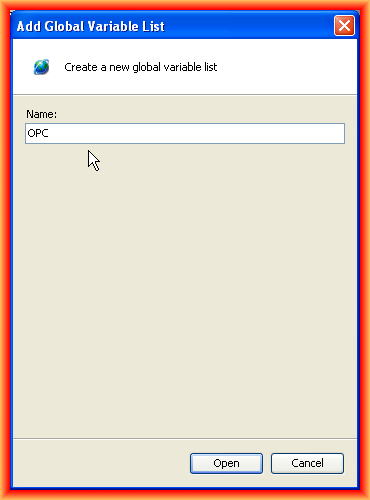
We give it the name we are interested in; in this case, I have named it OPC, as in the next practice I will check the operation of the OPC Server.
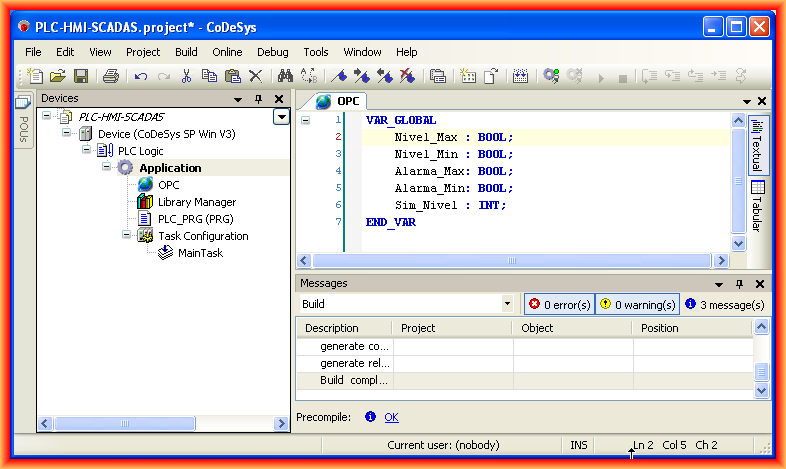
We define the variables we are going to use and that are of global scope. As this is a test, I have created the following; in the next captures, it will be seen that these are declared in the Program, but in reality, they are not; they are deleted, but the captures had already been made.
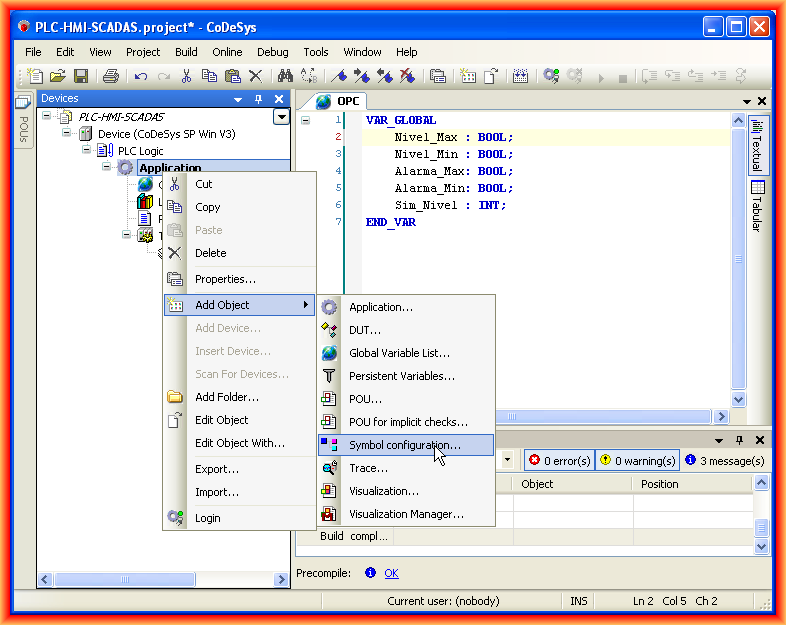
Once the global variables are defined, the next thing we will do is add a new object of the type symbol configuration, which will be useful for the next practice. For this one, the following steps would not be necessary since the symbols we configure will be the ones configured for the OPC Server.
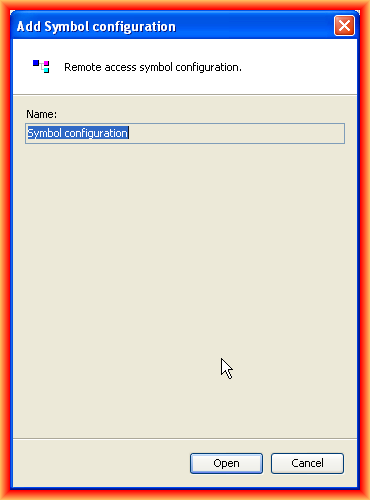
Once the name is assigned, the following image opens; to update all the symbols we have defined, we click on Refresh.
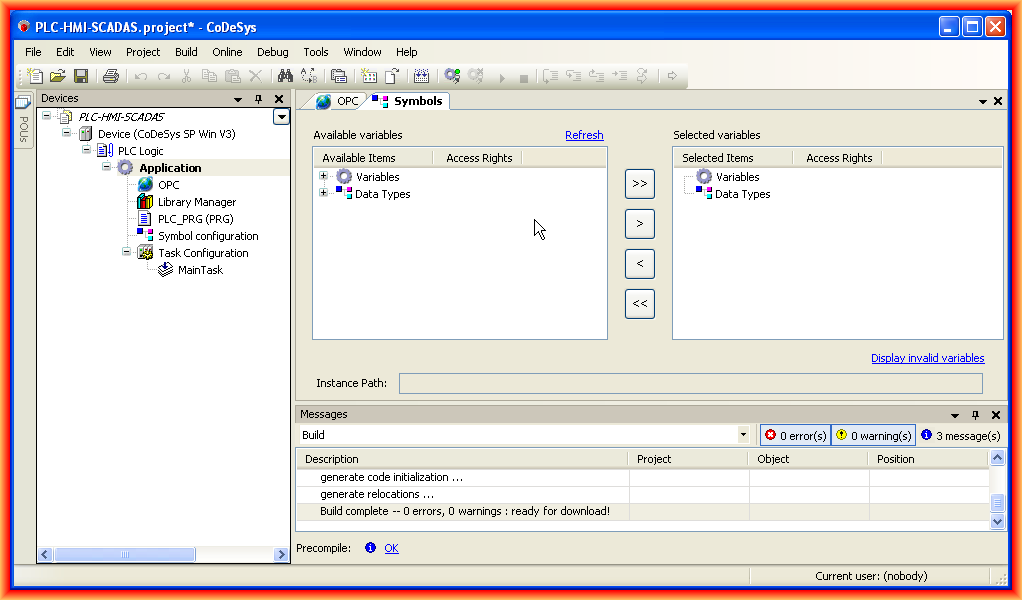
In the next image, we can see how the Global variables we had configured appear; we click on the > all the variables we are interested in for the OPC Server.
Once the symbols are configured, although this step is optional for this test, the next thing we will do is configure the communication. We click on Device, and several tabs appear; in the Communication Settings, we will configure it.
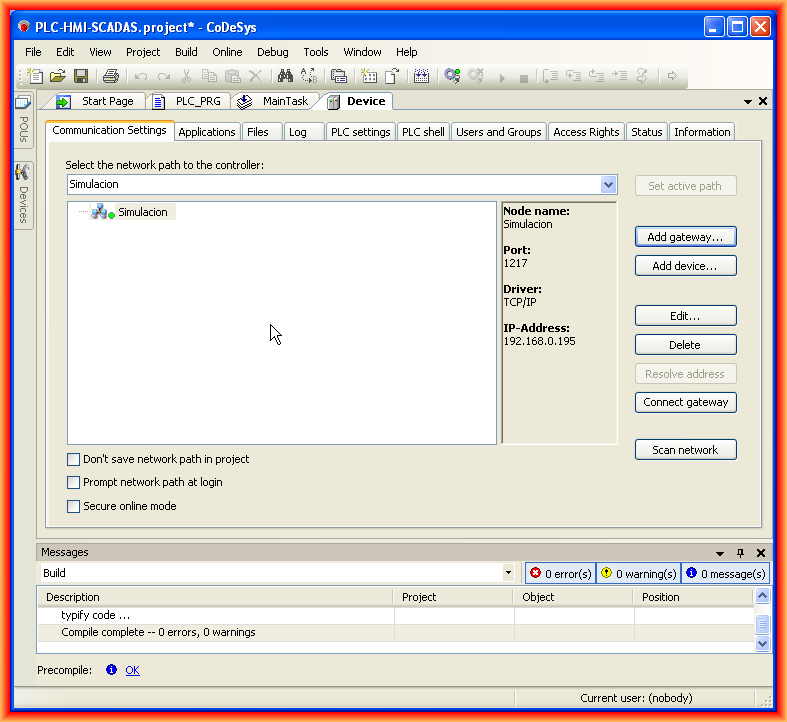
We click on Add gateway, give it the name we are interested in, and as a driver, we select TCP/IP, configuring the IP according to our machine or localhost.
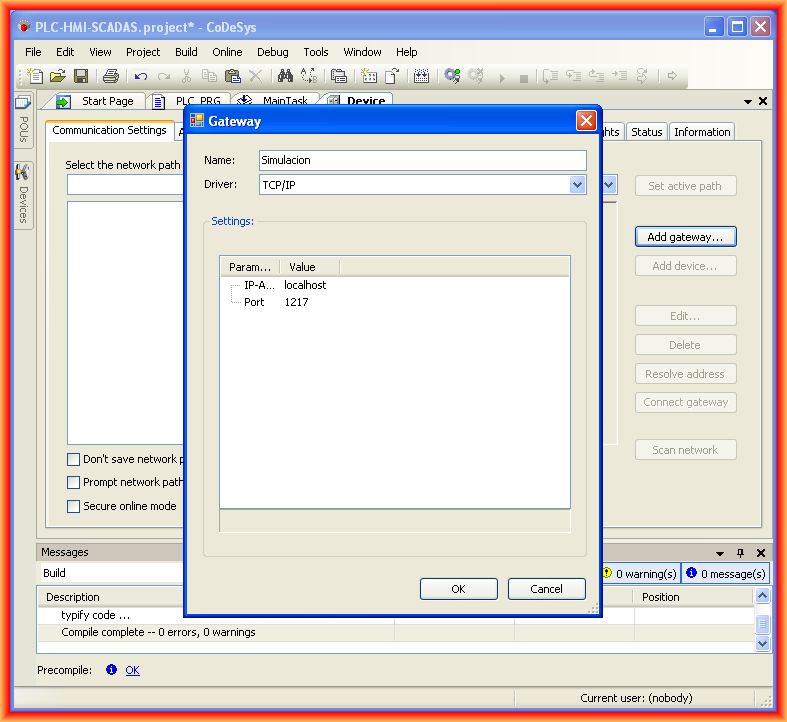
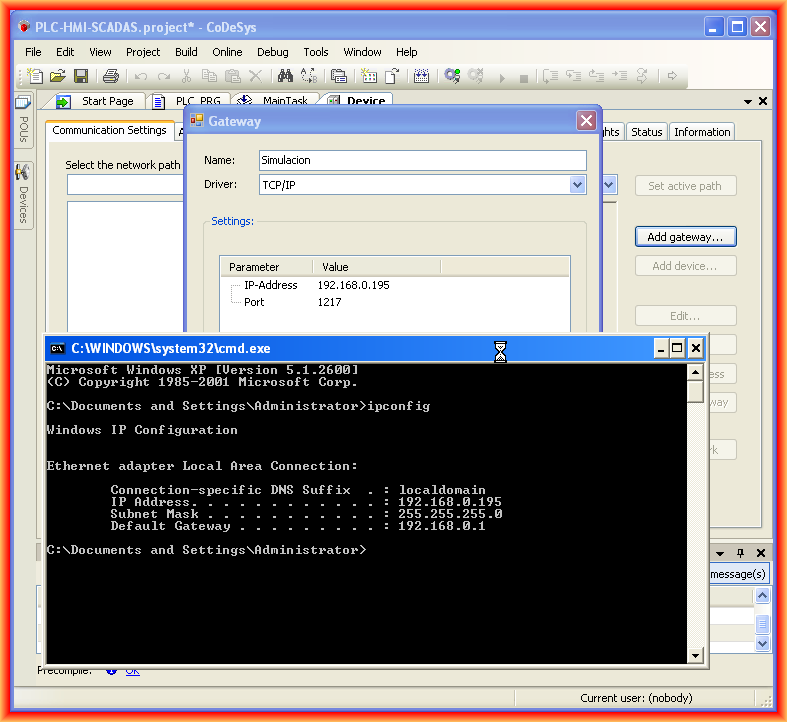
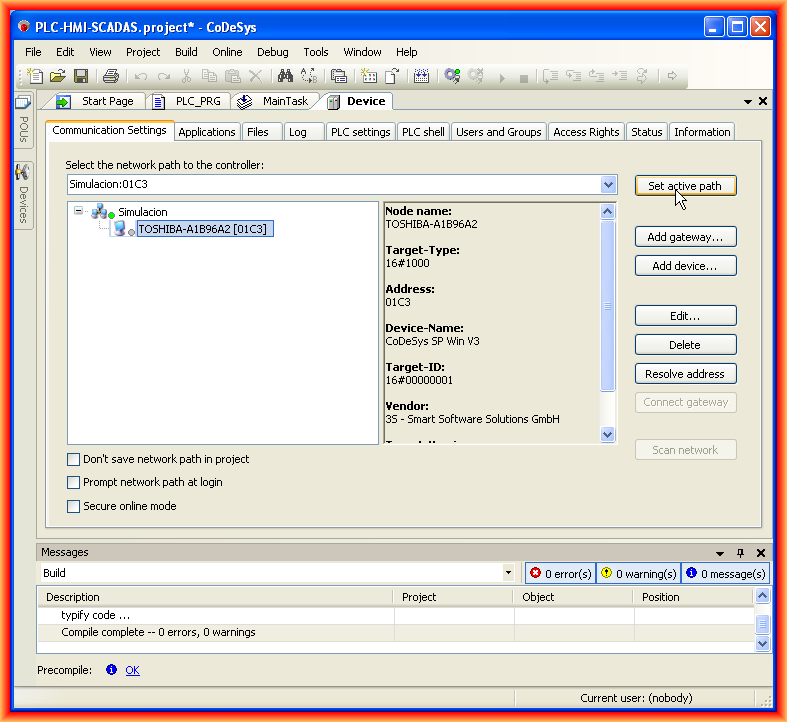
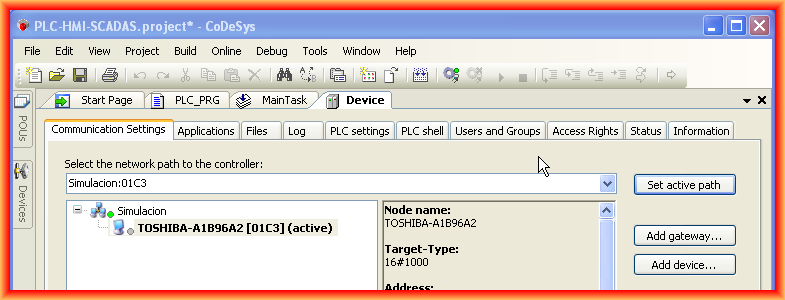
Once we have added our gateway, we click on scan network; this procedure will detect our machine, the name of our PC, and we will select this as set active path.
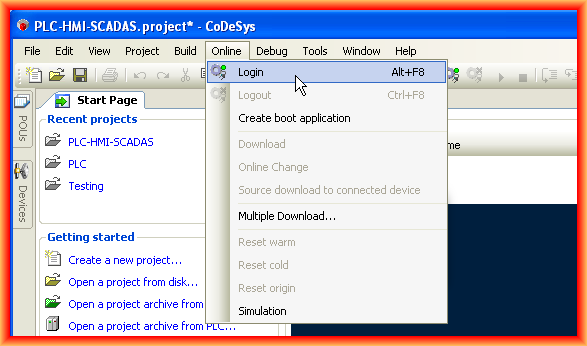
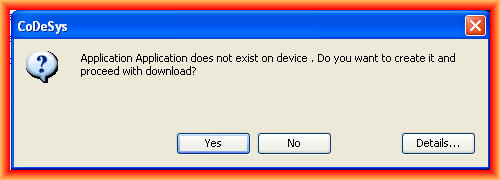
I will assume that we have completed the necessary programming, with its functions, etc. Therefore, the next thing we do is go to Online -> Login to connect to our Virtual PLC; the following window appears, and we confirm with yes to transfer the program.
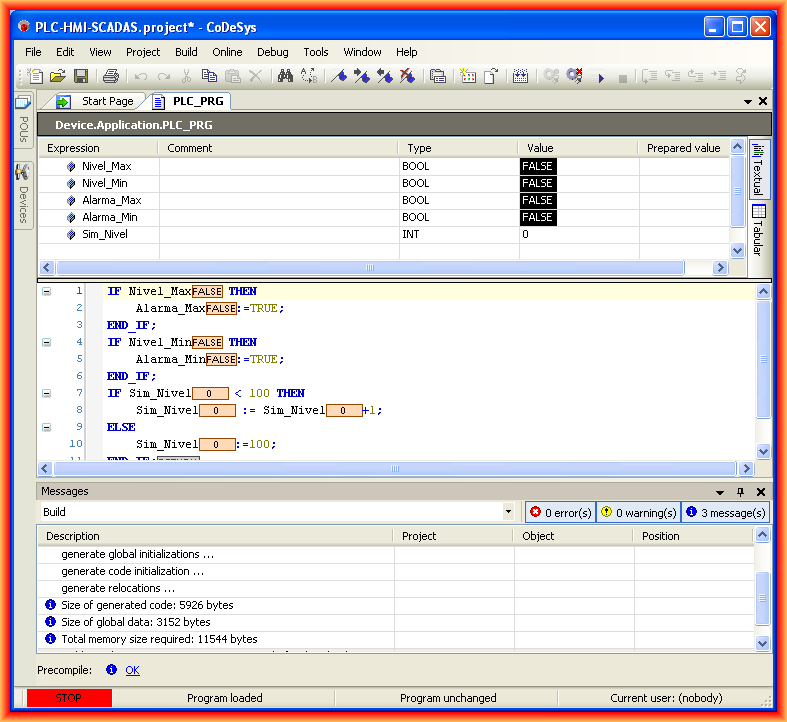
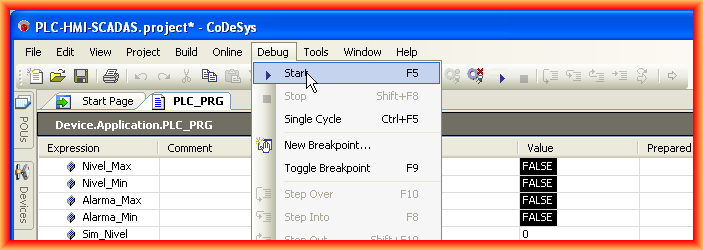
Once transferred, we can see that we are Online; what we need to do is set it to RUN, which we can do with the play icon or Debug -> RU.
And here, our program runs cyclically, and we observe the results. To end the session, we perform the same steps but in reverse, Debug -> Stop followed by Online -> Logout.

February 5, 2013