Continuing with the controls and Remote control, we will look at the Sm@rt Client viewer. This control, as its name suggests, is a client of the Sm@rt Server, which, as we saw with any VNC client, allows us to access the Server; in this case, we will access the Sm@rt Server.
On our screen, we insert the control, ideally using the full width of the screen for better visualization.
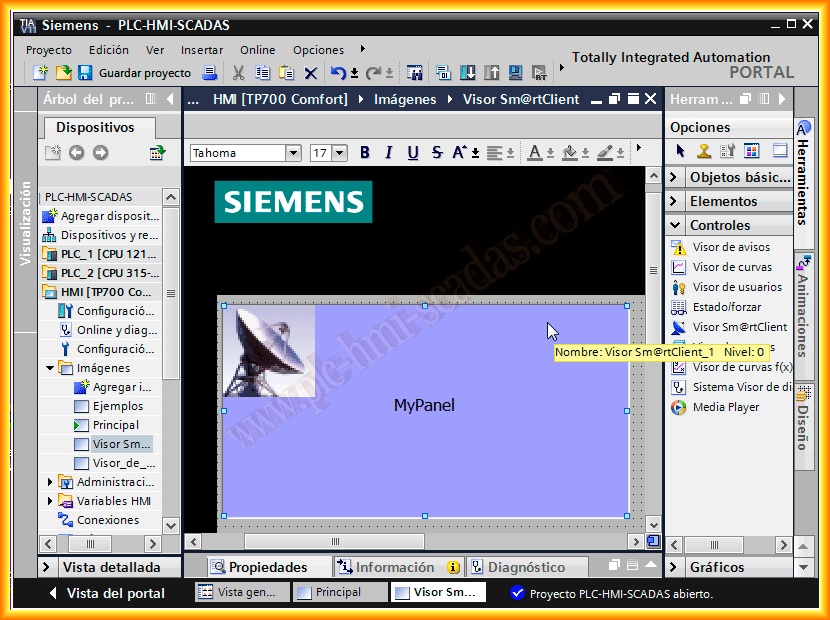
The next step is to configure the properties. We choose the type of connection; for this example, the devices are on the same LAN network, and we leave it as default.
Machine name, the IP address of the device, and if we are only going to access one device, there is no need to define either the address variable or the password variable, only the Server password.
In the options, we choose according to our interest; I will leave the options as default.

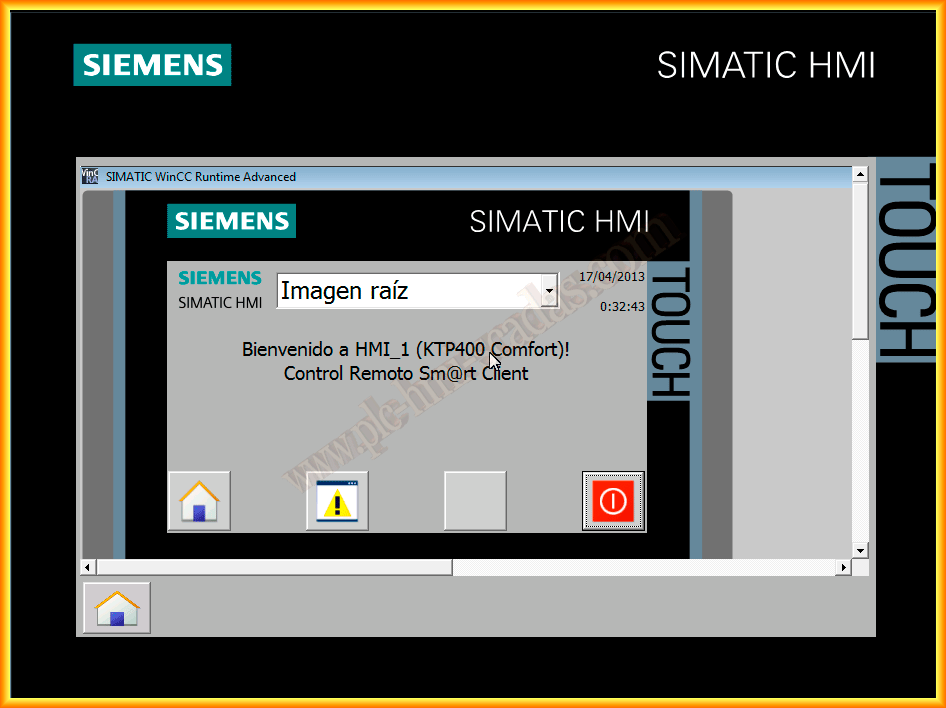
Once we finish configuring our screen, we compile and run the Runtime. In this example, we assume that we have several Screens, and in this case, one of them has the Sm@rt Server option enabled. From another screen in the same installation, we will access the Screen.
In this first image, it is about establishing the connection, but since the Server is disabled, it shows the following error, and we perform a ping to check that there is communication between both devices.

Now we activate the Server, and when we connect, we can already visualize the other Screen of the Server within our Screen.
April 20, 2013