The following practice will be reused for a later explanation, as we had started to see the services offered by the new Comfort Panels, but we will postpone it.
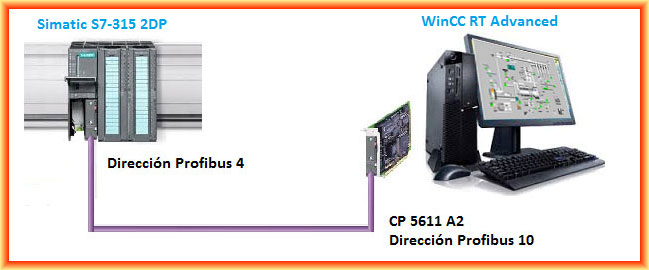
In this one, we will configure our PC to run WinCC RT Advanced, but this time we will work with an old S7-315 2DP CPU; another requirement is that we will program it with the Simatic Manager, hence we will not integrate it into the TIA Portal.
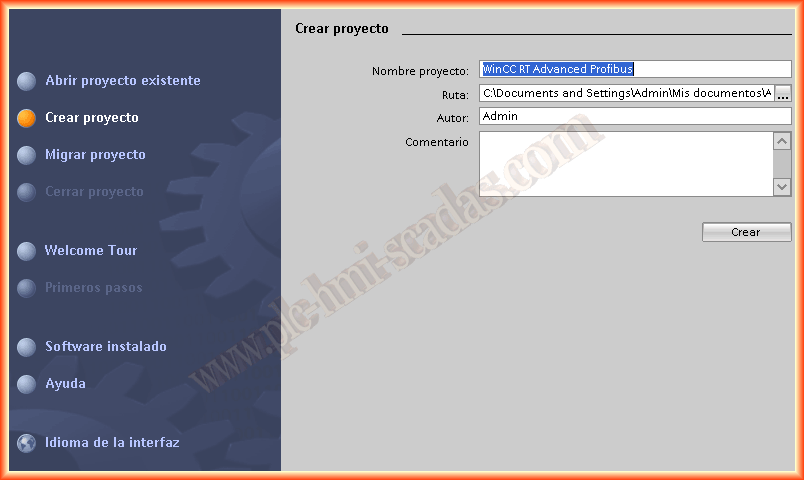
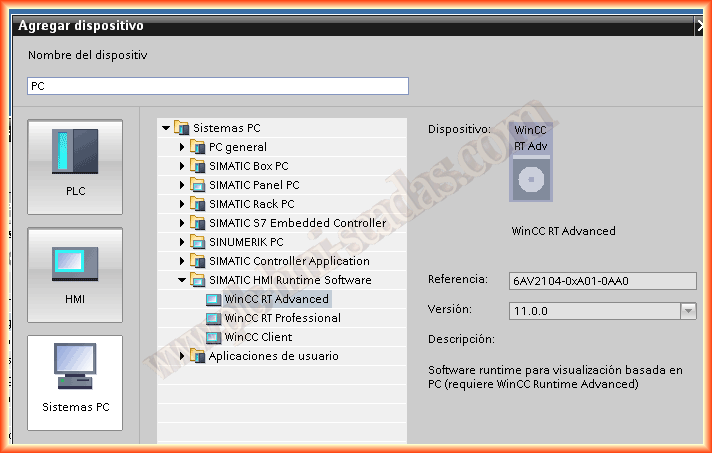
We run the TIA Portal, regardless of its version V.11 or V.12 and create a new project; once created, we add a new device and select WinCC RT Advanced.
The next step will be to add our CP 5611 A2; this card will help us configure an MPI/Profibus network, in this case, it will be a Profibus communication. We have previously inserted the card into a PCI slot on the computer's motherboard and installed the drivers.
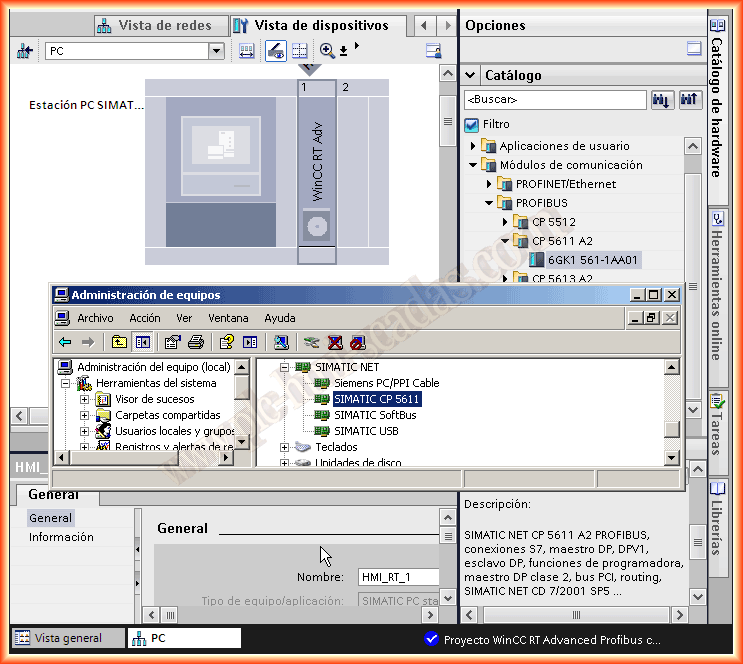
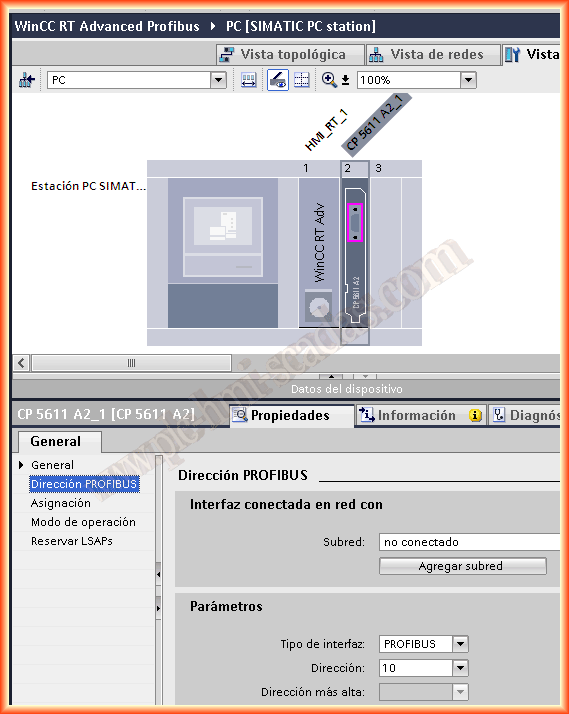
Once inserted, we need to make the configuration we are interested in; since it is a Profibus network, we select this type of network and a unique and non-repeating address.
As I have the Profibus network configured in the Simatic Manager, it is not necessary to add any here.
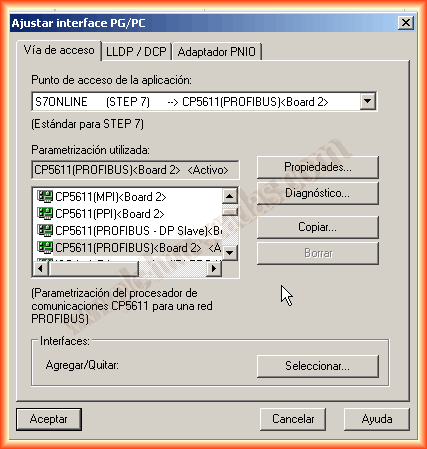
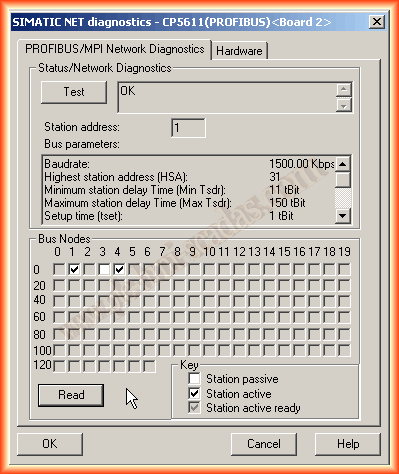
We run from the control panel Adjust PG/PC interface to select S7ONLINE CP5611 as the Access Point; if we click on the diagnostic button, we can analyze the network.
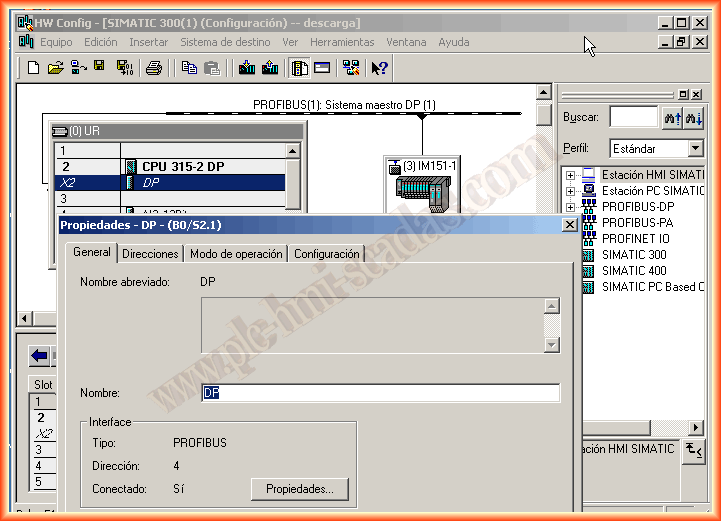
Once we finish configuring the hardware, we will start with the software, and the first thing is to configure a new connection with our PLC; we specify the transfer speed of 1.5MB/sec, the network profile is DP (Decentralized Periphery), and the Profibus address of our PLC; the rack and slot number are usually the default values when adding the connection.
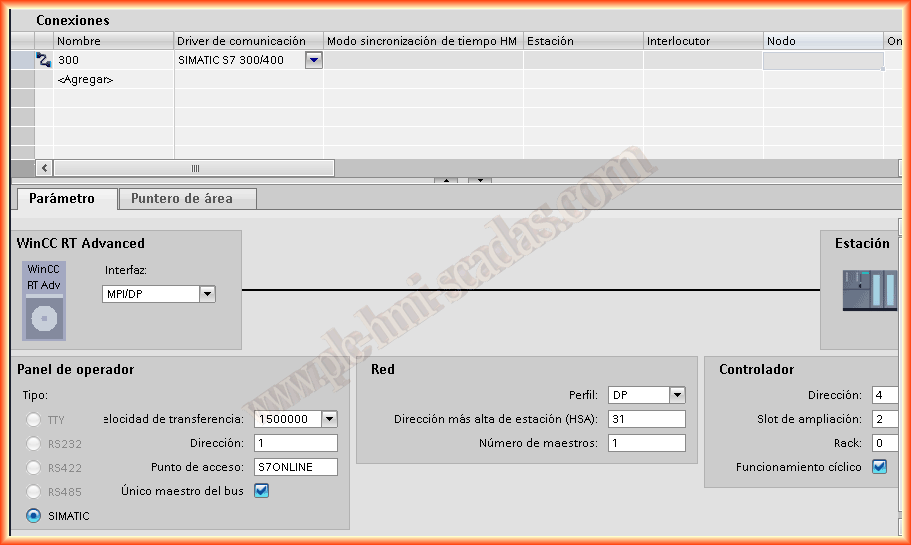
In the next image, we can check that we have already configured the Profibus network and the address of our PLC.
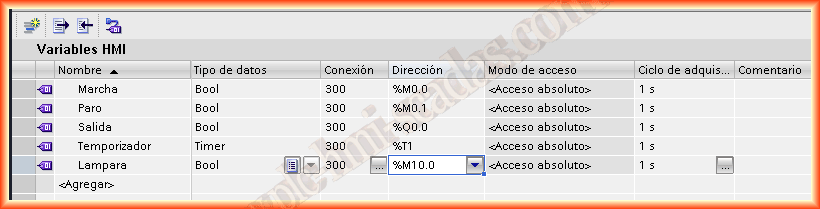
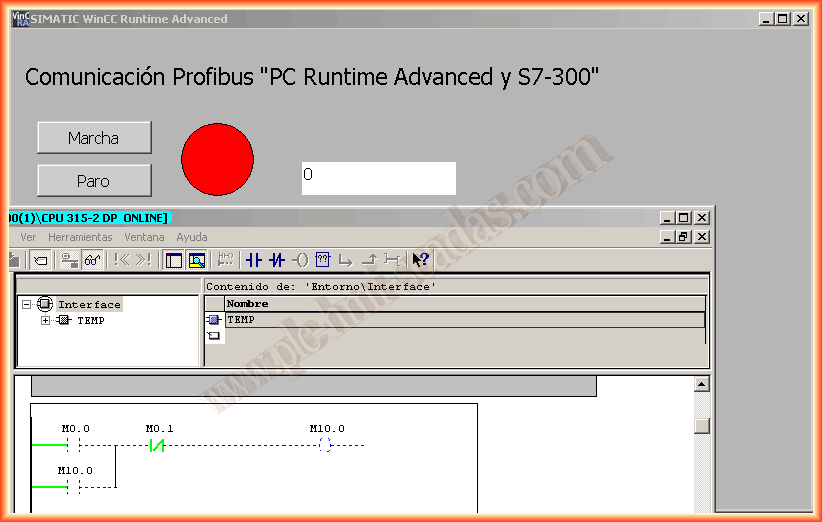
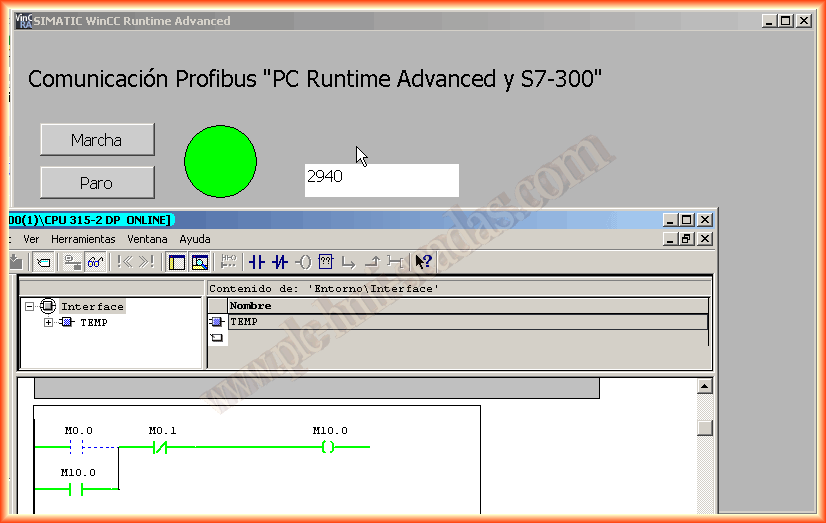
Once the link is configured, we will create the necessary variables; for this test, I have added the following, as I have created a simple start/stop.
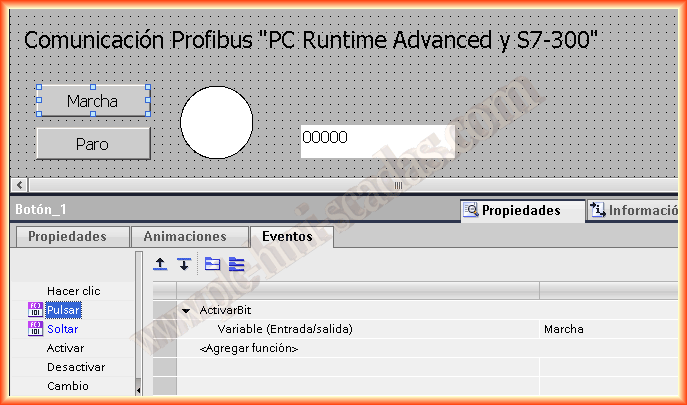
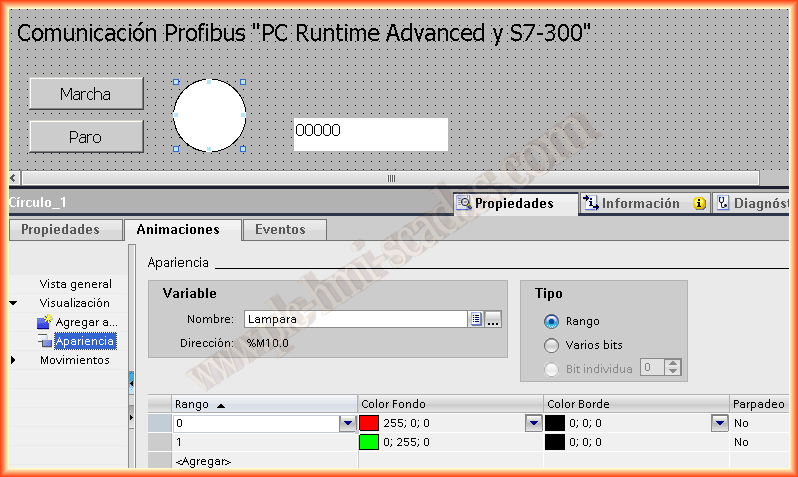
The image I created consists of start and stop buttons, with the events to activate and deactivate the bit when pressed and released respectively, and a circle object, adding animation to the appearance.
We can now compile and save our project; if everything is correct, we can start the simulation; the following images show its correct operation.
May 19, 2013
If you liked it or found the information useful, share it...