SQL Databases in SCADAs
Create Database in SQL Server and Configuration (ODBC) System DNS
In the following practice, we will create a Database in the SQL Server Database Management System. Practically, when installing a SCADA, one of the requirements is to install a Database Management System; examples include WinCC, Factory Talk View SE, Intouch Application Server, Vijeo Citect, etc... and all these share the same Microsoft Database Management System, SQL Server, whether in version 2000, 2005, or 2008, depending on the software version.
This is not the first time I have created a database and managed Open Database Connectivity (ODBC); to avoid repeating in future practices, I will do this one as a reference.
If anyone is interested, typical queries or creating some procedures or functions can be included.
The first thing we need to connect to the server is the administrator, which by default is not included in some installations; it can be downloaded free of charge from Microsoft, just like the free version of SQL Server Express.
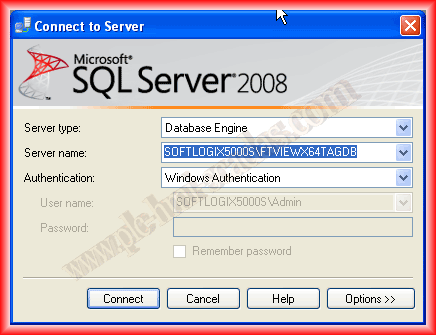
Once downloaded and installed Microsoft SQL Server Management Studio, we can connect with a graphical interface, and we will connect to the Local server and the instance FTVIEWX64TAGDB; this instance is created when Factory Talk View is installed.
Once connected, all existing databases will appear. Right-click on Database and select New Database.

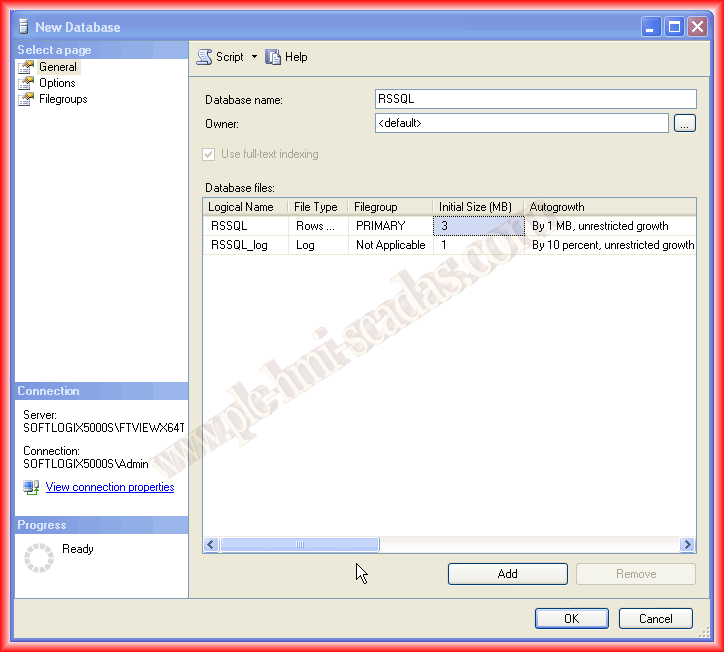
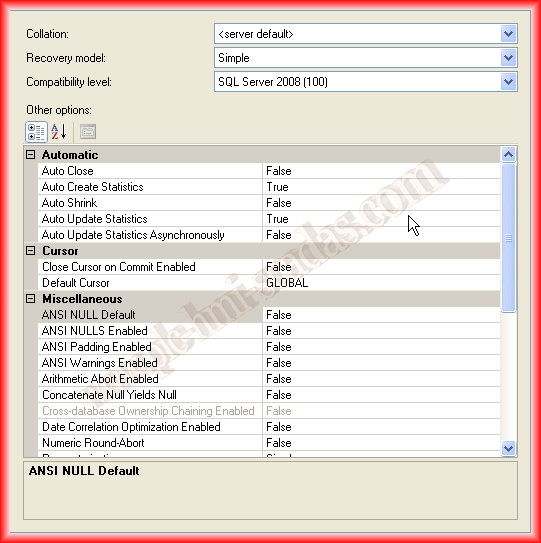
In the following images, we will configure the properties of the database, assign the name that interests us, which is the minimum requirement; the other properties to modify will depend on our interest, for now, this is sufficient, so we will leave it as is.
At this point, we have created the Database, but we do not have any tables; the next step is to add the tables that we are interested in for our application.

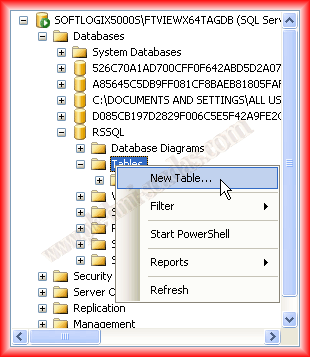
To create the tables, the same procedure applies: right-click New Table, and the screen will appear to configure the table. If you are not familiar with databases, a couple of tips: each table we create must have a primary Key, which is a column in which each new record will have a unique and non-repeating value; an example would be the person table with the DNI as the Primary Key, as there cannot be two people with the same number.
Here, as I am only going to create one table, there will be no relationships, but we are using the relational database management system. Now we will skip this step and focus only on one table.
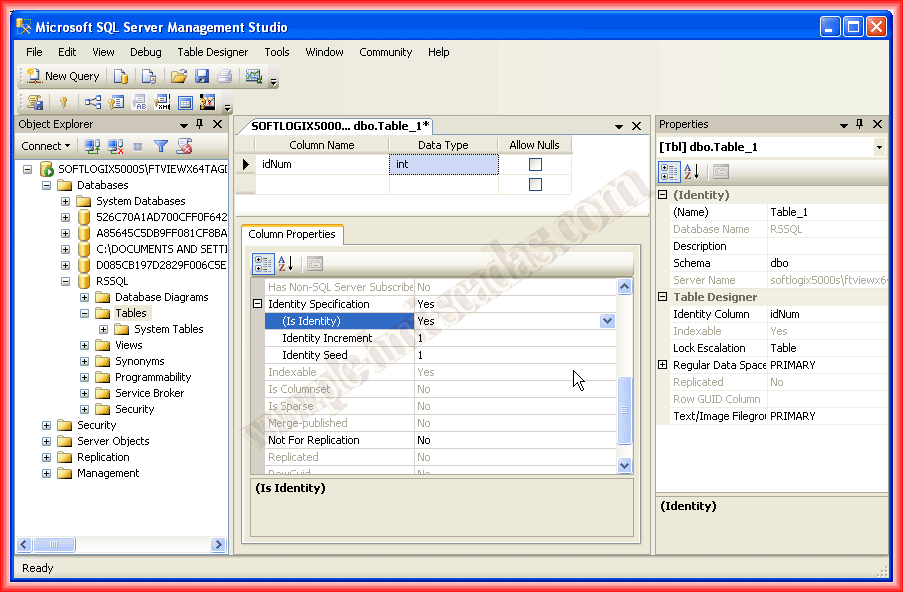
Returning to our table, we will create a column with idNum and of the integer data type; to make idNum our Primary Key, we will configure it so that with each new record, a new tuple, the value of idNum increments automatically, as shown in the image.
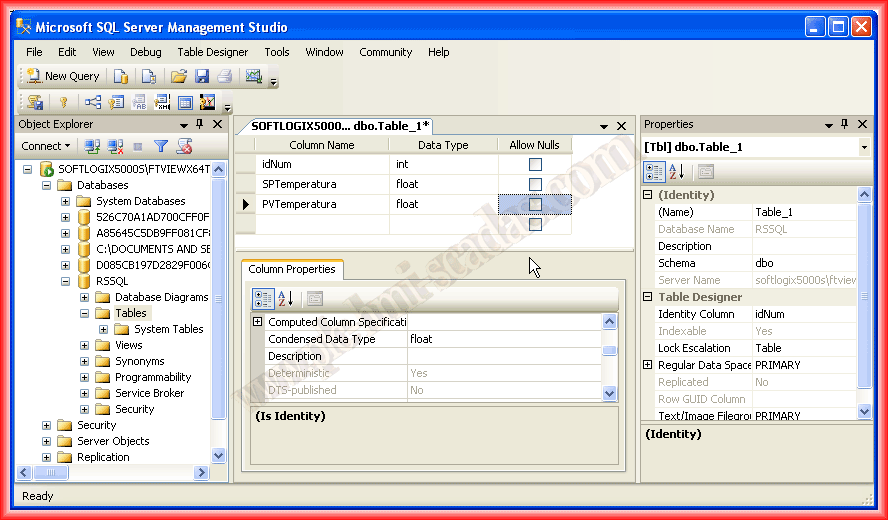
For the next two columns, we will store the value of a Temperature SetPoint and the Process Value of that temperature; we will name them and specify that they will be of the Float data type; for this example, these simple steps are more than sufficient.
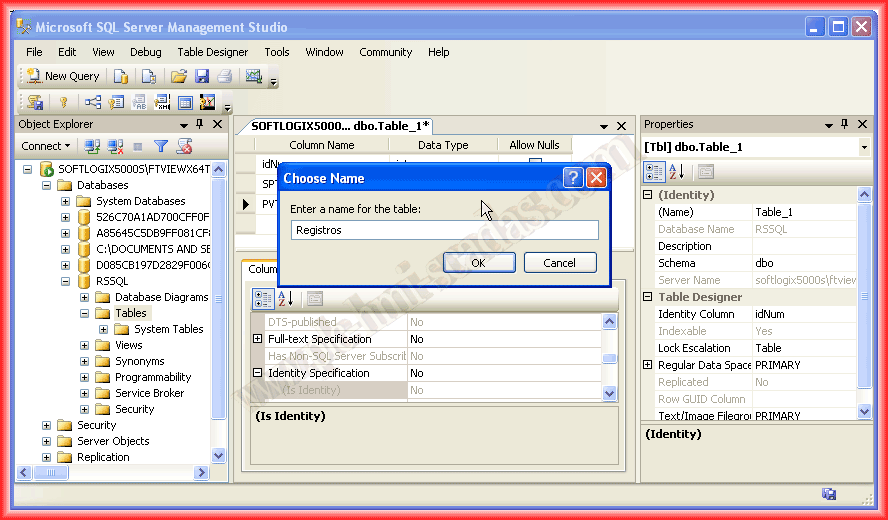
Finally, we save the table under the name that interests us; in this case, it will be called Records. In the same way, we would create the tables that interest us and, if necessary, the relevant relationships between them.
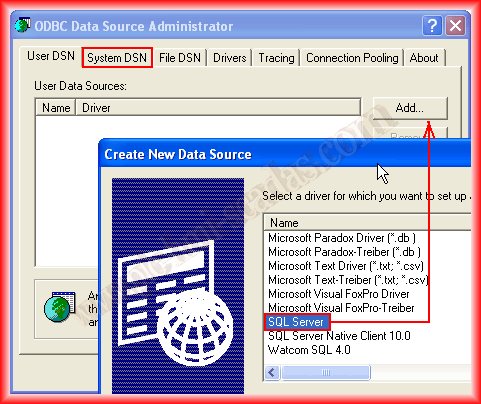
The second part of this practice is how to create a Data Source Name (DNS) that will point to our database for access; we do this in ODBC Open Database Connectivity. We find this in Administrative Tools in our Operating System; for the Factory Talk Transaction Manager example, it specifies to create it in System DSN, although for other applications, we will create them in User DSN. The procedure is the same.
The first step is to add the driver that will reference which database we are going to connect to; for the SQL Server example, we select this one; if it were Access, we would choose its corresponding one.
Once the Driver we are going to use is added, we assign a name and a description; next, we need to define which server we want to connect to and which instance; once this is done, we continue with the wizard, and it asks us how we will authenticate, we choose according to our needs.


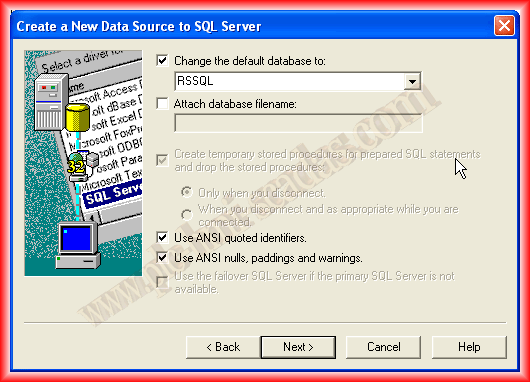
In this step, we select the database we want to connect to; we will connect to the one we previously created, named RSSQL, and select the properties accordingly; by default, they can be left as is; if we want to implement any features, select them and consult the help for more information.

To verify that the steps taken are correct and functioning properly, we click finish, and we can perform a test, which connects to the specified database; if correct, it will display the following image.
From now on, every time I need to create a new DNS, I will refer to this guide.


June 30, 2013
If you liked it or found the information useful, share it...