Prosoft Gateway Configuration AN-X2-AB-DHRIO
Thanks to Raul and Francisco, we are going to test how the Prosoft Gateway works, which according to the information provided by the manufacturer is as follows:

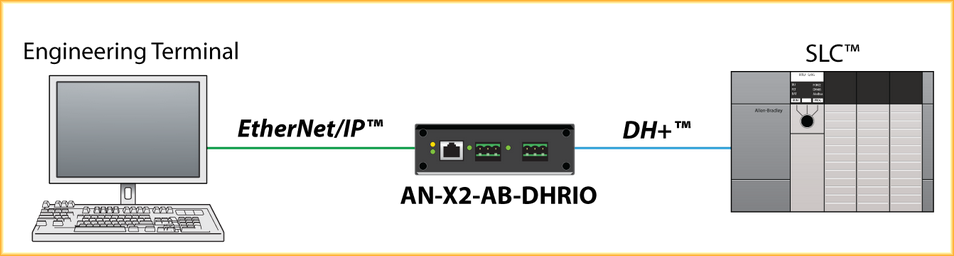
For the following tutorial, the goal will be the following image, we have an SLC5/04, and for those who do not know, this range of CPUs does not have an Ethernet port, except for the SLC5/05. And for the real case, it is to integrate the CPU into an EtherNet/IP network to communicate with Panel View Plus and other devices. To avoid changing the CPU, Prosoft offers several Gateway products, and among these, we find the one we will test next.
Before we start working on the Gateway configuration, we will connect to our PLC and obtain a series of information that we will use later. To communicate with the PLC, we use RSLinx and in this first case, serial communication with DF1. If you have questions about RSLinx configuration, check the following information.
Once we have connected and downloaded the project, if we do not have it, we go to the directory Controller --> Channel Configuration
Here the relevant information for us is Channel 1 DH+

And the information we are looking for is the speed and the Node, we already know that the speed is 57.6K and the PLC is node 1

Now we will move on to the Gateway configuration. For now, all we need to do is power the device and connect a network cable between the Gateway and our PC. The first step is omitted, but I will briefly describe it. By default, the Gateway comes with the IP address 169.254.42.84, so we know that to connect, we need to change our PC's address to be in the same range and be able to access it. Once we have accessed, we can change the IP address and configure it according to our needs.
In our case, we assigned the IP address 192.168.1.10, which is the address we use to access the device, as can be seen in the browser's address. We select the subnet mask, gateway address, in case we are connected with a router, and the type of firmware, for our case the AN-X2-DHP. This is the first step.
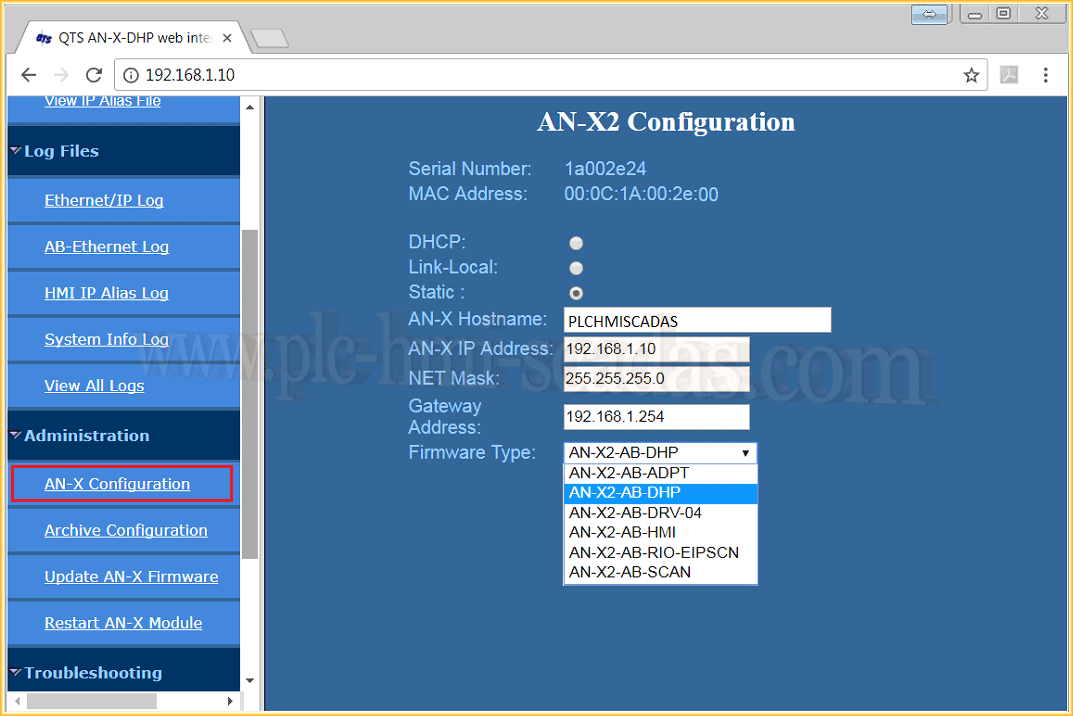
Next, we go to Automation Network, and we will configure the DH+ network, as we could see at the beginning, our speed was 56.7K, so we select 57k and assign a node number to our device, we already know it cannot be 1, because that is the PLC. In this example, it is 22. We have completed the second step.

The next step we will see, there are several ways to approach it, is to configure a *.csv file where we will specify the Alias, that is, by default there are examples of how to configure the file, but we will start by saying that the file can be obtained in several ways:
1.- Inside the Gateway, there is a microSD where we can find the file.
2.- We can download it from the Prosoft manufacturer's website.
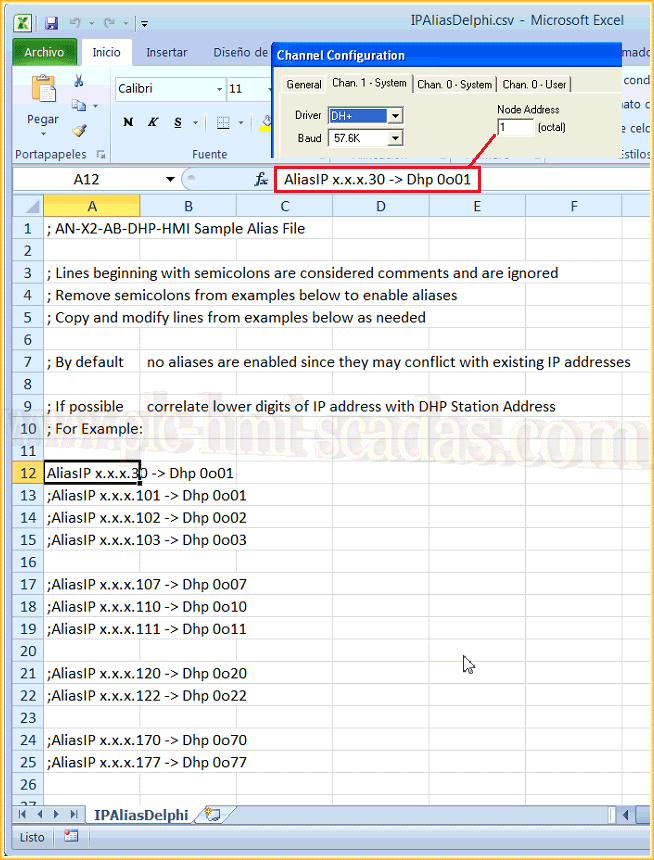
3.- We can create it ourselves, and for that, the easiest way is to create a new file with notepad and write the following
AliasIP x.x.x.Address -> Dhp 0oNode, Where Address corresponds to the address that our PLC would have on the EthernetIP network, in our example it would be 192.168.1.30 and Node is the node number we retrieved from our PLC, which was 1. We save the file as csv and upload it.
Now we will upload the file we created to our device, to do this select file, find the path where we located it and send it with the button send File to AN-X, as shown in the instructions, after this the module requires a restart.
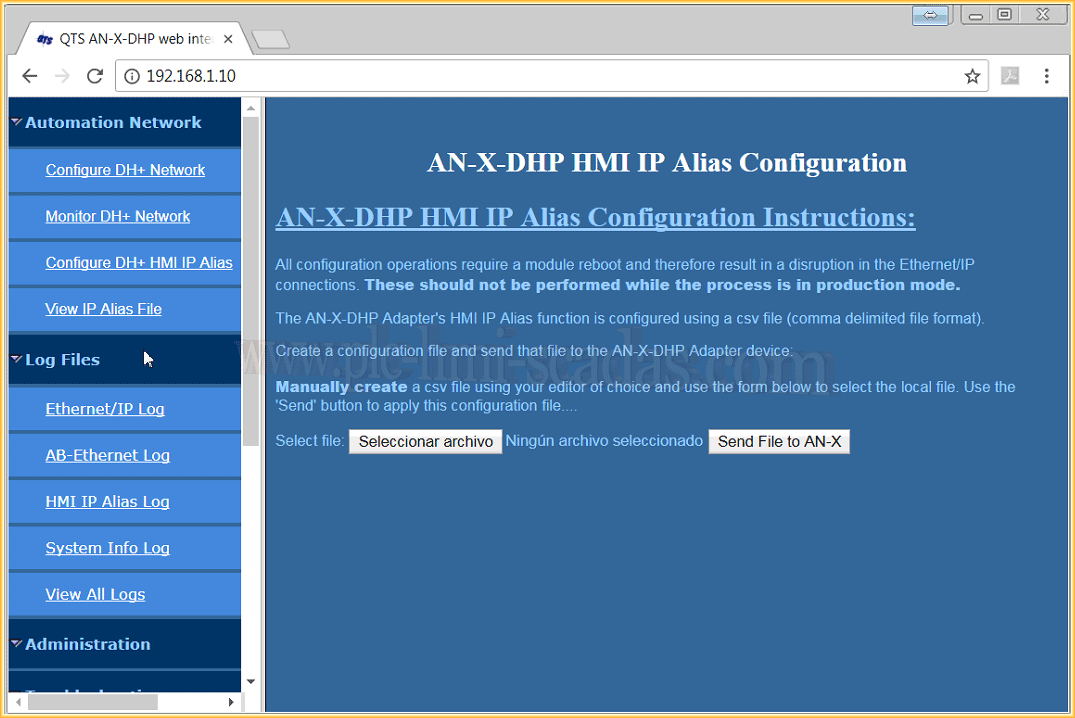
Subsequently, if we go to Automation Network --> View IP Alias File, we can observe our configuration, another alternative when creating our file is to first visualize it, copy and paste it into a new file, update it according to our needs, and upload it.
With these steps, we now have our device ready to use.

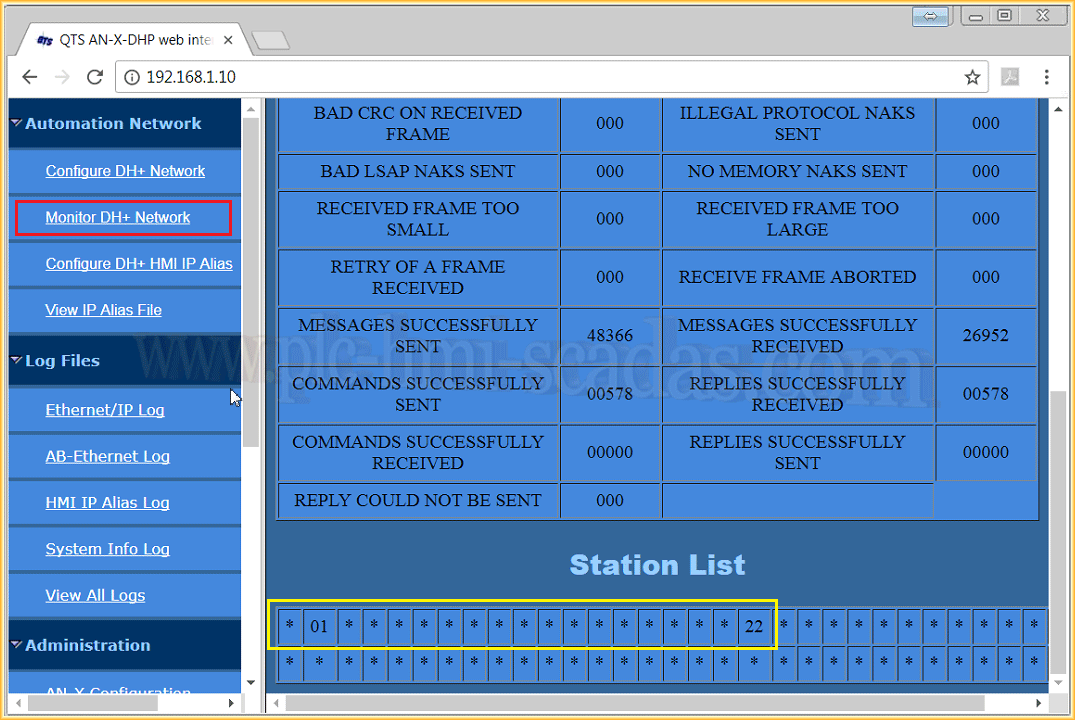
If we check the DH+ network, we can see that node 1, which is our PLC, and node 22, which is our device, appear, along with other additional information.
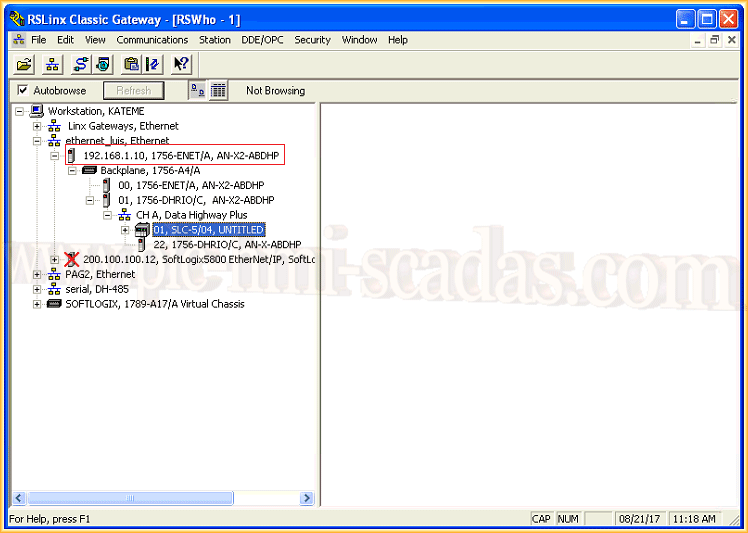
The first test we are going to perform is to configure the Ethernet driver in RSLinx, and as we can see in the following image, we communicate perfectly with our SLC5/04 with the Ethernet driver.
We can now go Online and make the necessary modifications, etc...
Subsequently, communication between the PLC and the Panel View Plus was tested and it works correctly.

An image of the equipment in question.

August 23, 2017
"Gratitude in silence serves no one." Gladys Bronwyn Stern