Factory Talk View ME Alarm Configuration
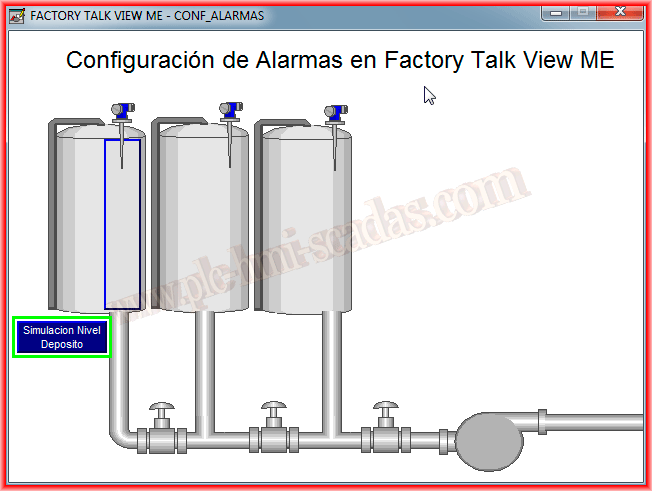
In the following practice, we will see how to configure alarms in Factory Talk View ME for our Panel View. Within the directories of our project, we have one dedicated to alarms. Let's assume the following example: we have a tank with an ultrasonic sensor, and we will establish the following condition: when the level is greater than 85%, it will be considered an alarm. Now let's see how we configure it.

We run the Alarm Setup Wizard, and to add a new alarm, we click Add and specify the tag or an expression; in this case, the expression is LevelTank1> 85. Trigger type is the type of trigger we are interested in; for this example, it is Value. If we use a number as a float, it rounds to its integer value. The bit type could be of interest for a digital alarm or LSB if we are working with an array. Here, it is important to highlight that when multiple bits in an array change from 0-1, the trigger only executes on the least significant bit.
We assign the name we are interested in the Trigger Label.
From the optional connections, we will highlight that if we are interested in using the Message option, to make it work, we must select the checkbox Message to Tag in the Messages tab.
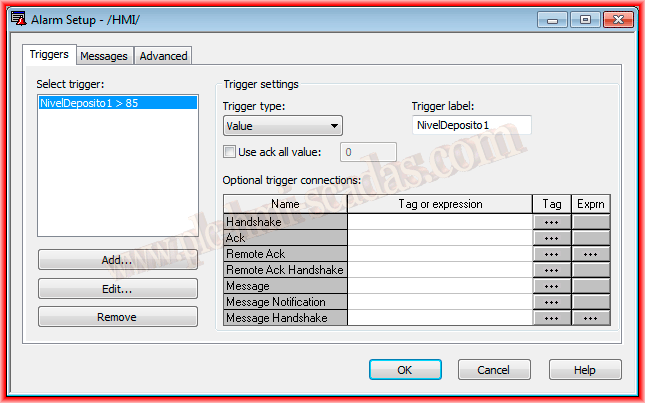
In the Messages tab, we will configure the message we are interested in for the trigger we have created, and we assign a value to Trigger Value; this can be positive or negative, but if we have configured LSB, we cannot specify 0.
Next, we have the checkboxes for the features we are interested in configuring; by default, Display is checked since when the trigger occurs, the ALARM display will automatically appear, or the one we have configured in the Advanced tab, but by default, it is the system's.


In the Advanced tab, as I mentioned, we can assign the display we are interested in or the one we have created, the size of the history, and the update time, as well as the optional connections, which we will configure according to our needs.
By default, the display for alarms is [ALARM], but we can modify it or create one that interests us by adding or removing functionalities or buttons.

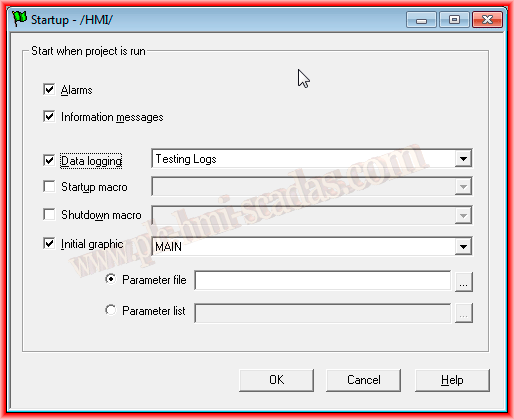
Finally, what we need to select is the checkbox in the Startup Configuration window, where we must select Alarms; with this, we can test our configuration and our alarms.
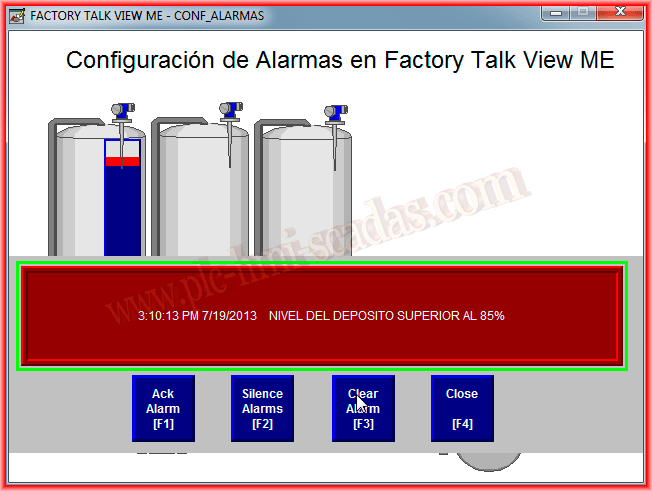
To check its operation, we need to run the entire project; it is not enough to run the Test Display function, as the alarms will not work.
Once running, we can force the value of our level, and if it exceeds the established condition of the trigger, it will execute, and the alarm display will appear with the configured message.
July 19, 2013