Logix5000 Red Ethernet with PowerFlex 525
Taking advantage of having a PowerFlex 525 and thanks to our colleague Raul, we will see in this example how to create an Ethernet network between our Logix5000 and the drive.
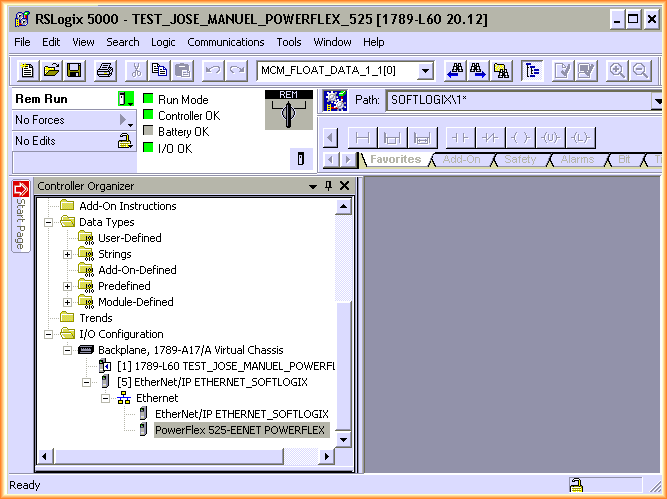
We start from the basis that we have created a project in RSLogix5000 or Studio 5000, with the following hardware.
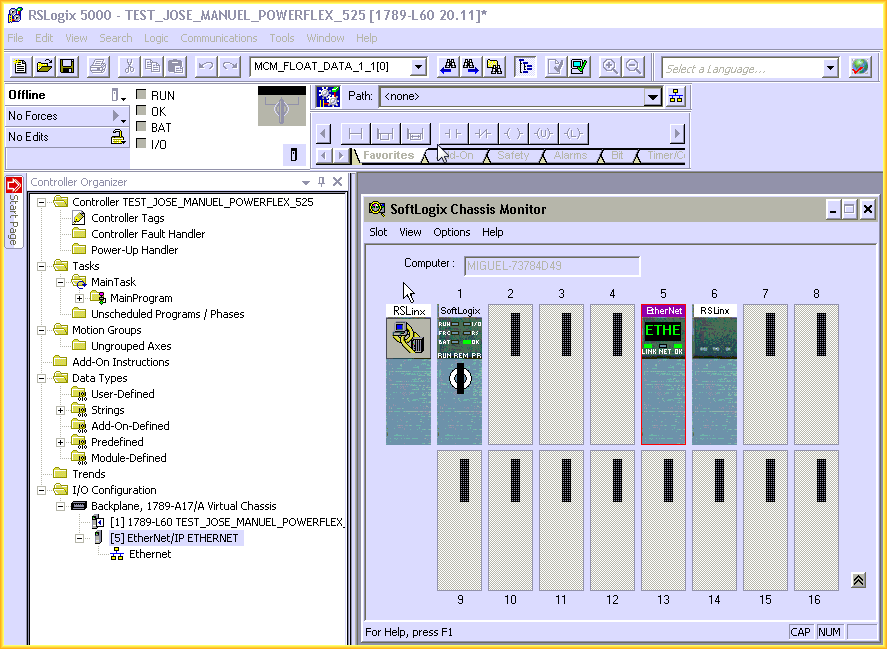
The properties of the network card where we have configured an address within the same range we are working, that is, of our network.
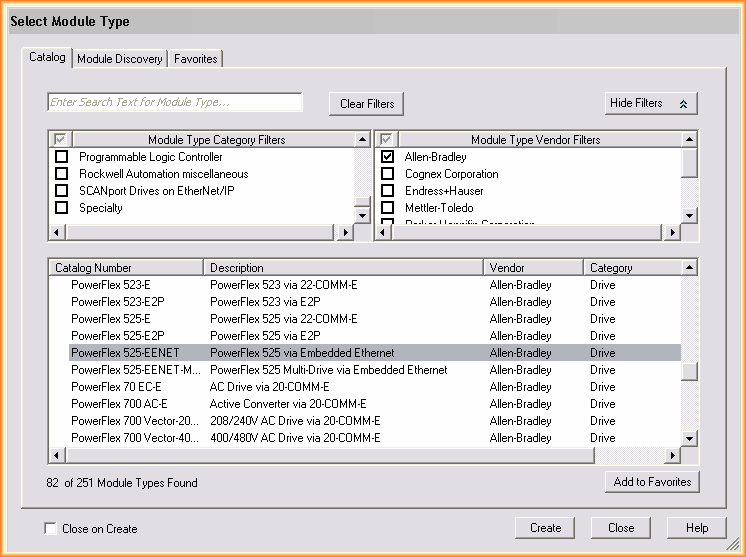
The next step is to add our Drive to the Ethernet network; here we may find that our catalog is not updated, and for that, we need to install the following package that you can download directly from Rockwell www.ab.com/support/abdrives/webupdate/software/RA_PF5ClassAOP_Ver_1.03.zip, with this we can now search for our PowerFlex and add it to the network.
Now we are going to configure the properties of our PowerFlex; the IP address has been previously assigned with BOOT/DHCP, and the first thing is to assign the characteristics, for this, we click on change.
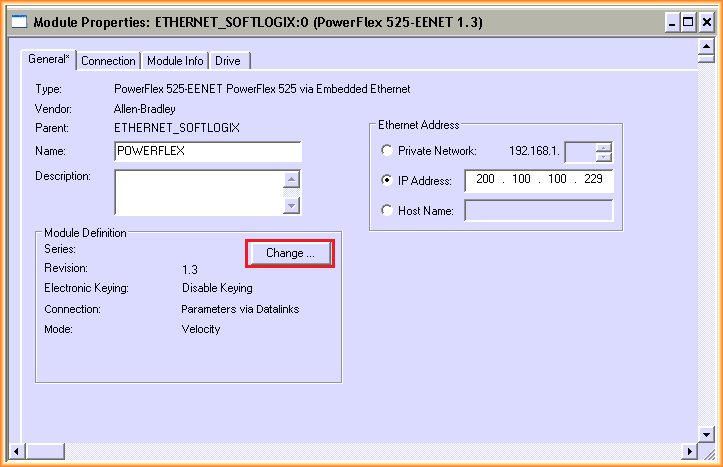

We select the Drive Rating according to ours, and change the Electronic Keying to disable.
Upon confirmation, a pop-up window will appear, accepting the changes made.

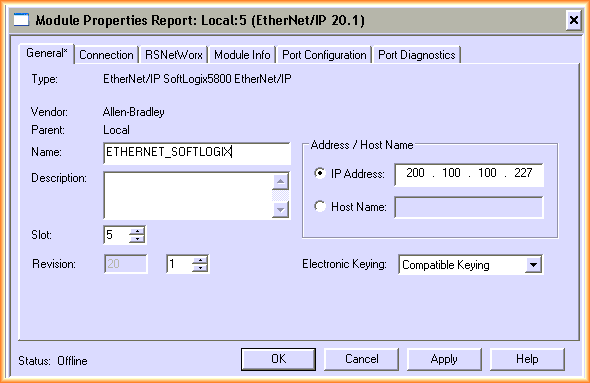
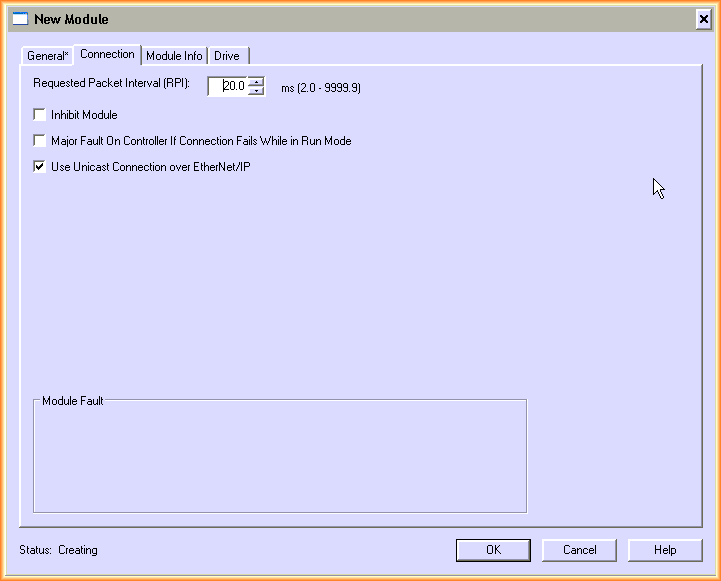
If we continue to see the properties, the next one is the Connection tab; we leave the 20.0 ms and the default values as is, the Module Info tab is currently not updated, so we leave it for when we are online.
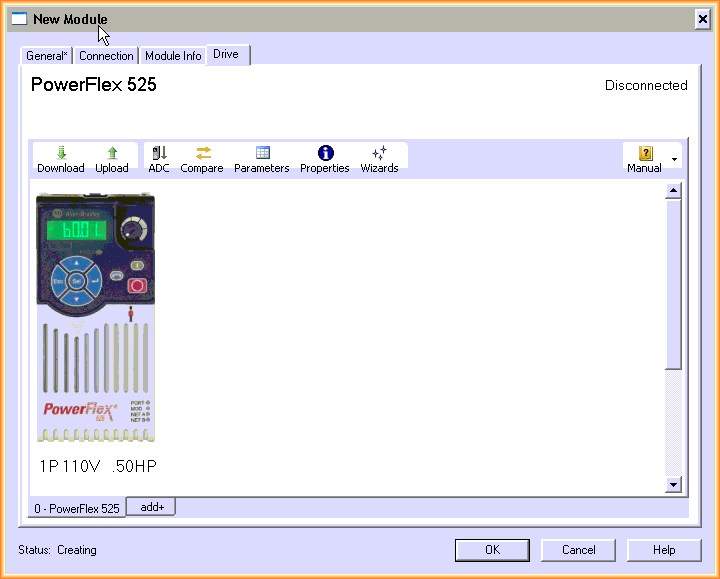
We switch to the Drive tab, which is the one we are interested in to configure the parameters; for this, we click on Parameters and configure according to our needs.
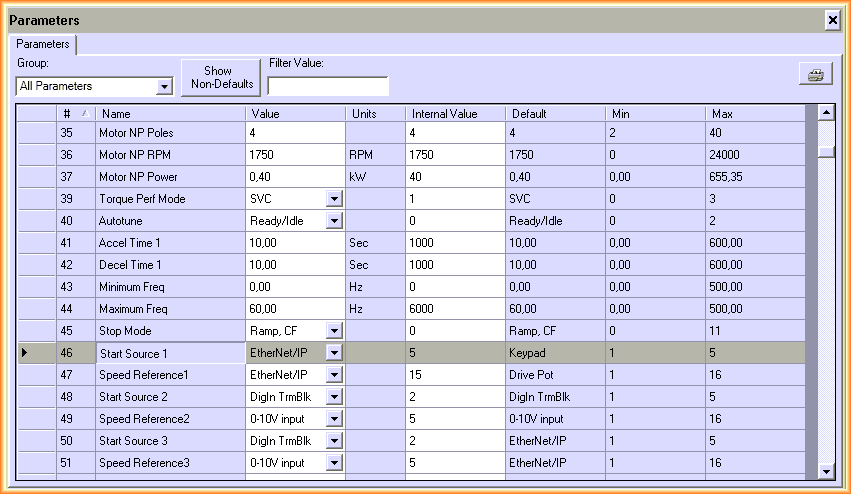
It is obvious that the first parameters we need to change are parameter 46 and 47 to have control of the drive over the network; in parameters 129-130-131-132 we have the parameters for the IP address, and in parameters 133-134-135-136 we have the parameters for the subnet mask.
Once we have parameterized all the parameters according to our application and needs, we can transfer them to the PowerFlex, but for that, the first thing we need to do is configure the Ethernet/IP driver in RSLinx, where we add the addresses of our Logix5000, in this case, the SoftLogix.
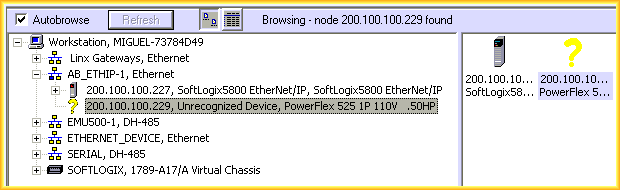
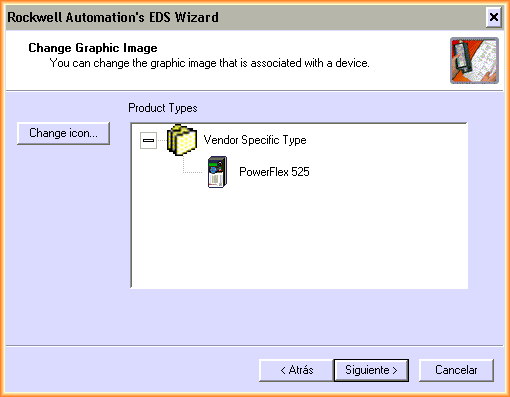
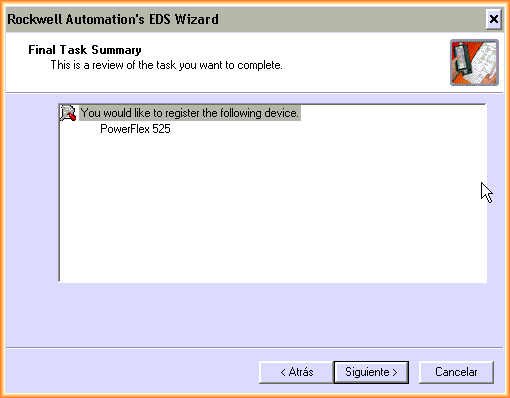
It successfully finds our hardware, with the only inconvenience of the question mark, which has an easy solution; we are going to install the EDS.
To do this, we run the wizard and follow its steps; in case we have downloaded the EDS files from Rockwell at the right time, select the correct path.
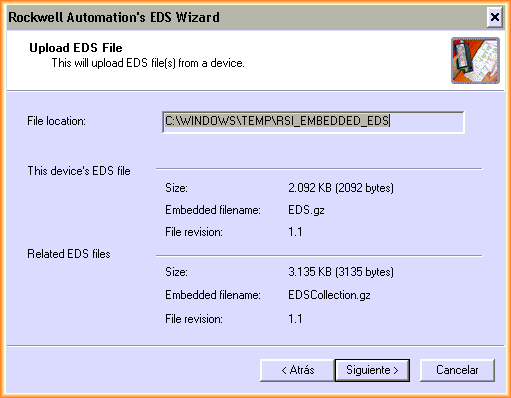
Having previously installed the AIO module to update our catalog and have our PowerFlex available, we need to follow the wizard with the default values.
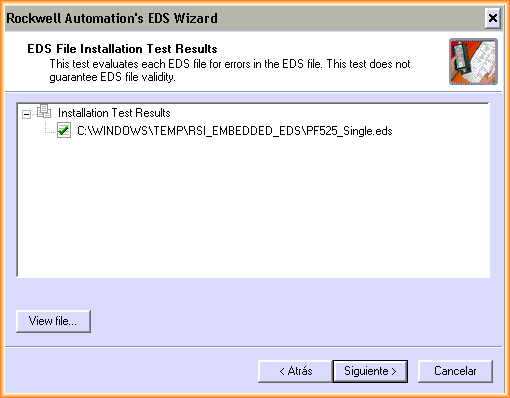
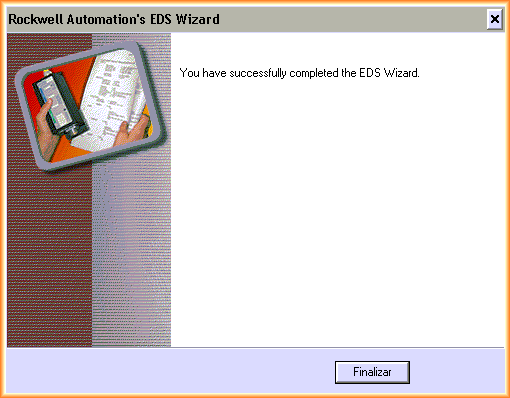
The wizard finishes, and we can now see in RSLinx that it perfectly recognizes our device; if we want to skip the installation of the EDS, we can perform the upload without problems.
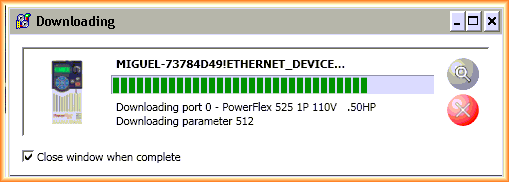
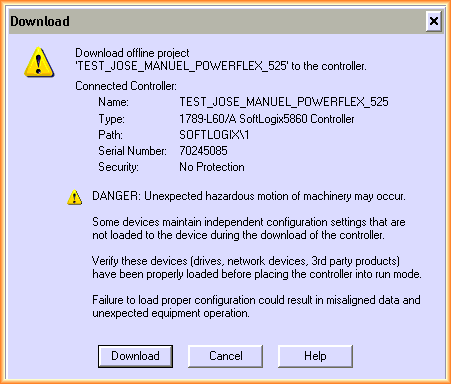
Once the previous steps are completed and having parameterized, we perform the download, a Download.
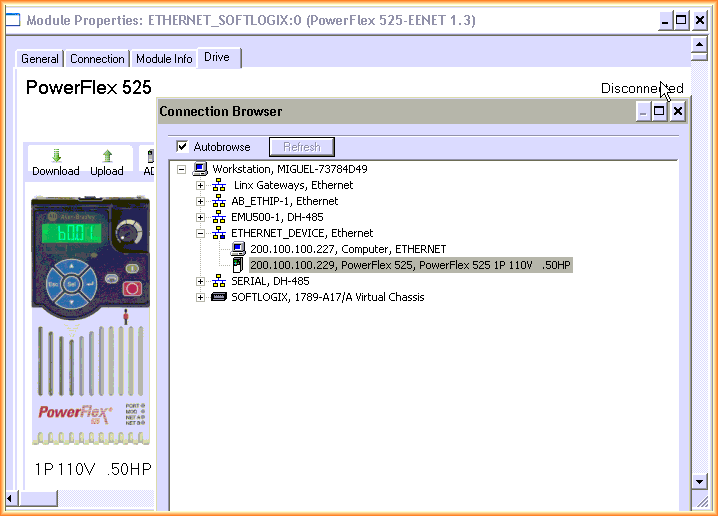
The next step is to download our entire program to the CPU; we will not include the previous steps of configuring RSLinx to communicate, but you can see them here.
We put our controller in Run, and everything is correct; now we are going to control our Power Flex.
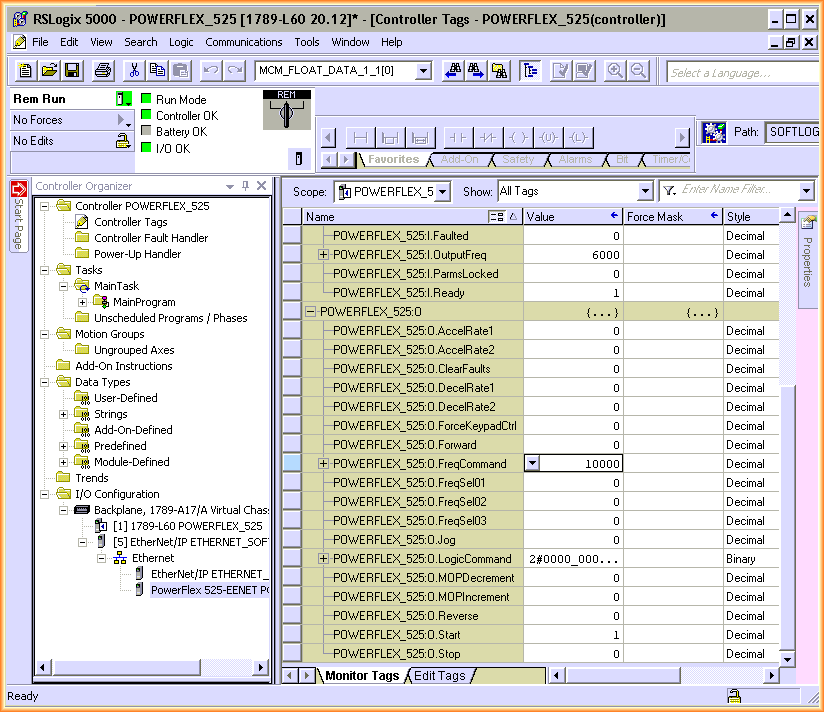
Automatically, when we add the Power Flex to our network and configure it, a series of Tags are created at the Controller level for its control, so there is no need to create any logic to test it; we go to monitor Tags and in the tag FreqCommand we assign the frequency, we put a value of 10000 and at the same time we start with the tag Start.
Everything is correct; we can see the response of the drive in the Tag OutputFreq, where at maximum we have a value of 6000, which corresponds to 60Hz.
May 13, 2014
If you liked it or found it useful, share it...