Transfer of the project to NB3Q
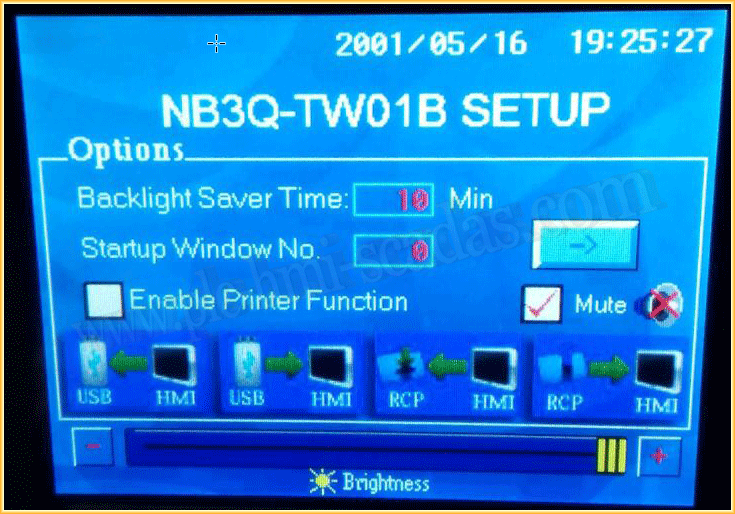
Once we have developed our application and debugged it, the last step is to transfer the project to our screen. The first thing to do is to put it in setup mode to define the IP address, as we will transfer the project via the network.
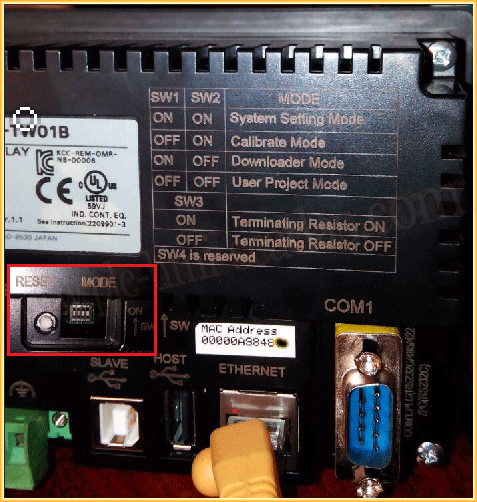
To do this, we will set SW1 to ON and SW2 to ON.
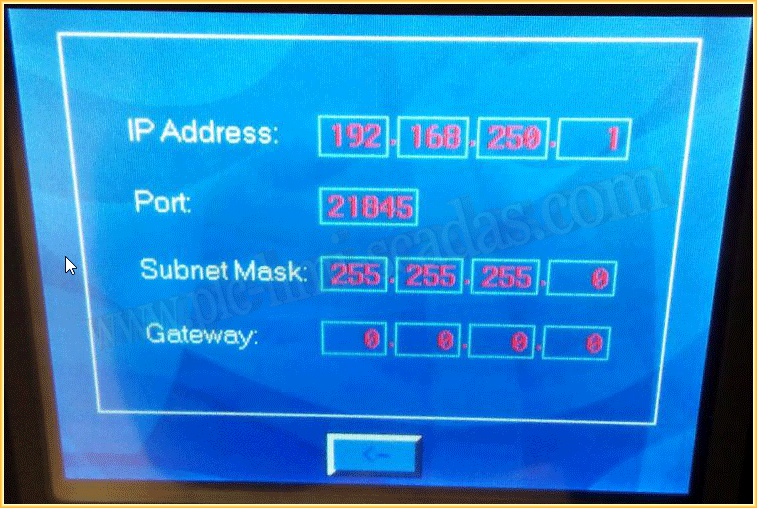
We enter configuration mode and define the IP address, Port, Subnet Mask, and Gateway, if necessary; in this case, there is no router, so we do not define it.
We can now turn off the screen and switch the switches back to the User Project Mode position. SW1 to Off and SW2 to Off.
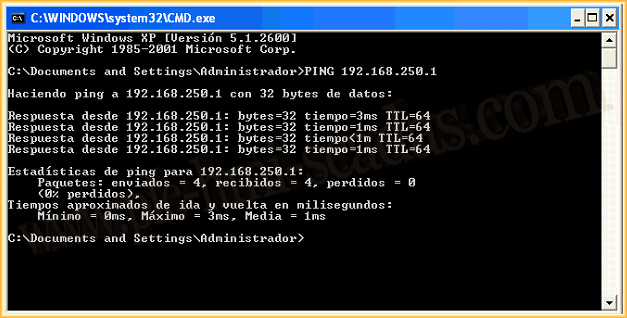
Once this step is completed, we will check it by executing a Ping and verifying that it responds correctly.
Now we move to NB-Designer, and we will configure the transfer mode, which, as we said, will be via the network.
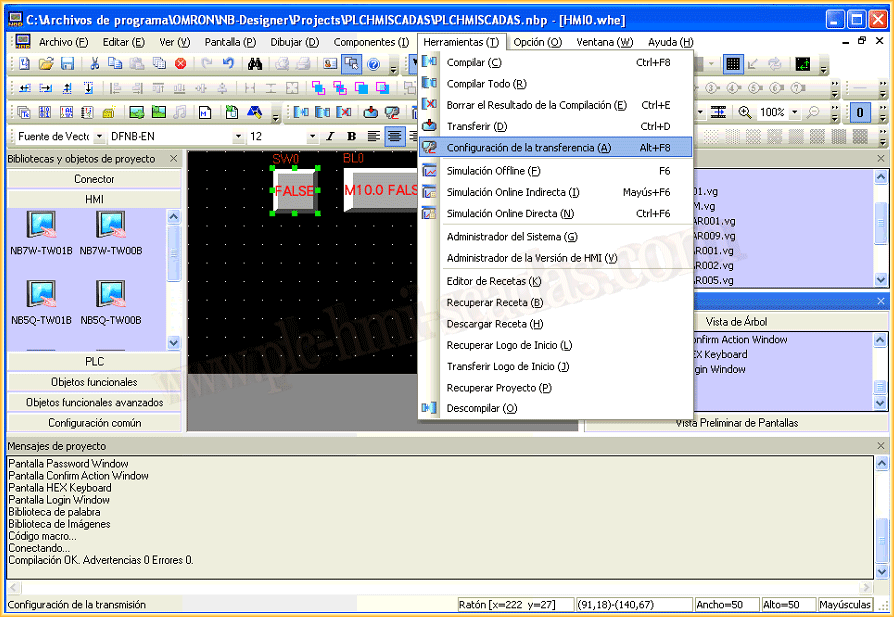
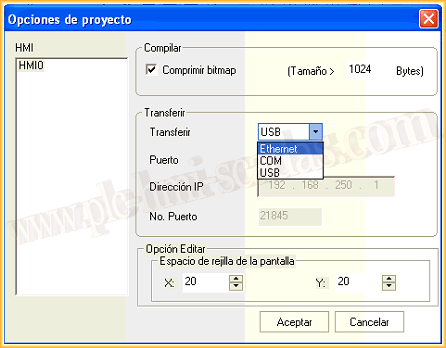
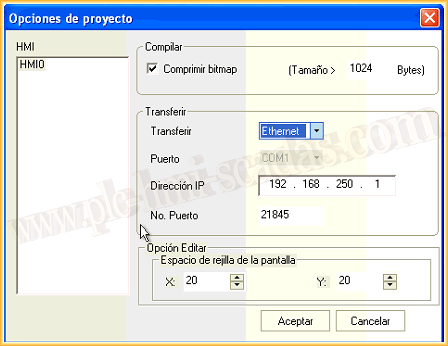
The following pop-up window appears, and we will change from the default, which is USB, to Ethernet and adjust it to the address we configured on our screen as well as the port.
Once we accept the changes made earlier, we will transfer, Tools --> Transfer
The following pop-up window appears, and we select the options that interest us; for this example, it would be the default configuration. We click transfer, and a confirmation window will appear, confirming that we do.

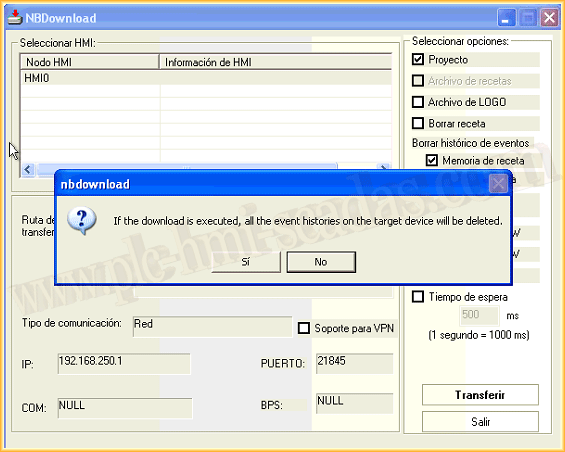
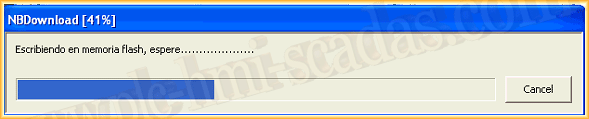
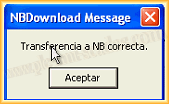
The transfer begins, and if everything is correct, as it should be, the last window will inform us that the transfer was successful.
August 27, 2017
"Silent gratitude isn't much use to anyone." Gladys Bronwyn Stern