WinCC RT Professional Manually Transfer Project
In the previous practice, we saw how to transfer our WinCC RT Professional project from our Engineering station with TIA Portal, this time we will see how we can do it manually, by copying the folder of our project and pasting it into the destination directory of our PC where WinCC RT Professional is installed.
For this practice, I created a new project, where I configured the basics, identical to the previous practice, and I only created a screen to check its functionality. Considering those minimum requirements, we proceed to compile our project.
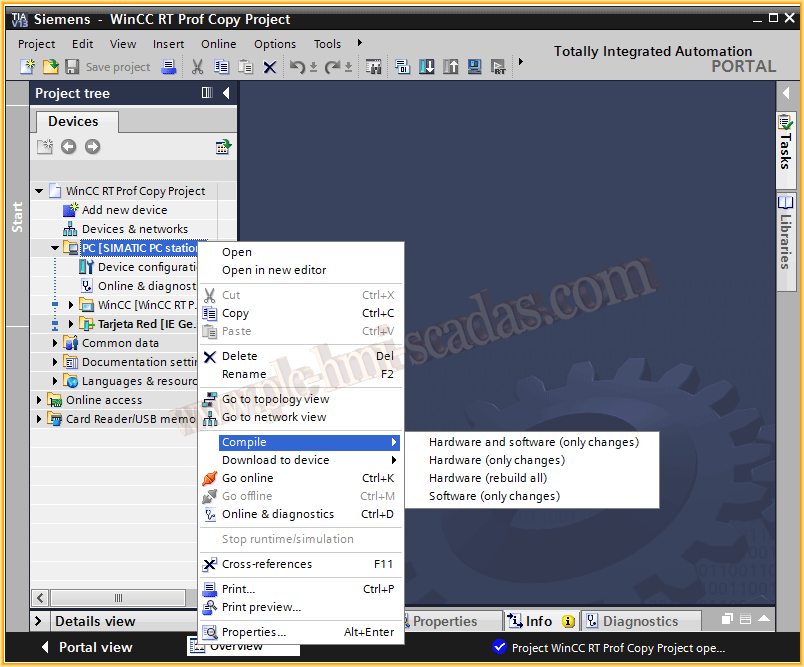
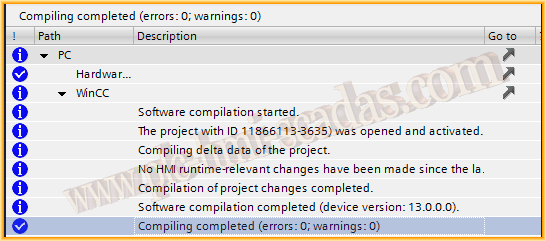
Once compiled and without errors, we move on to the next step:
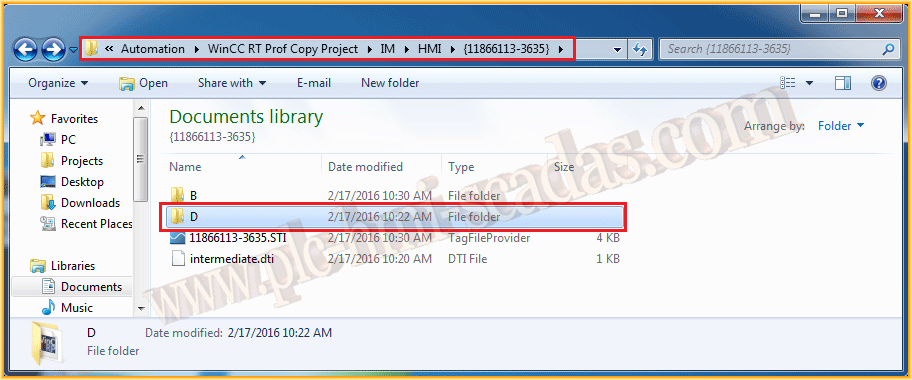
If we have not changed the directory, by default when creating a new project in TIA Portal, its directory is Documents --> Automation.
Depending on the case, we need to go to the directory of the project we just created, in my case WinCC RT Prof Copy Project, and within this, we go to IM --> HMI, here we will have two other directories B and D, but the one we are interested in is Directory D, this is the one we copy and take to the Destination PC.
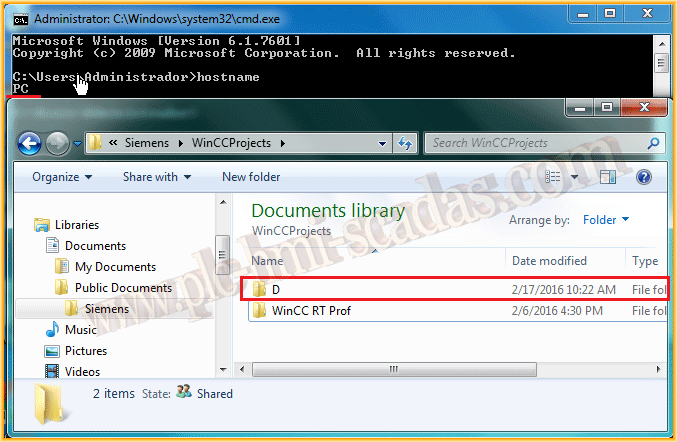
Now we are on the destination PC, called PC and within the default directory of WinCCProjects, we paste the folder we copied from our PC with TIA Portal.
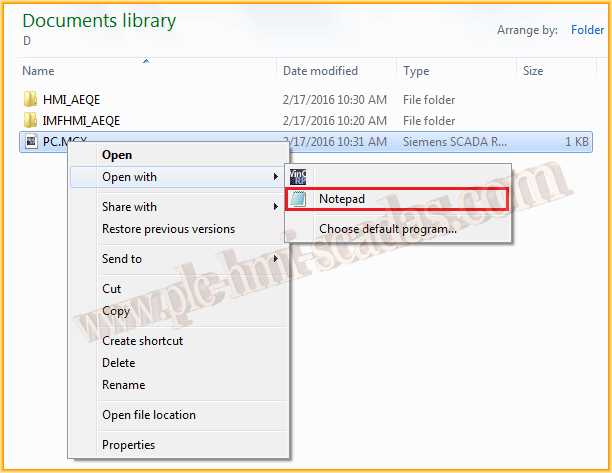
Now we are going to make some small changes, inside folder D, we have the directory of our WinCC project which is HMI_Name, and the configuration file. The folder IMFHMI_Name can be safely deleted.
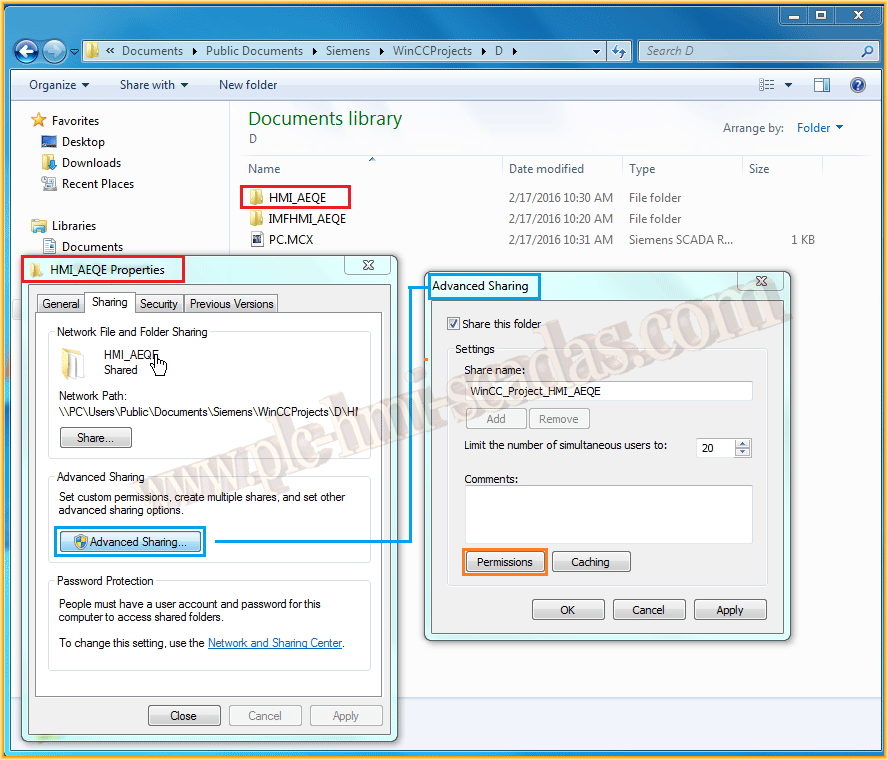
What we need to do is the following, we have to share the folder of our project HMI_Name and change the permissions. To do this, we select the folder, right-click, Properties and as shown in the following image.
The name we are going to give it is WinCC_Project_Name of the Folder, thus we will follow the philosophy of when the program does it automatically.
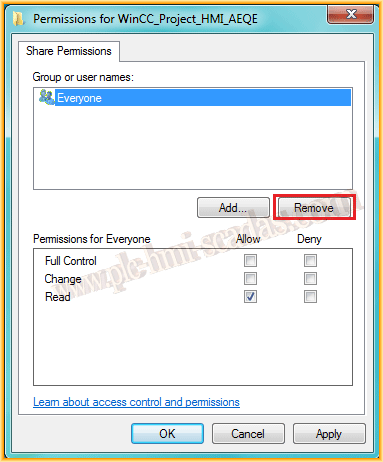
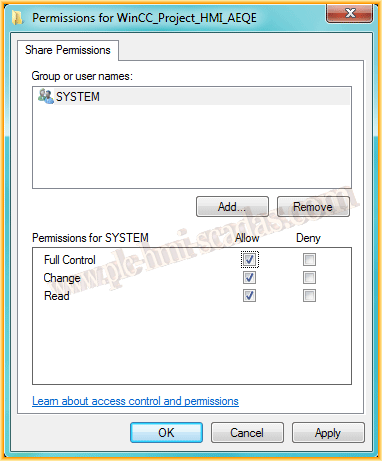
In the permissions of our directory, the first thing we do is remove Everyone and add SYSTEM with Full Control.
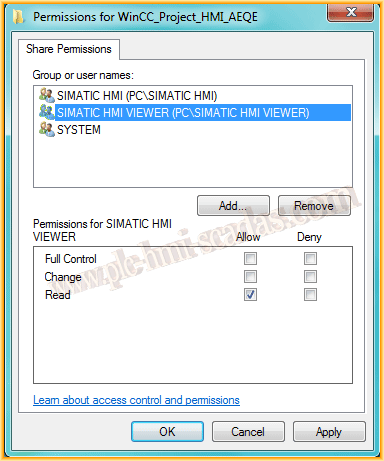
We also need to add the group SIMATIC HMI with Full Control
and we add the Group SIMATIC HMI VIEWER with Read permission.
In the next practice
We have already made the first important change, now we move on to the second change we need to make.
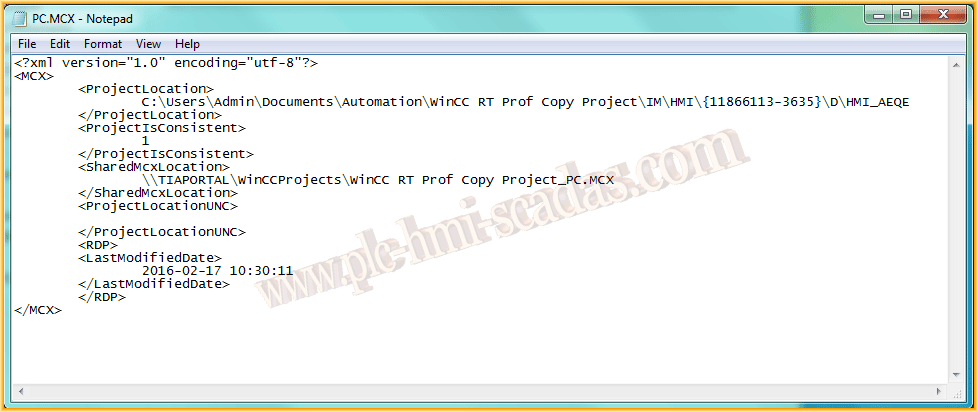
We are going to open the configuration file Name.MCX with Notepad, or any XML editor, since it is a file with XML markup language structure.
Here we have the original file
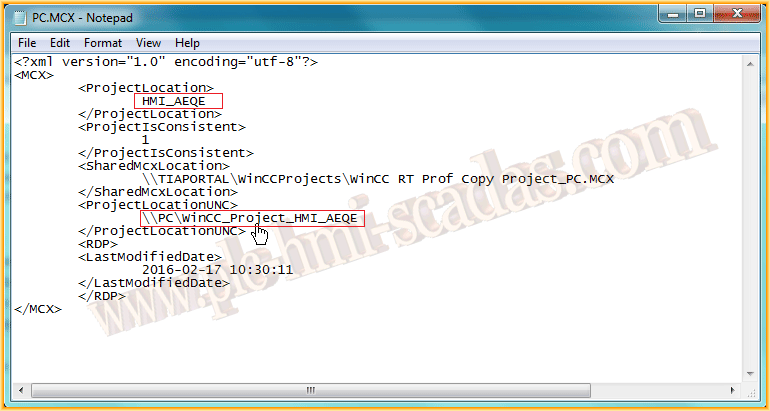
And here are the changes we are going to make:
1.- Change the value of the element <ProjectLocation> and write the name of our folder where our WinCC RT project is
2.- Change the value of the element <ProjectLocationUNC> and write the location of the name of the shared folder we defined earlier, which refers to the project folder of WinCC HMI_Name, where we assigned WinCC_Project_HMI_Name
3.- We can now save our file.
In the next practice
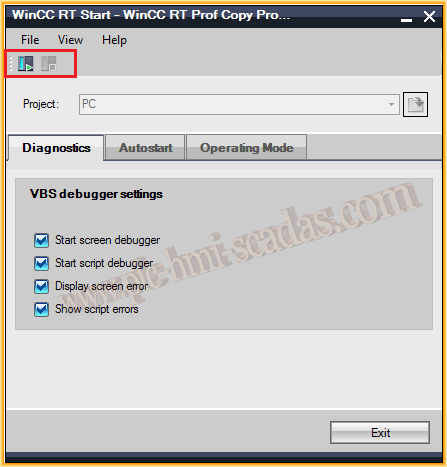
We run WinCC RT Start, open the directory of our project and select the file we just edited.
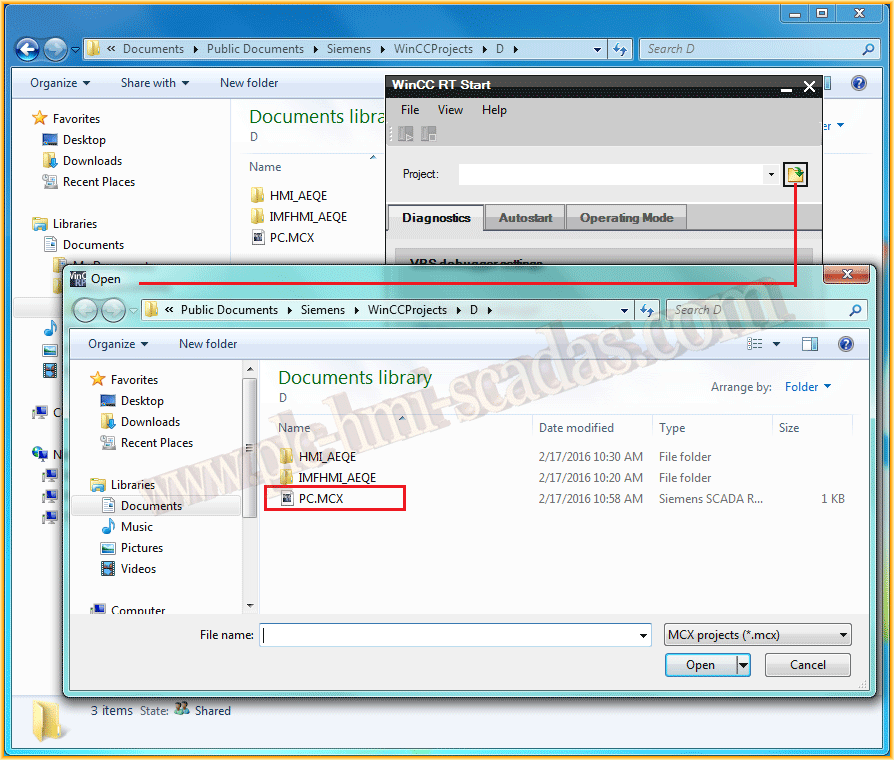
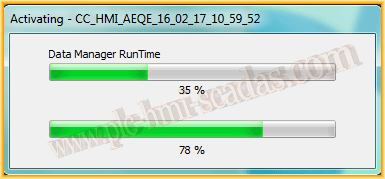
Once loaded, we can now put our project in Run and if everything is correct, it will automatically start.
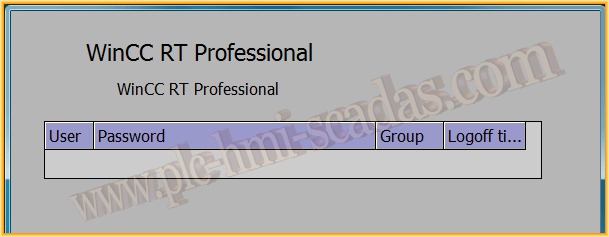
Ready, it works perfectly.
February 17, 2016
If you liked it or found it useful, share it :-)