This second part is a continuation of this first where today we will continue working with VBScript and Excel within our project in WinCC.
The objective is to create a new Excel sheet each time a recipe is loaded, and insert the data we had in the *.txt file (The Recipe), sorting these according to their treatment, whether in Automatic or Manual, sending it to the printer and saving the file.
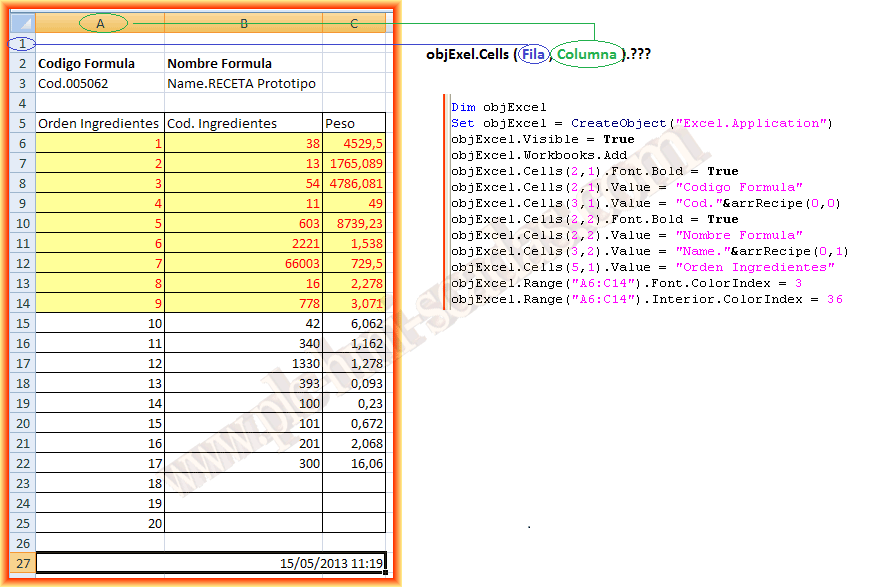
It should be remembered that we had created an array arrRecipe(20,20) to store the 20 codes of the ingredients, plus the 20 weights, in addition to the name of the recipe and the recipe code number. Although now when we work with Excel, this order has already been established.
The final result of what we are going to do is the following, but to explain it more easily, as the saying goes, a picture is worth a thousand words.
Now we will explain the process I followed, in this first part we instantiated an object of type Excel.Application, made it visible, and added a Workbook in which we will work. Next, we set the headers and extract the code and name from the array.
For the first 9 ingredients, which are considered to be processed in Automatic, we change the background and text color, selecting the range and applying the color according to our needs.
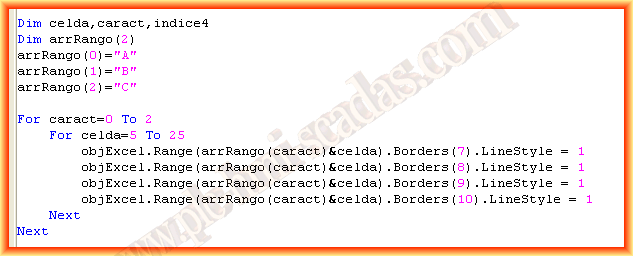
The following code snippet will be applied to give some formatting to the sheet, which adds borders to a range of cells.
The cells in question are traversed with loops.
.Borders(x) means that depending on the number we pass, we will apply the right, left, top, and bottom borders.
The following loops will be responsible for filling the different columns, the first loop will write the order number.
The second loop will load the ingredient code and the last one will load the weight.

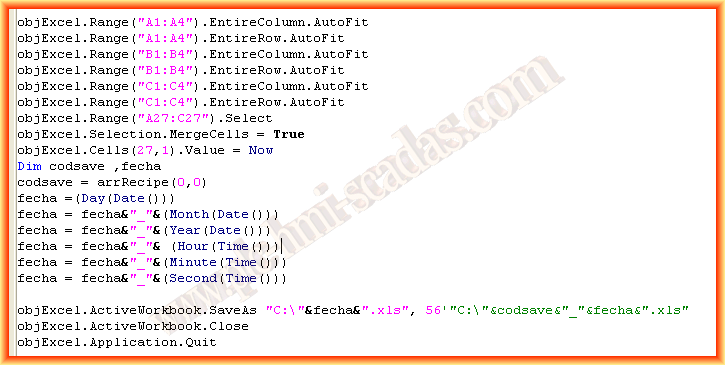
The last part of the code will adjust the width and height of the cells in the selected range to fit the text they contain, which would be the first 6 lines.
The next three select a range of cells and merge them, passing the Now function as a value that will write the date and time.
To save the file, we concatenated the data extracted from day, month, and year from the Date() function and from the Time() function we extracted hour, minute, and seconds, all of which we stored in the variable date and saved our Excel workbook with that name. Once saved, it is closed and done.
Before closing, there would be a line to print the file:
objExcel.ActiveDocument.PrintOut
And to see it in action, a small demonstration video, except for the printing.
May 16, 2013
If you liked it or found the information useful, share it...