Factory Talk Transaction Manager Configuration
The following practice deals with the configuration of Factory Talk Transaction Manager, the new version of its predecessor RSSQL, and for those unfamiliar with its use, the description provided by Rockwell Automation is as follows:
FactoryTalk Transaction Manager is an industrial transaction software engine that shares data between your shop floor systems and your enterprise applications (for example, corporate databases) or COM+. FactoryTalk Transaction Manager can interact with the following shop floor systems:
Human Machine Interfaces (HMI)
Programmable Logic Controllers (PLC)
ControlLogix Controllers
Distributed Control Systems (DCS)
Among this range of configurations, we will perform the following: we will register the values of our Controller in a Database, in this case, the SoftLogix.
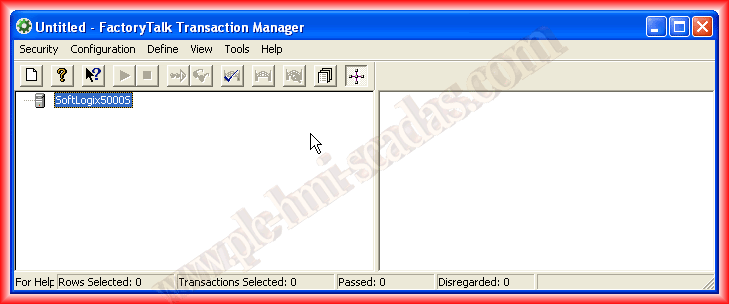
Rockwell offers a 7-day grace period, more than enough to test it and subsequently acquire the corresponding license. Once the interface is started, it looks like this, and the first thing we will do is a new configuration:
Step 1 Define Configuration The first thing we do is define a name and then we proceed step by step with the configuration; if the configuration is correct, a symbol will appear as can be seen.
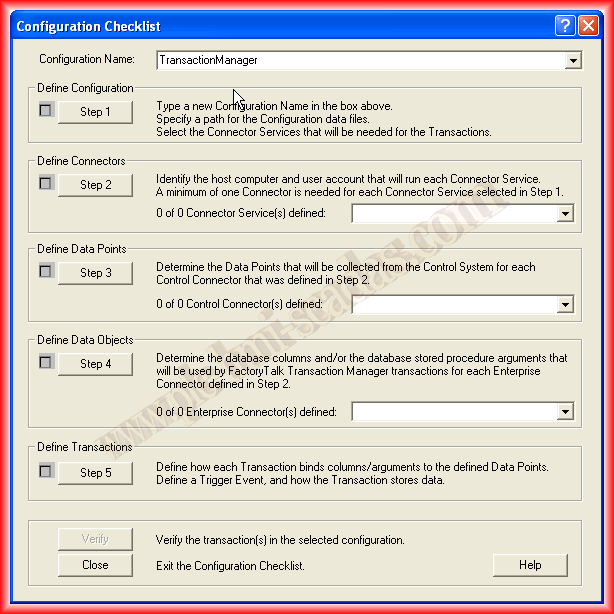
We have already assigned the name of our configuration and we go to the first step, where it asks for the name we entered earlier and a directory to save the configuration files and the *.log file, which will be very helpful in case we have any errors in our configuration.
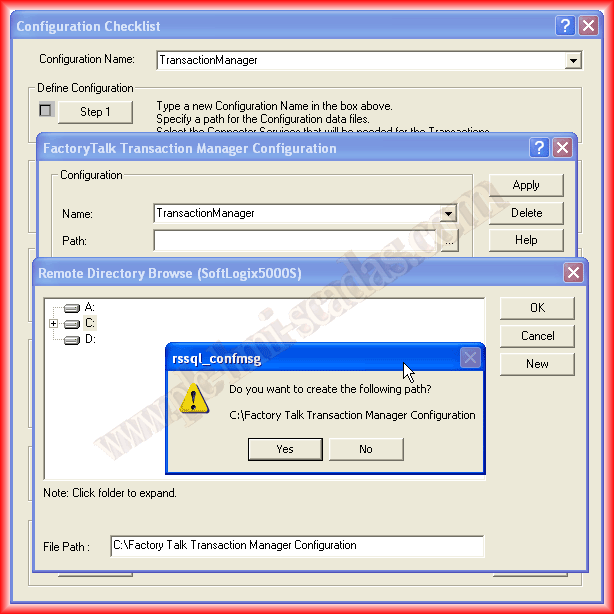
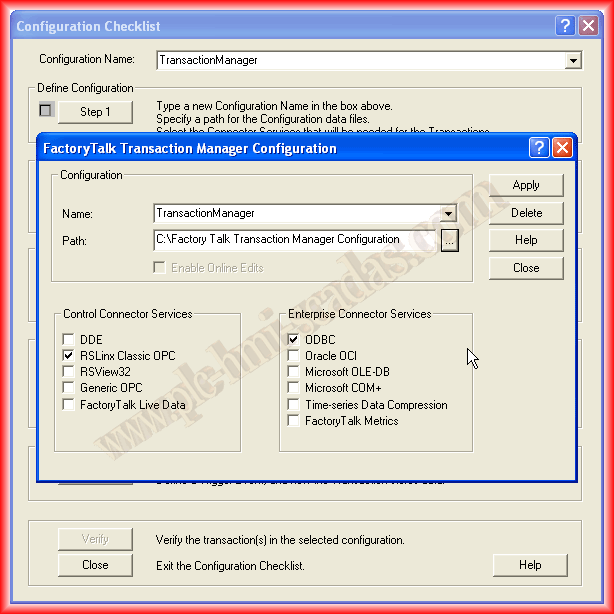
The second part of this first step is to define the two involved parts, where one of them would be how we connect to the Controller or the RSView32 SCADA itself, and the second how we will connect to the Database Management System.
Once we have selected how we will proceed, we confirm with Apply and we can close this first step.
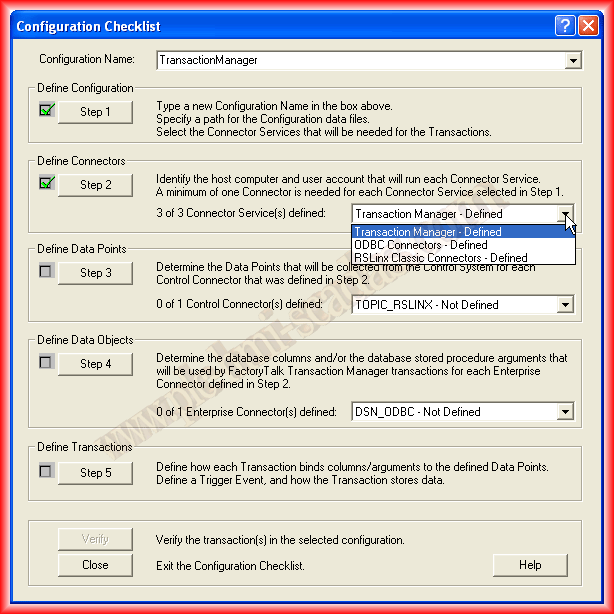
Step 2 Define Connectors As can be seen, the steps are consecutive; once we have completed the first, we move on to the next, as the information from the previous step will be expanded and configured in the next one.
Since we have selected that the connection to the database is through Open DataBase Connectivity ODBC and the connection with the Controller, we get these two options as undefined.
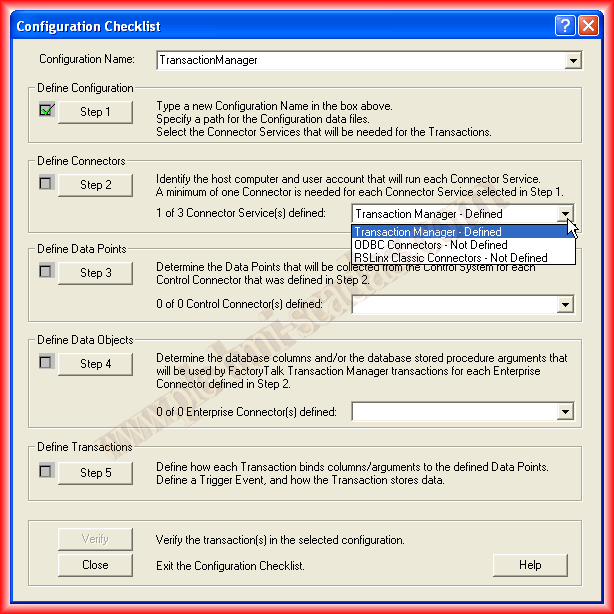
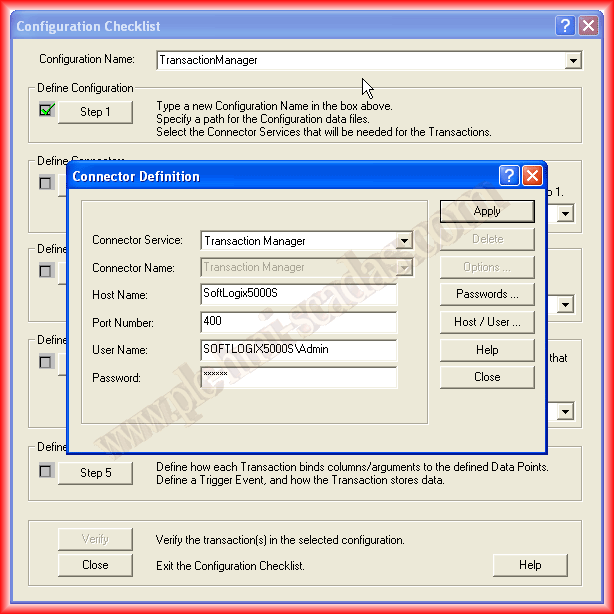
In the following images, the configuration made in each of the sections will be observed; the first one is already defined, but we need to assign a password to the User, as if it is not specified, it will give an error, it is mandatory!
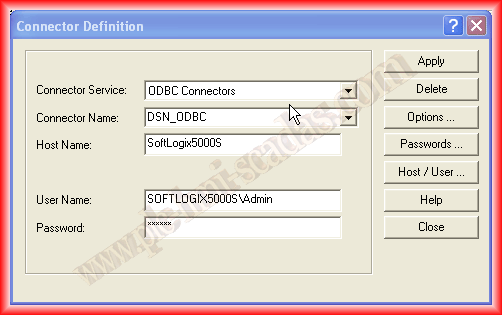
The second one corresponds to ODBC Connectors, but in this step, we will only give the name we are interested in for our connector.
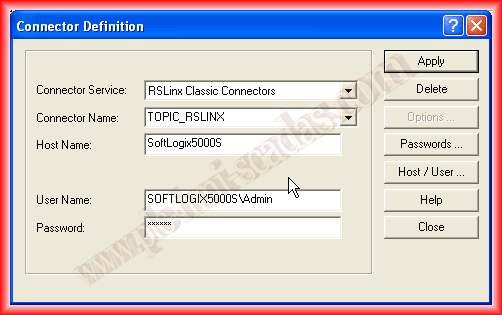
And the third one corresponds to the name of the Connector for RSLinx Classic; in all of them, we specify the password of the user who is the System Administrator.
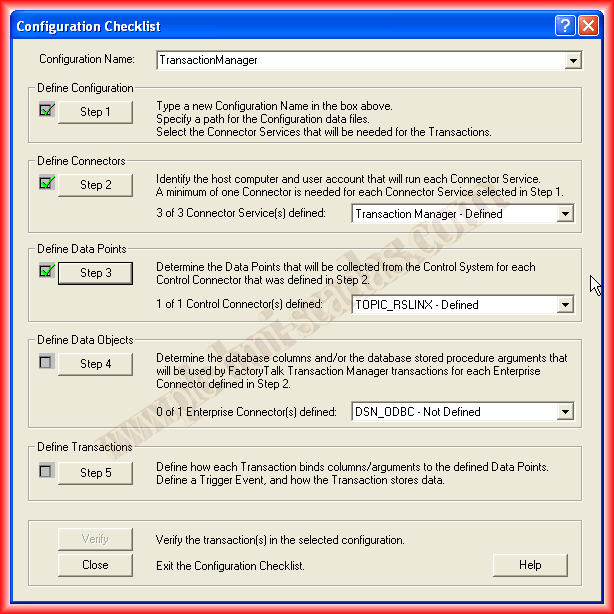
Here we have completed the second step and we can see how the three parts that make up this second step are already defined.
Step 3 Define Data Points In the third step, we will finish configuring the connector we defined in the previous step regarding the RSLinx Classic Connector; here is where we will specify the variables we are interested in registering in the Database.
To add the tags, we can do it through the Add Tags wizard or manually; if we choose the first, we must have exported the tags in a *.txt or *.csv file and load it in Tag File.
If we do it manually, as is my case, we follow the same methodology as before; if they are controller tags, we write their name directly, if they are program tags, we specify Program.ProgramName.VariableName, this is the address of our variable; in the Datapoint Name field, we write the symbolic name we will use later to link this variable to our Database item.
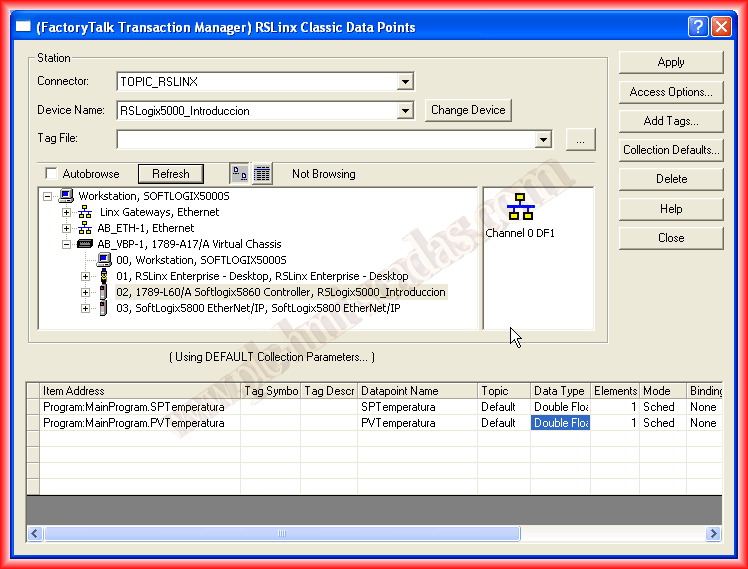
With these steps, we have already configured the variables (Data Points).
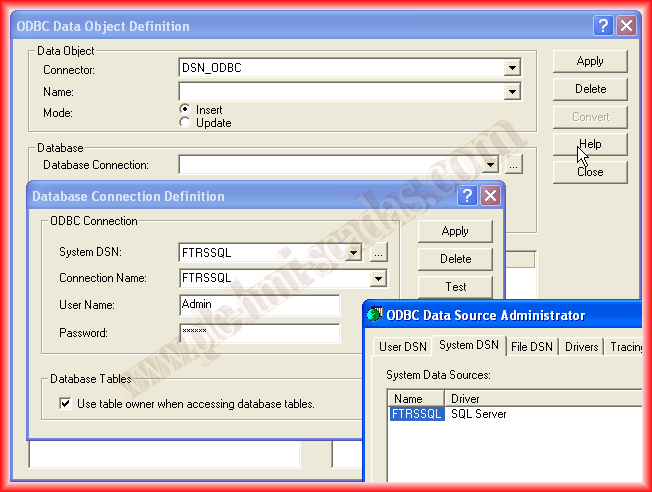
Step 4 Define Data Objects In this new step, we will configure the Data Objects; for this step, it is necessary to have previously created a Database and a System DNS. To avoid extending this practice, the following link is available, as it is something very common that needs to be configured when working with HMIs, SCADAs.
If we click on the button ... Database Connection, a configuration window will open, where the name of the previously configured System DSN will appear; we select it and specify the User's password.
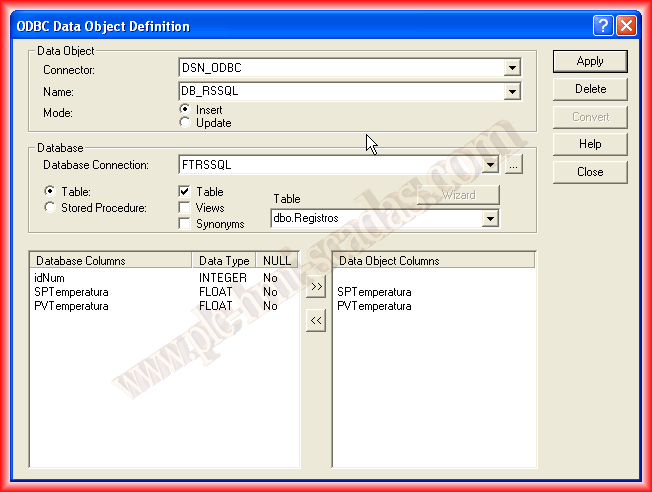
Once we have selected the DNS, we can select the table from our Database; once selected, the columns of our table appear, we select the columns we are interested in and add them >>
We can now Apply, and if it is correct, we can close it.
This step has been successfully completed.
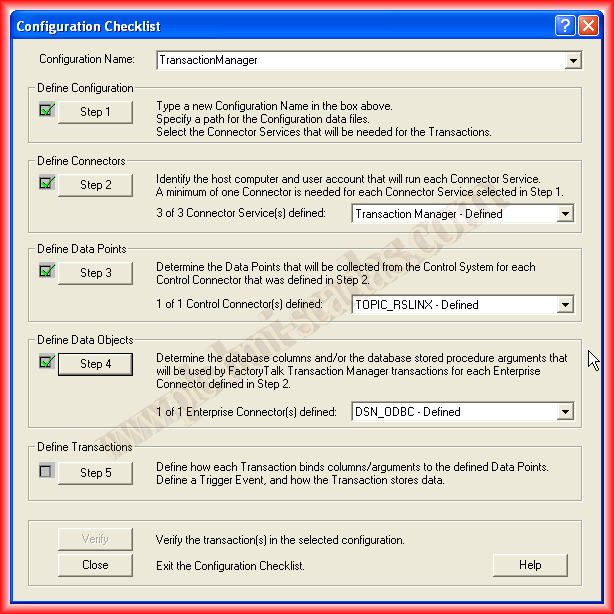
Step 5 Define Transactions In this step, we will associate the Data Points (Variables) with the Data Objects (Columns of our DB).
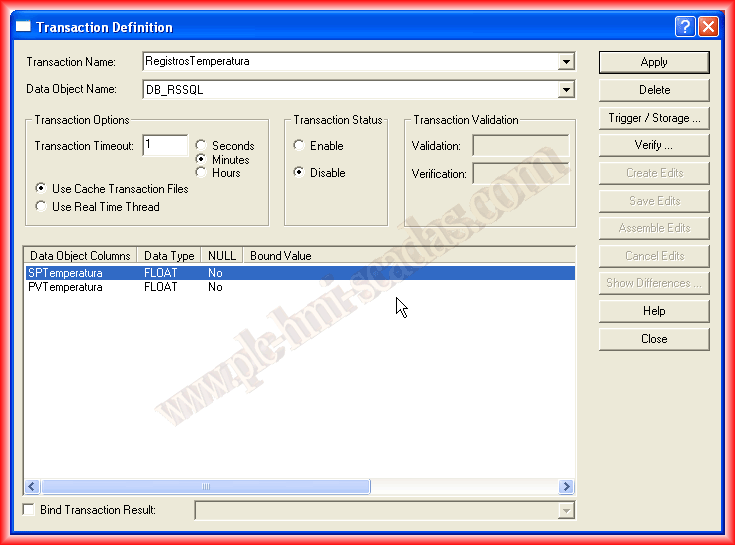
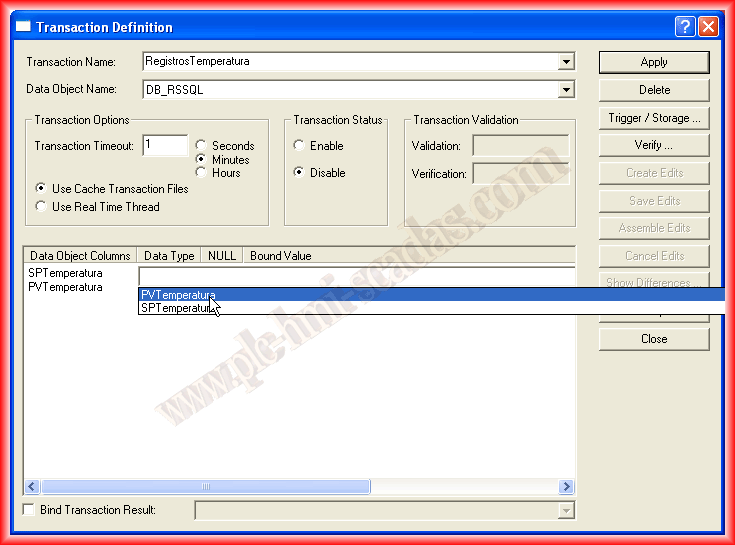
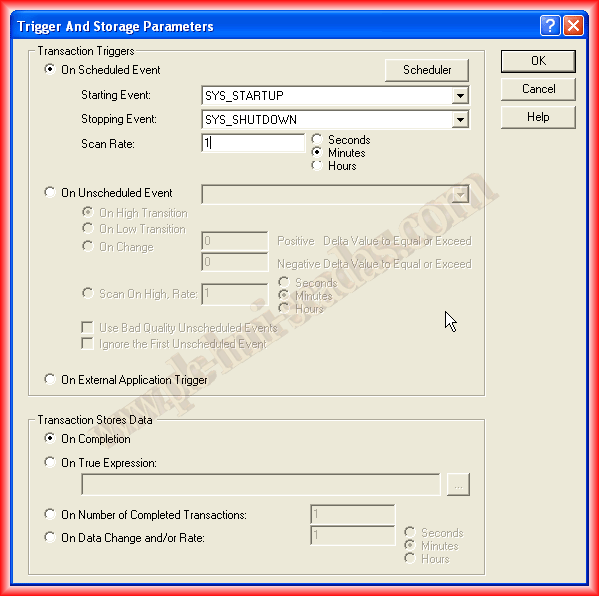
Transaction Triggers In addition to that, we will configure the transaction time and how it will be executed, and if it is of our interest, we can configure one according to our interest in Scheduler, whether it be the days of the week we are interested in as well as the months, etc...
Transaction Stores Data, we define when the data will be stored in the Database, we leave the default option.
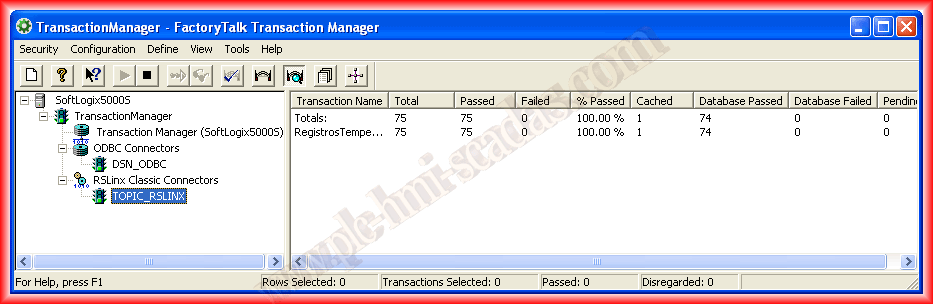
We apply the changes and we can verify the status of our Transaction; we can now close it.

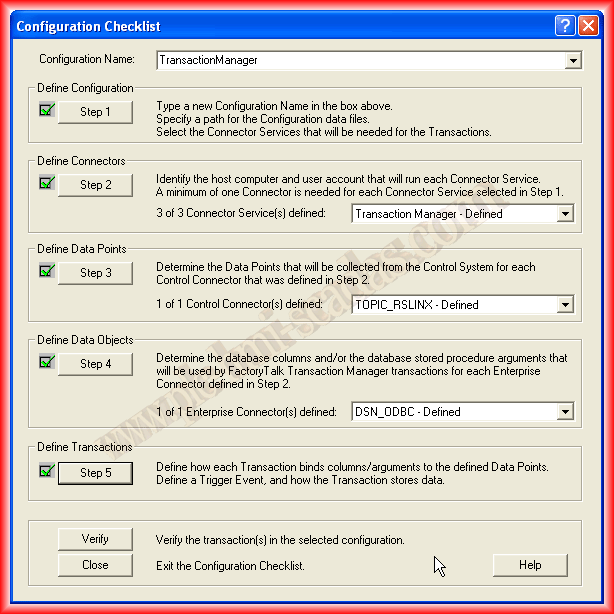
With these steps, we have completed our configuration; in the next image, we can observe it and make the necessary changes in each of them.
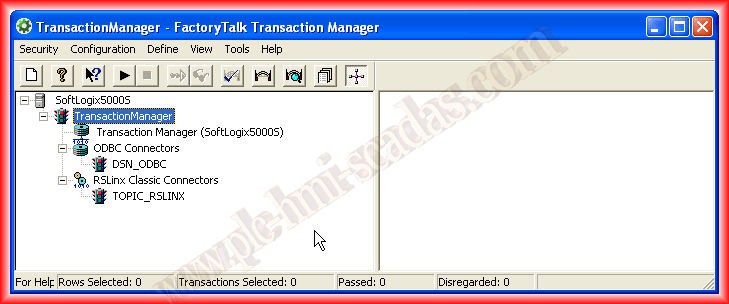
To start it, simply press the Play button and that's it; any error or warning will be recorded in our configuration file. It is advisable to check the box corresponding to Debug and Warning in the Define -> Error Logging toolbar, as these options are not selected by default.
To conclude, a short demonstration video:
July 29, 2013
If you liked it or found the information useful, share it...