TIA Portal - Cognex Camera (Profinet)
As the title says, we are going to create a project from scratch, where we will integrate a Cognex camera in Profinet. The camera is already set up, we have enabled the Profinet protocol, defined the Profinet name, and it has an IP address on the network we are going to work with.
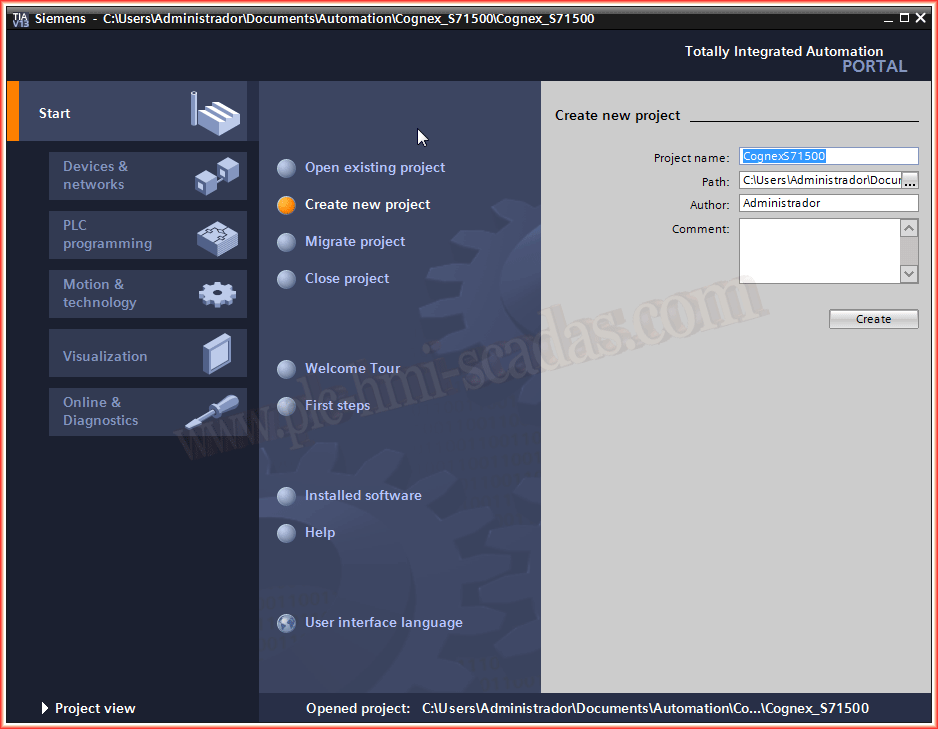
To do this, first of all, we are going to create a new project in TIA Portal, we put the name we are interested in and start the process.
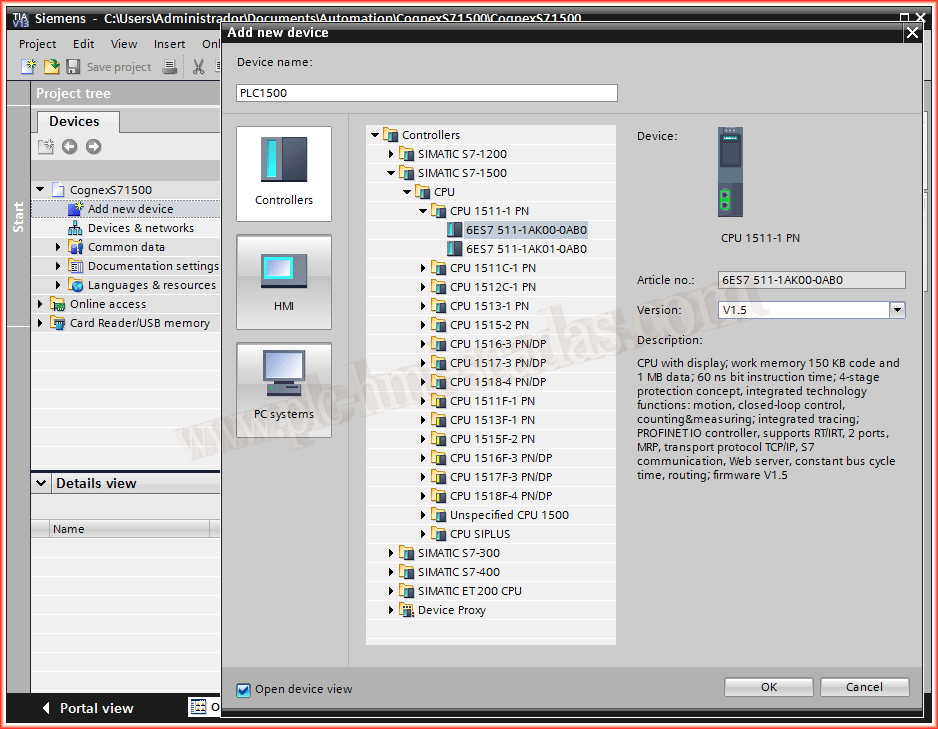
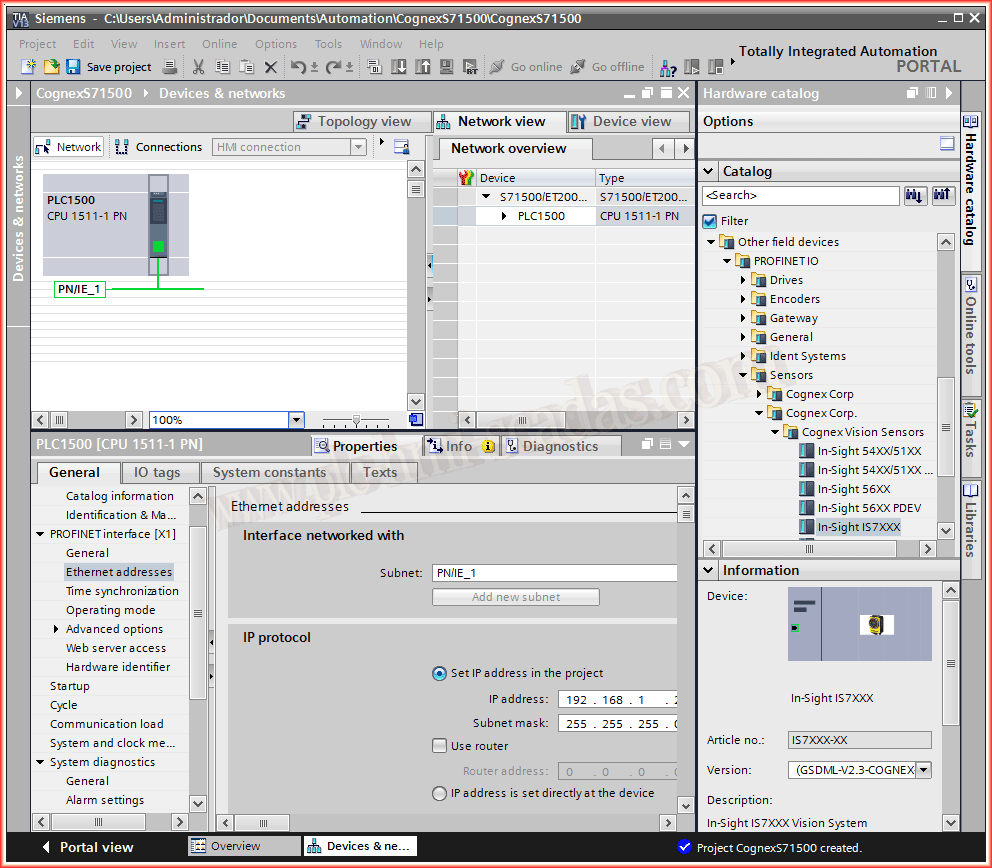
Once the project is created, the next step is to add all our hardware, and we start with the PLC, we look for the one we have in the catalog and insert it.
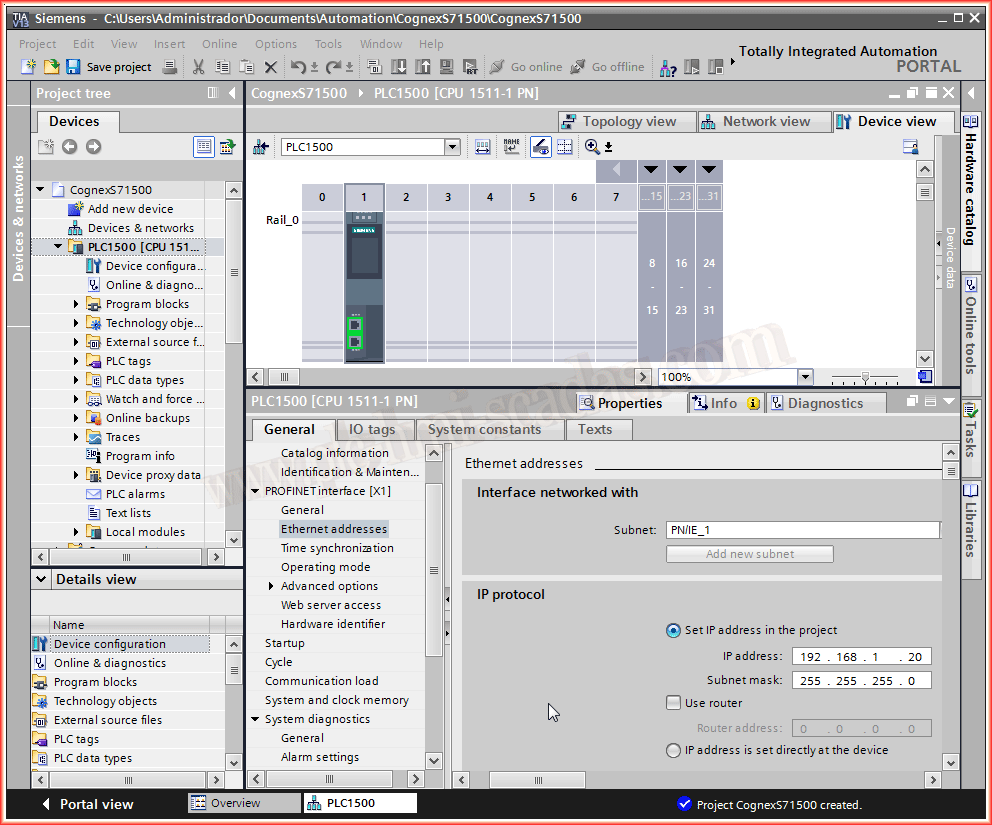
Once our PLC is inserted, we are going to change the default IP address, and we will set one that is within our working range, at the same time, we add a subnet.
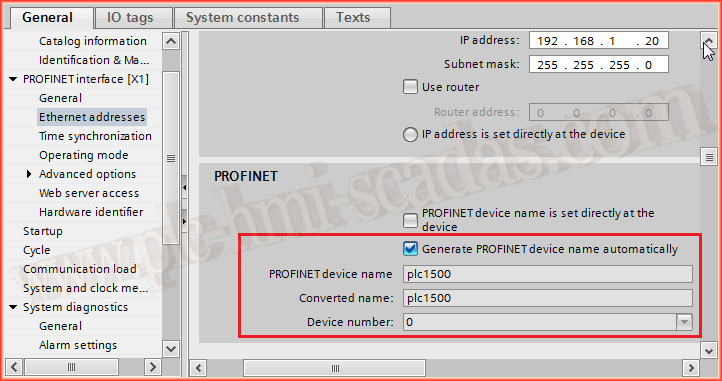
We have already defined the IP address, and by default, the Profinet name is generated automatically when the checkbox is selected. If we want to change it, we have to deselect the checkbox and assign the name we are interested in.
We have the PLC ready, now we are going to insert our camera, the previous step is to install the GSD file, we can now search in the catalog according to the camera we are going to work with and insert it.
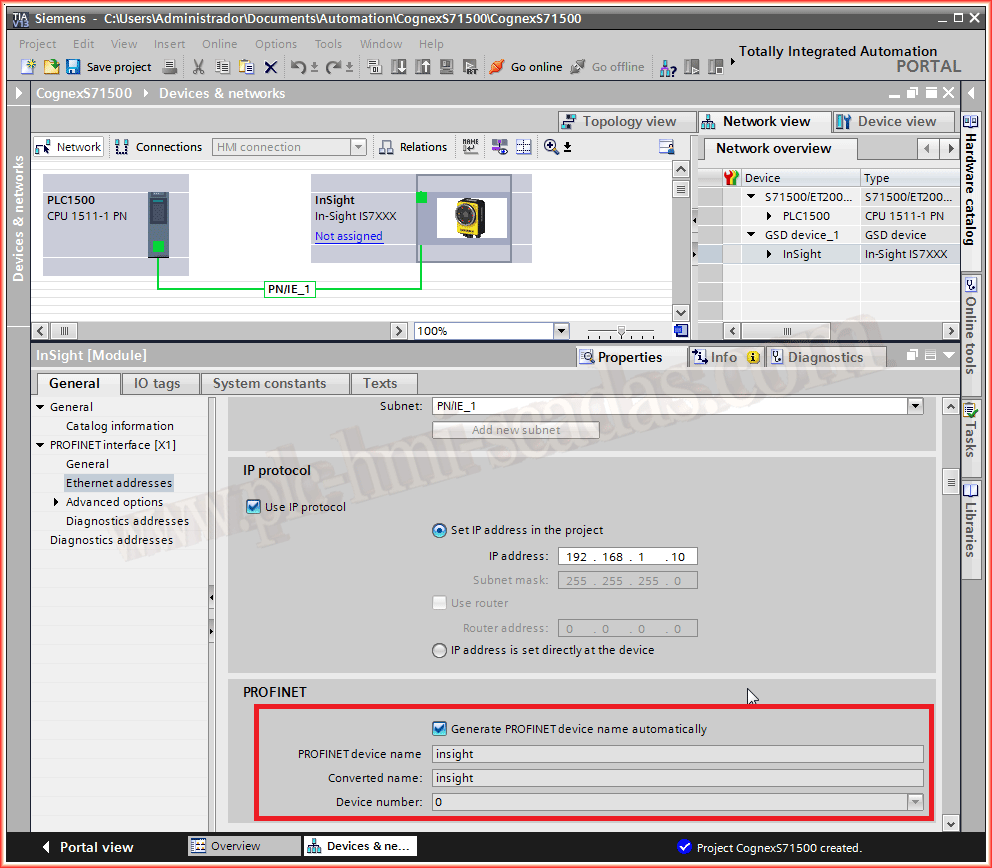
We have it inserted and we proceed to configure it. The first step will be to assign an IP address that is free and within the subnet we are working in. The next step is very important, it is the checkbox to assign the Profinet name, as I have configured this same name in the Insight Explorer, I leave the checkbox selected by default, and this name.
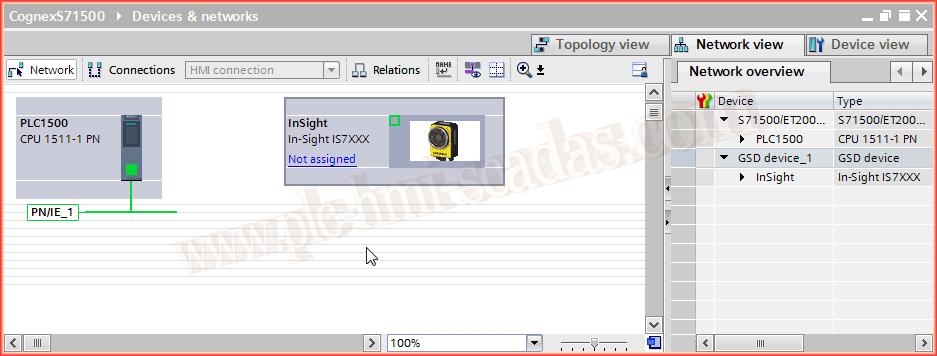
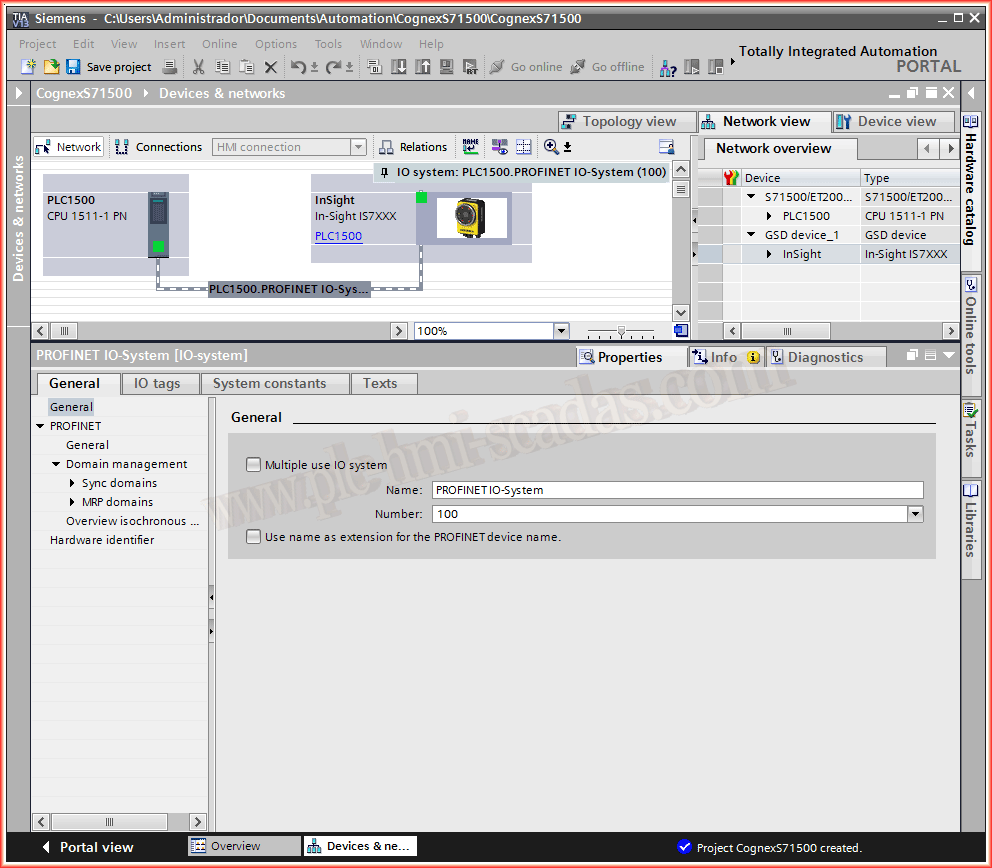
We now have our hardware prepared and configured. Here we can already see the connection of the PLC and Camera on the same network.
Now we go to the camera configuration part, every time we insert a camera, the Inputs/Outputs section is automatically generated as can be observed, and within all this, the most important for control, what we know as the command word and the control word.
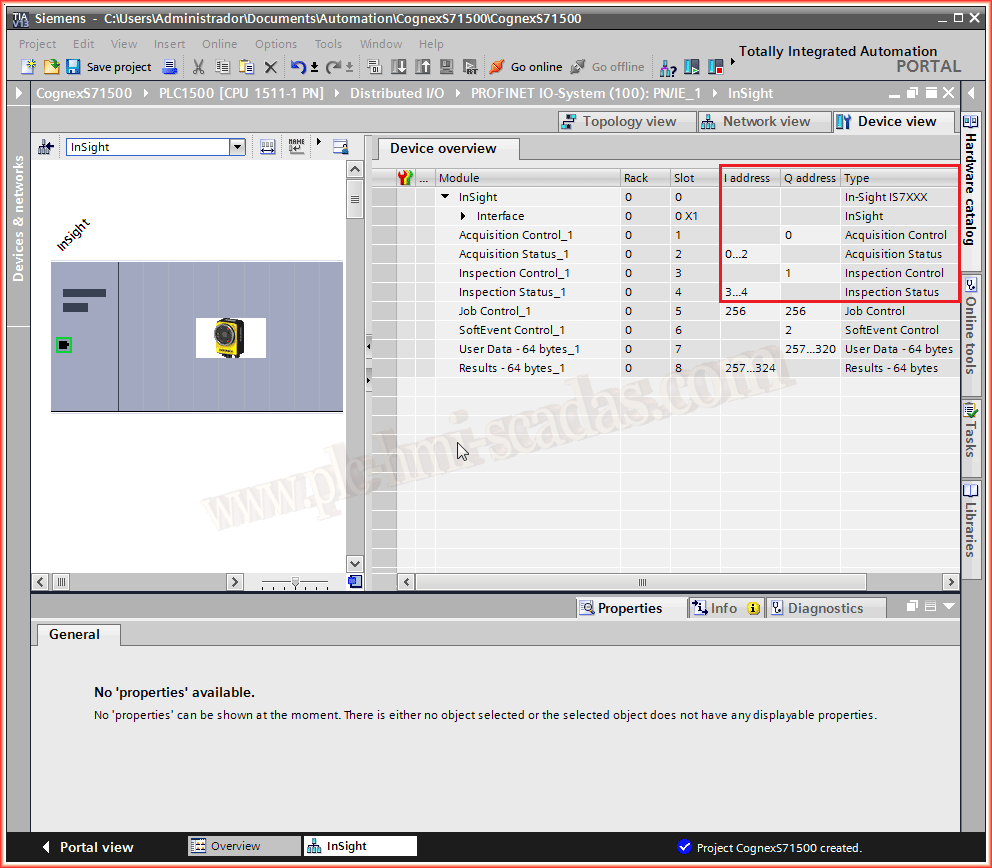
Now that we know the peripheral addresses of our camera, we can create the variables we will work with in our program. We can have much more information depending on what we have configured in the Insight Explorer.
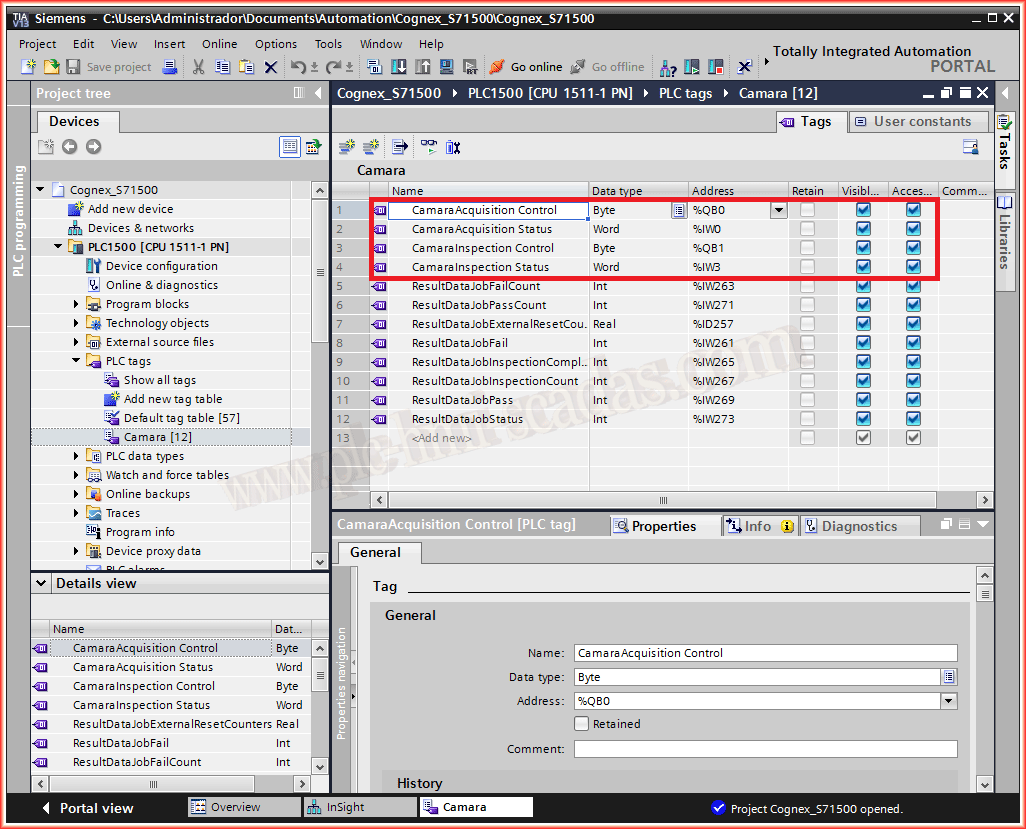
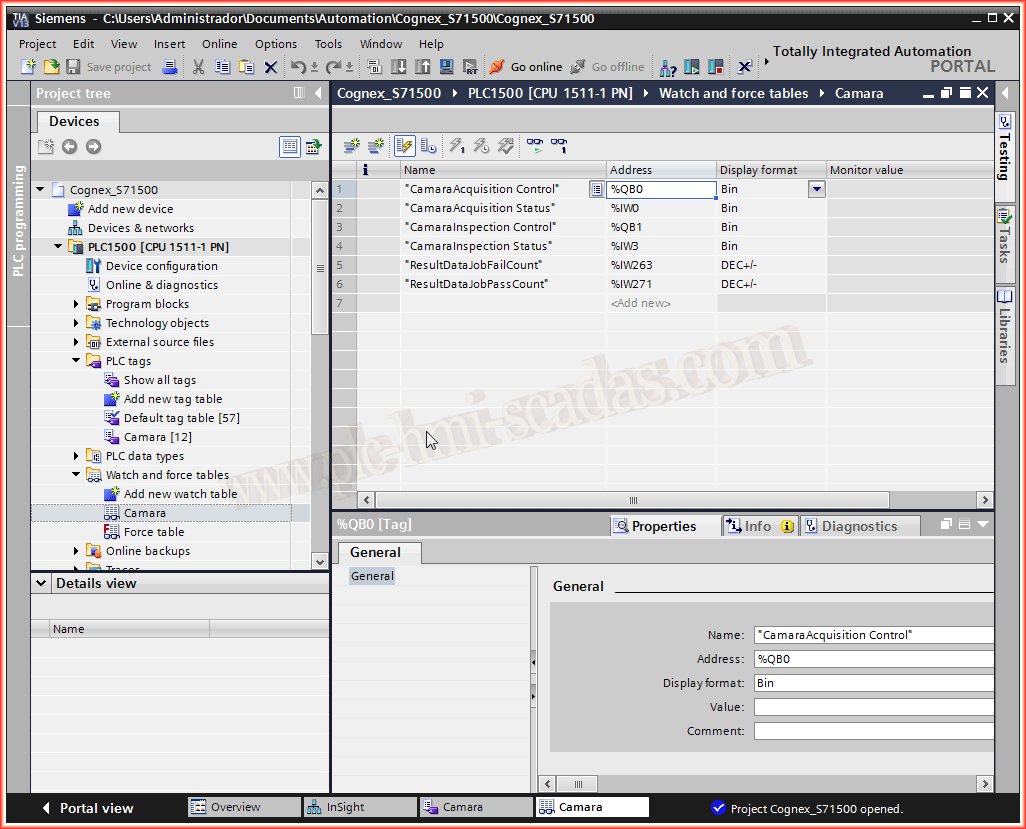
At the same time, we are going to create a variable table for these, to observe them online.
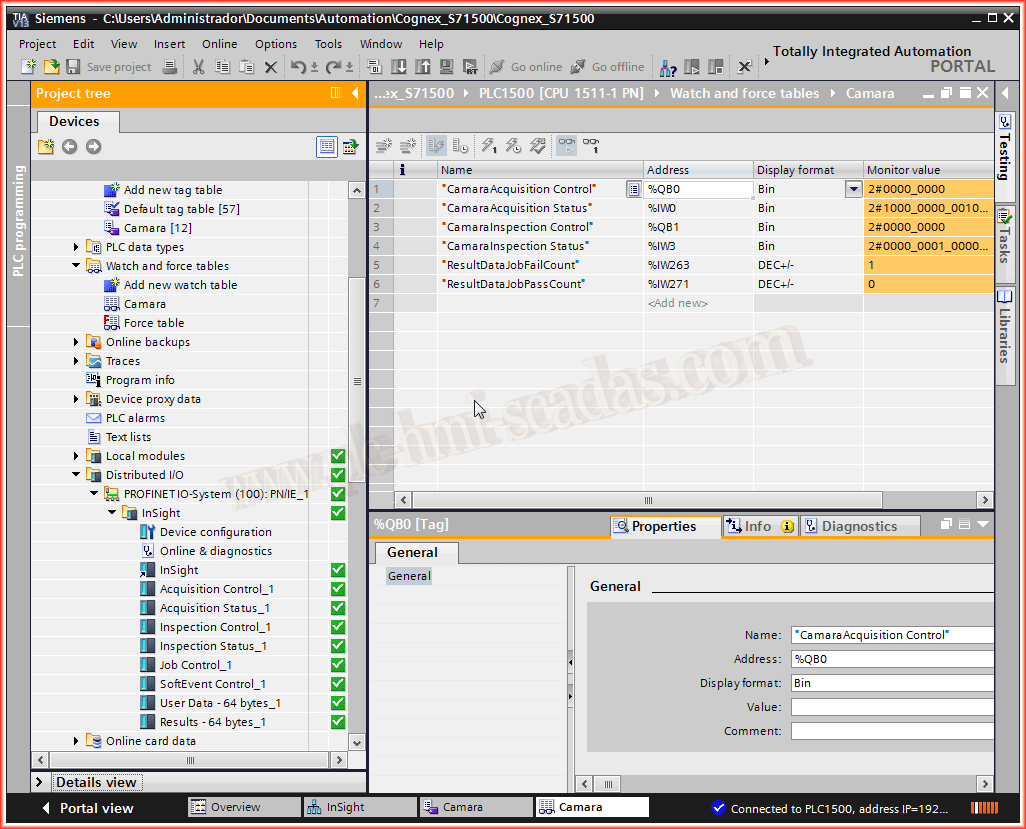
We would still need the part where we transfer the project to the PLC. But once that step is completed, we can go online and observe the status.
It can also be checked how the communication with the camera is correct.

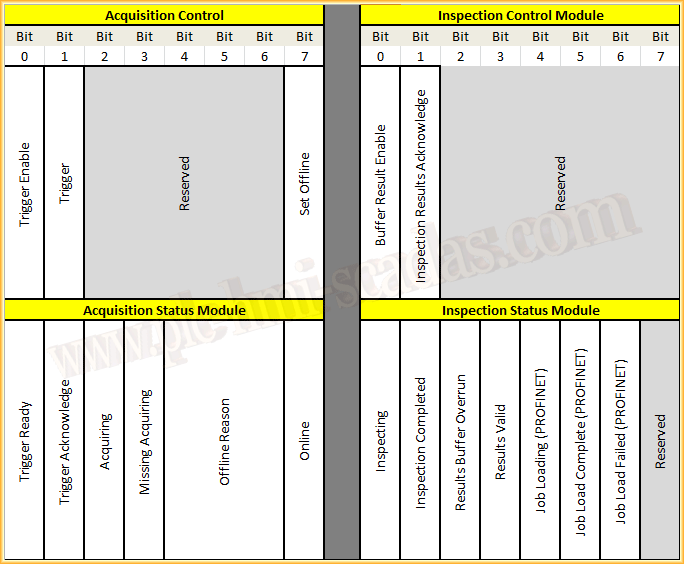
Finally, we would need the most relevant information about the command word and the control word.
To summarize briefly, we have to enable Bit 0 in the Byte Acquisition Control, once enabled, if the camera is Online we can use Bit 1 to trigger and take a capture/photo. On the other hand, we have Bit 7 which is used to take the camera from Offline to Online.
When we are going to change the Job in Profinet, the first thing we have to do is take it Offline and then we can send the new Job and finally switch the camera back Online. To see the status/result we have Bit 4 - 5 - 6 of the Byte Inspection Status Module.
February 4, 2018
"Gratitude in silence serves no one." Gladys Bronwyn Stern