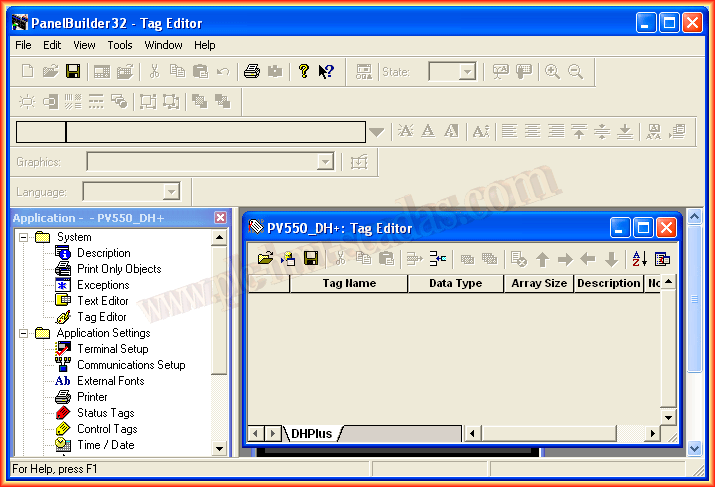
PanelBuilder32 Tag Editor
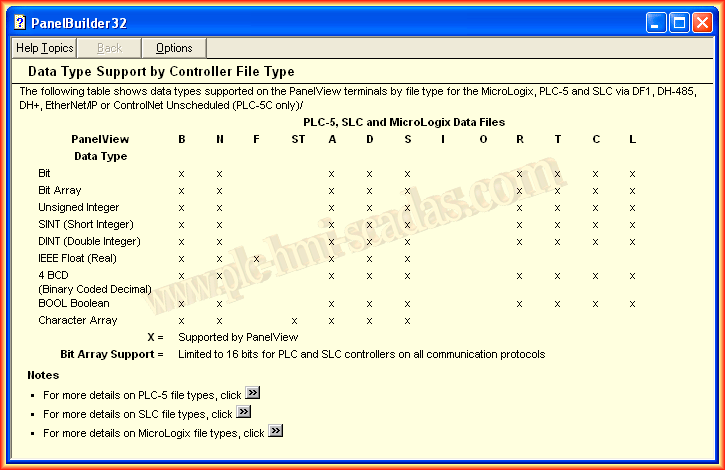
In the following practice, we will declare the variables for our program in PanelBuilder32. First of all, we need to know what types of data it supports; for this, consulting the help we obtain the following table.
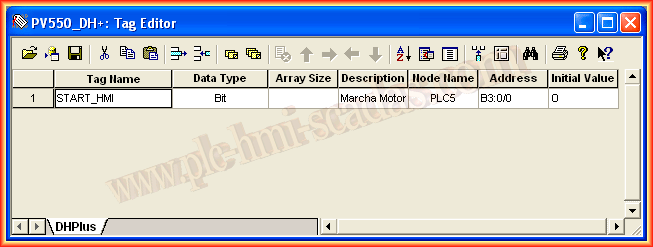
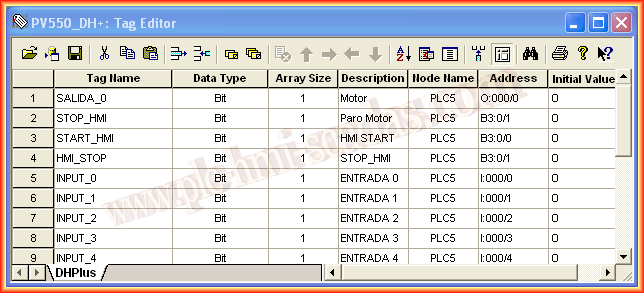
In PanelBuilder32, within the System directory, we have the Tag Editor; this is where we will declare the variables. To declare them, we insert a new line and specify the Tag Name, Data Type according to the table and as we need, Array Size which by default is 1 if we are not going to use any array, Node Name, which refers to the node we specified when we configured Communications Setup, and the Tag address, following the references we use in RSLogix5. The Initial Value by default is 0. Following this methodology, we declare all the Tags for our project.
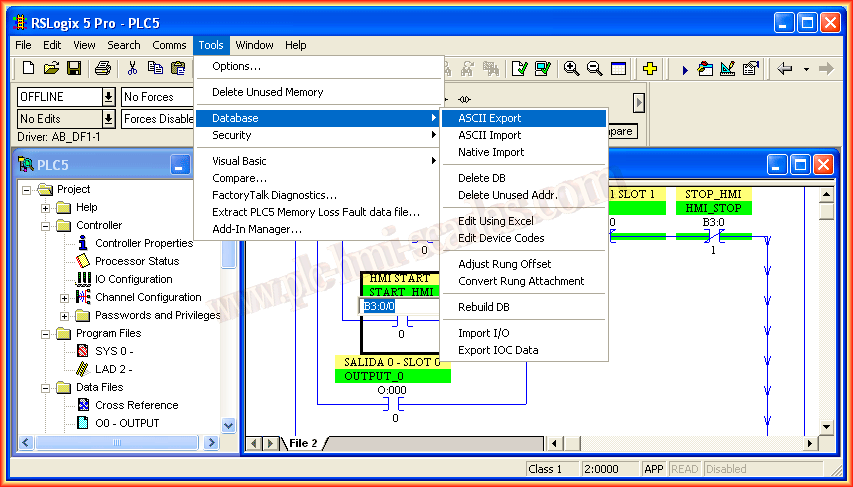
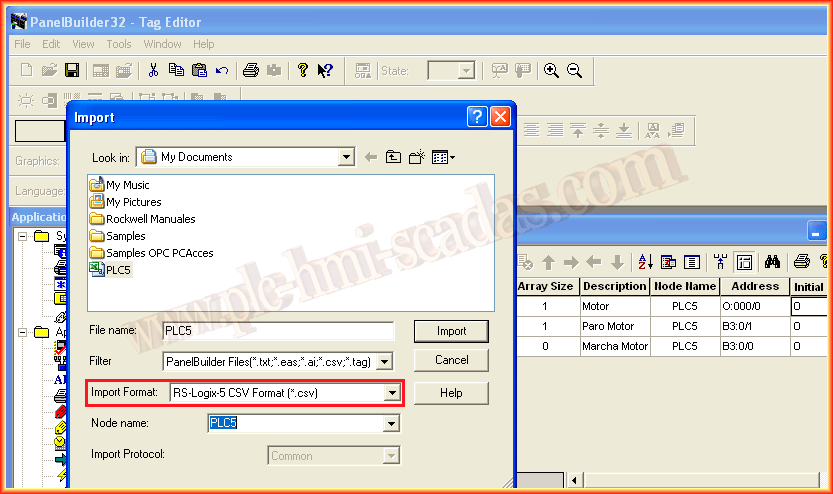
Another way to declare variables is to export the Database from RSLogix5 and, depending on the editor, select one of its different tabs RSLogix5 / A.I / AB6200 and also the Addr/Symbol checkBox or in CSV format.

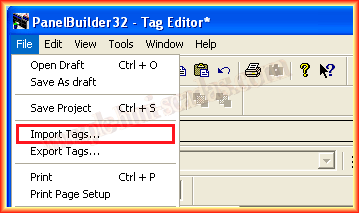
Once we have exported from RSLogix5, RSLogix500, as it is the same procedure, in PanelBuilder32, once we have the Tag Editor open, we can import all the tags File -> Import Tags ...
Depending on the format we selected during export, it must be the same format in PanelBuilder.
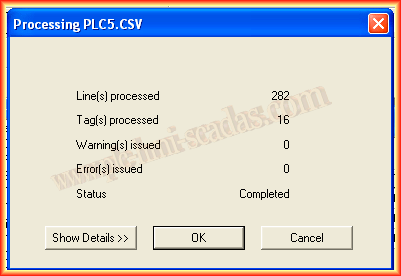
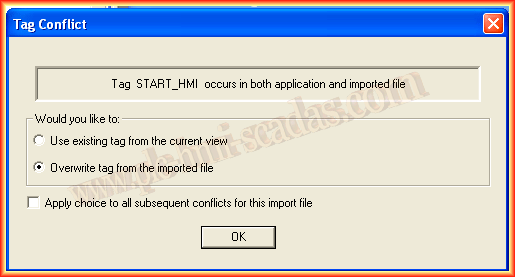
Once the file is selected, the import process begins. In case there is a duplicate Tag, as was the case when creating the tag manually, a warning shows us what to do; in this case, overwrite the tag.
Here we have the table of all the Tags that we had configured in RSLogix5, they are now ready to be used in our Project.
August 5, 2013