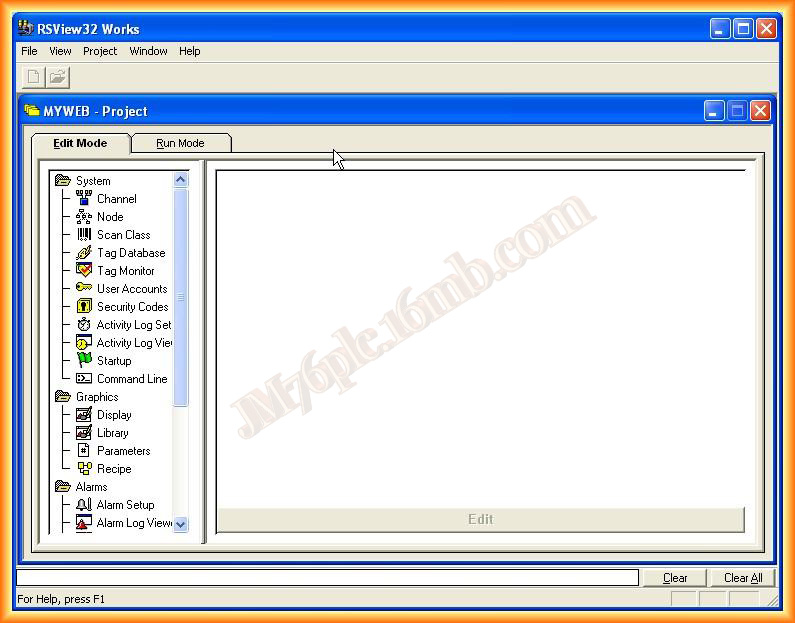
In this practice, we will configure a link between an OPC Server and the RSView32 SCADA. As I mentioned in other practices, when we want to link a SCADA with a PLC from another manufacturer, one solution is to use an OPC Server. In this practice, I will use RSLinx as the OPC Server, and its configuration was covered in this practice. When we start our project, this is the interface that is shown to us.
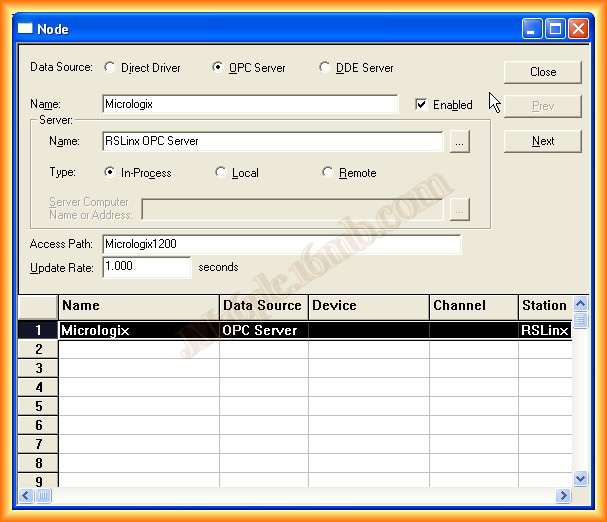
1.- We navigate to the System directory and expand it, select Node, and here is where we make our configuration, selecting OPC Server.
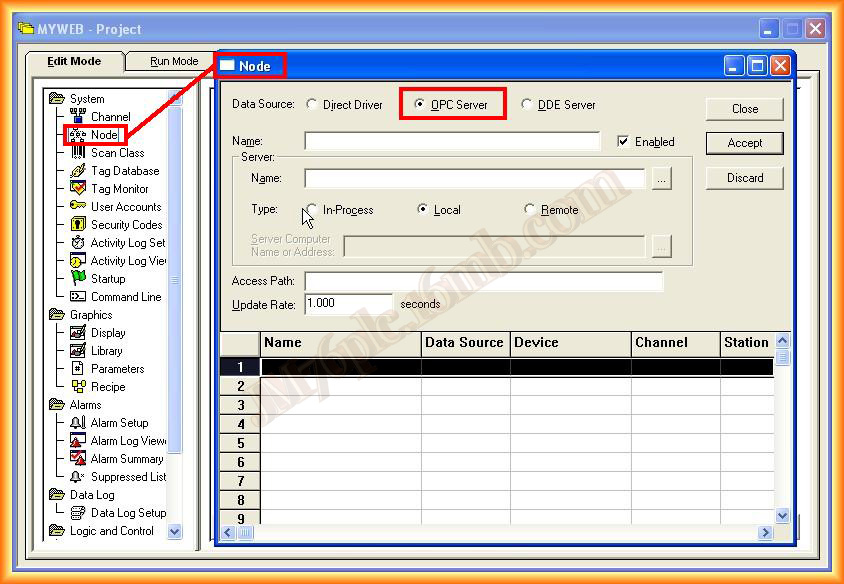
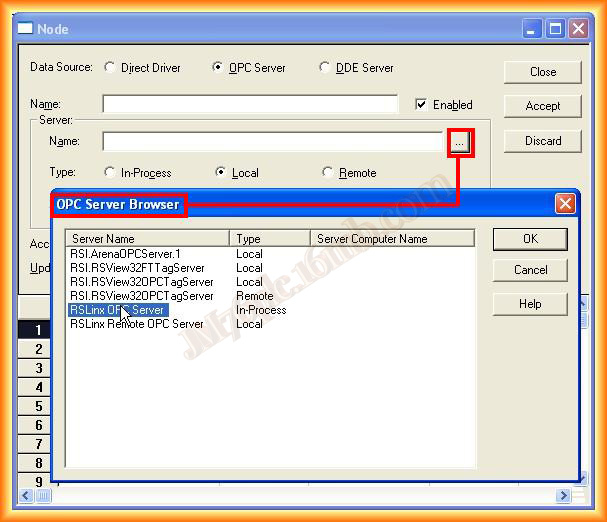
In the Name field: we assign the name that interests us. The next step is to specify the name of the Server; if we click on the icon ..., a window will automatically open, showing all the servers that we have installed on the PC. In this case, we select RSLinx OPC Server.
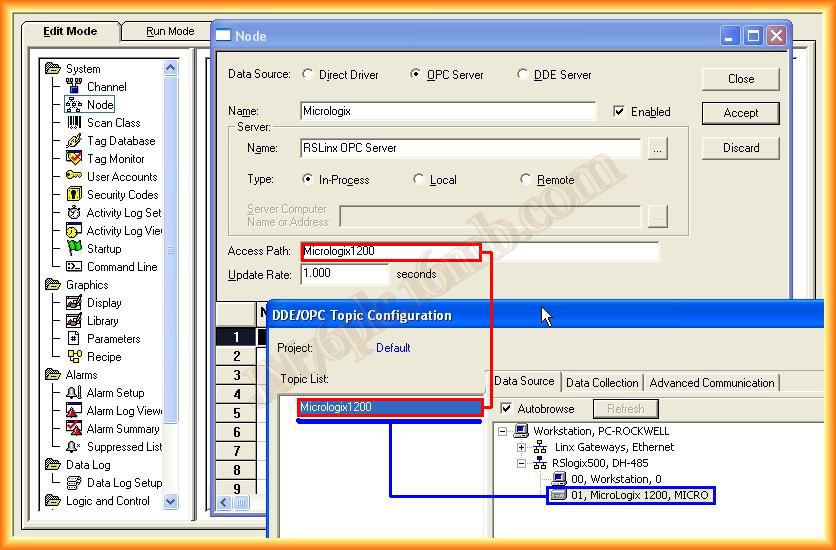
3.- In the Access Path field, it refers to the topic we have created in RSLinx, as will be seen in the following images. It is better to leave this field blank since when configuring the items, it will alert us that it needs to be deleted. I will leave it to show the warning and will delete it later.
4.- With these steps, we have configured our link. As can be observed, the next step is to configure the items, Tags, or variables that we want to access or manipulate.
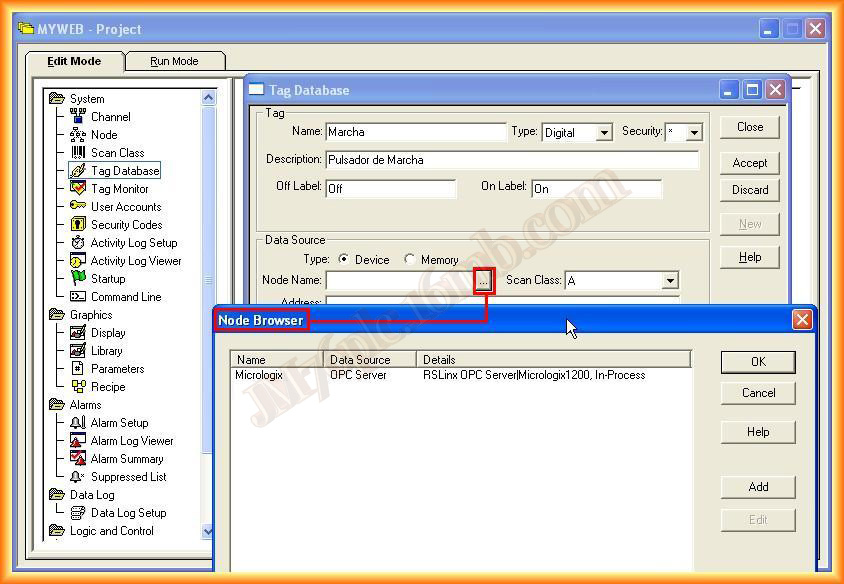
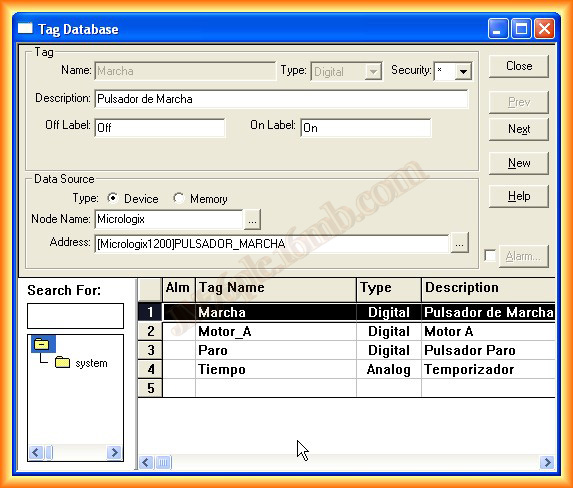
5.- We navigate to Tag Database, filling in the fields according to the tag, with its name, data type, description, and Security. I take this opportunity to mention that we have already configured users and security here, so depending on the level of security we assign to the tags, they can be manipulated by different operators.

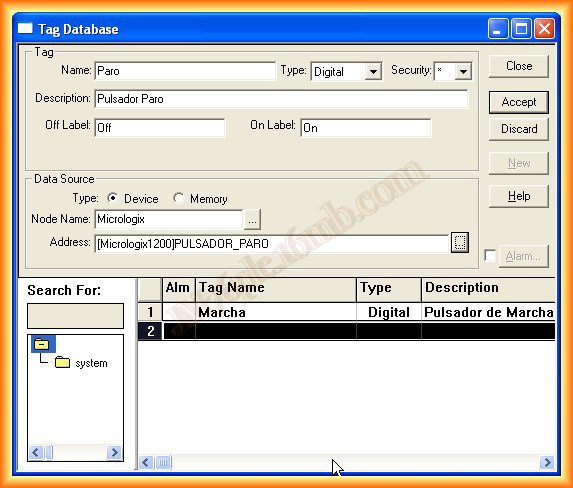
6.- Once all the necessary fields to create a new Tag are filled in, we need to select the data source. Since they are from a Device, we select Device; if it were an internal Tag, we would select Memory. We search for the Data source by selecting the icon, and the following image appears, we select Micrologix, which is the one we have configured previously.
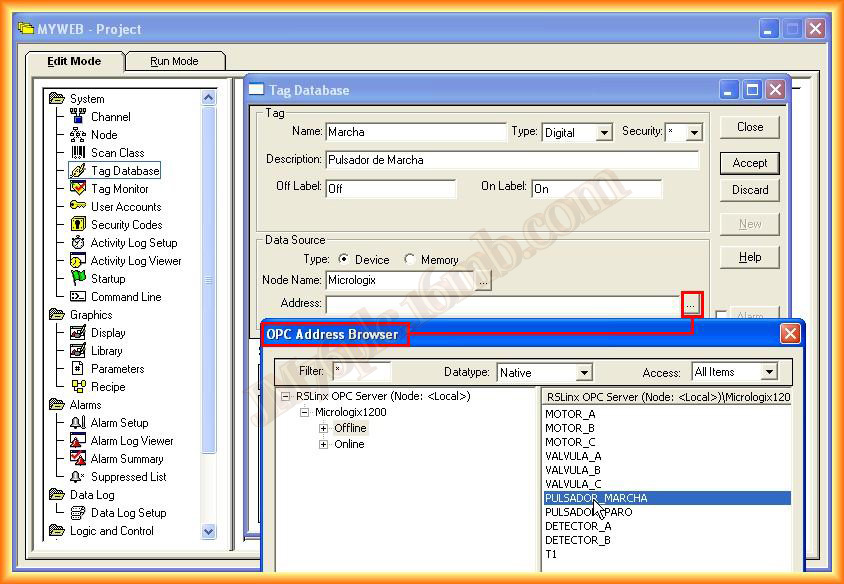
7.- When trying to add the memory address of the Tag, the warning message I mentioned earlier appears, indicating that we should delete the Access Path. We return to the configuration screen and delete it.

8.- Once deleted, we click on the icon again to search for the memory address, and another pop-up window appears, where we will select the Tag that interests us, and so on with all the Tags.
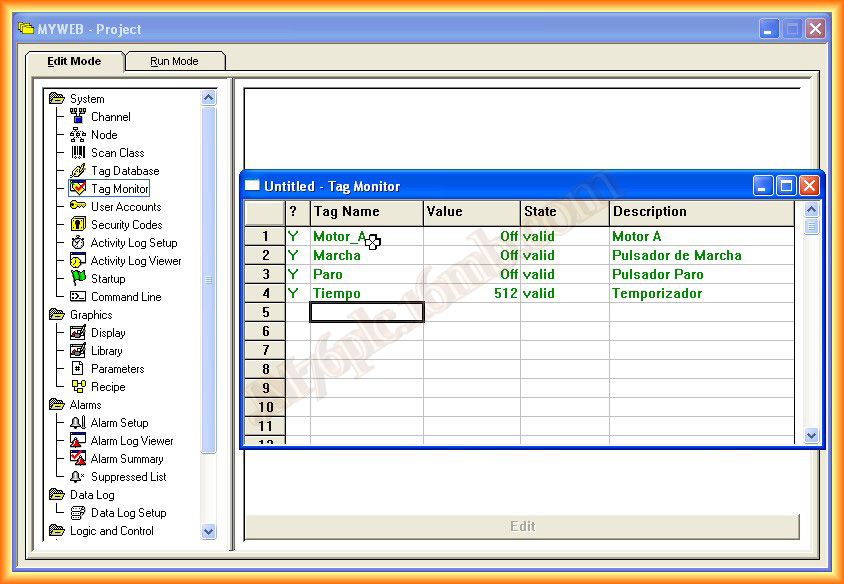
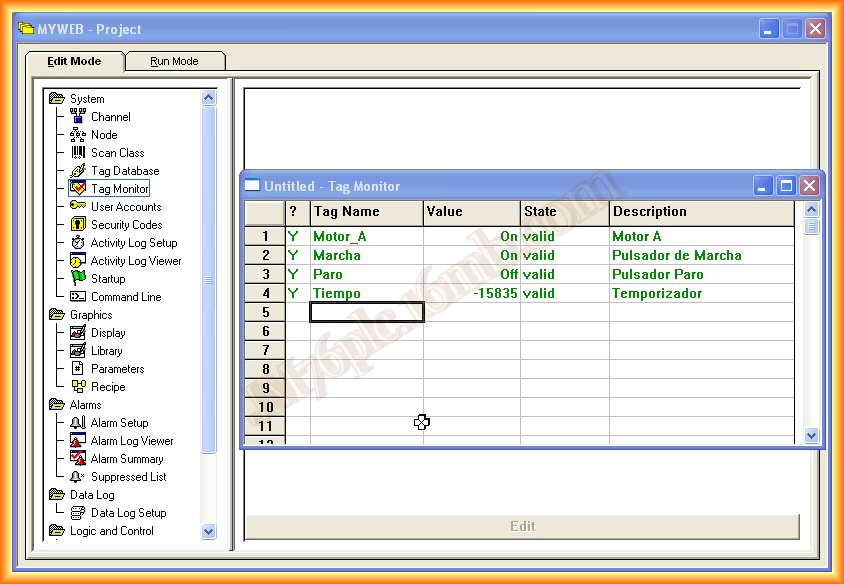
9.- Now we just need to check that it has been configured correctly. To do this, we use the Tag Monitor, add the Tags we are interested in visualizing, and we can observe the changes and the status. In the next practice, we will configure a direct link, with the option of configuring a "Channel".
September 6, 2012